Street Fighter: a game series I’ve always had a soft spot for, despite my less-than-stellar skills. People swear by its fighting mechanics, but I’ve managed to find my own brand of enjoyment, especially thanks to Zangief’s unforgettable “change the channel!” moment in the ’90s flick with Jean-Claude Van Damme. Seriously, that scene is legendary, and that’s a hill I’m willing to die on!
One day, as I was casually browsing Amazon, the Algorithm Gods intervened and suggested this not-so-official but heavily Street Fighter-inspired arcade cabinet micro block build. For a modest $25, I thought, “Why not give it a shot?” Little did I know that it would lead to hours of meticulous block assembly.
In this post, we’re going to delve into the nitty-gritty, following the provided instructions, to see if this mini masterpiece lives up to its Amazon listing. Is it worth the price tag? And more importantly, is it worth the precious hours of my life I’ll never get back? Join me as we explore the world of this Street Fighter-inspired micro block build!
Unboxing
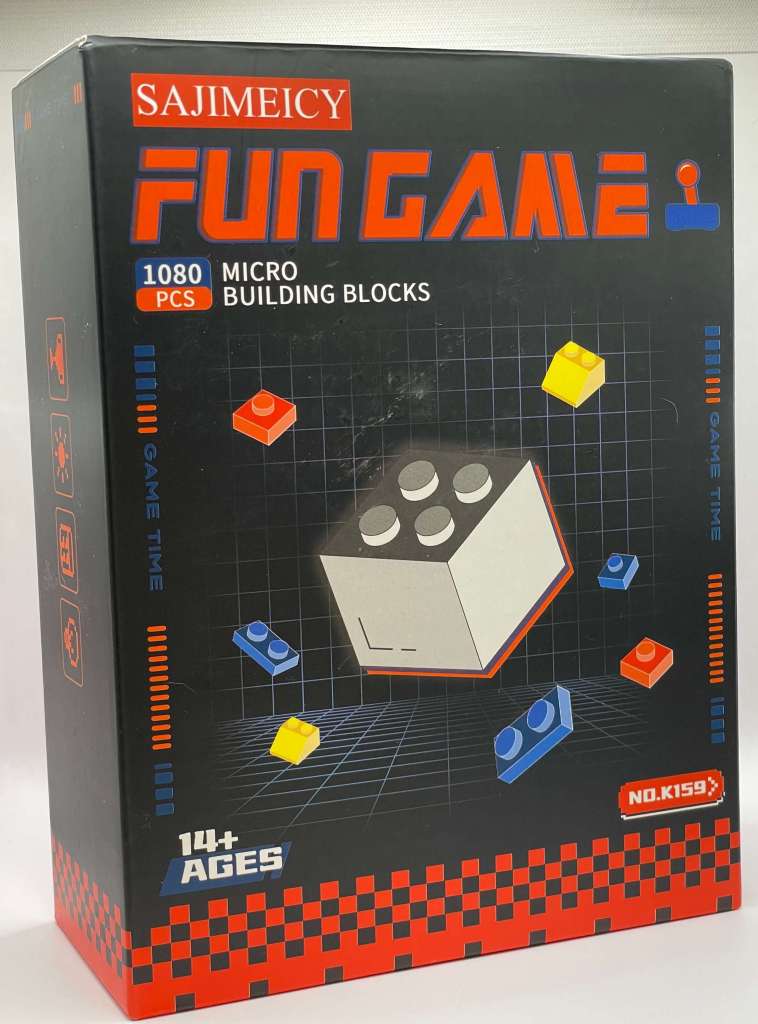
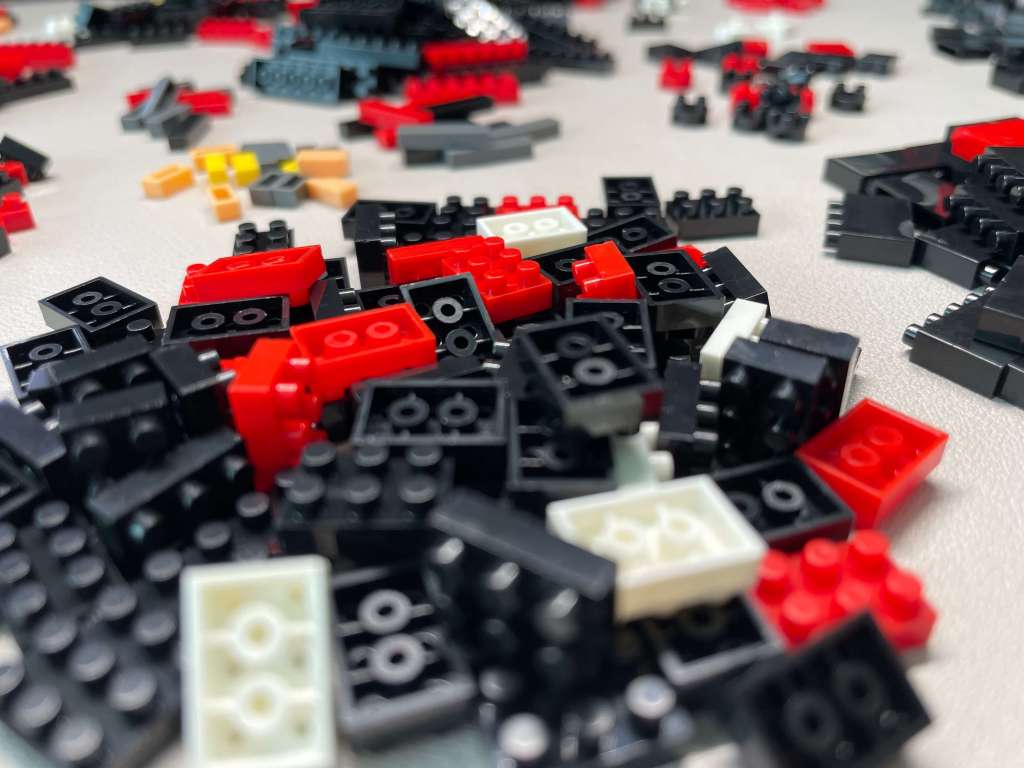
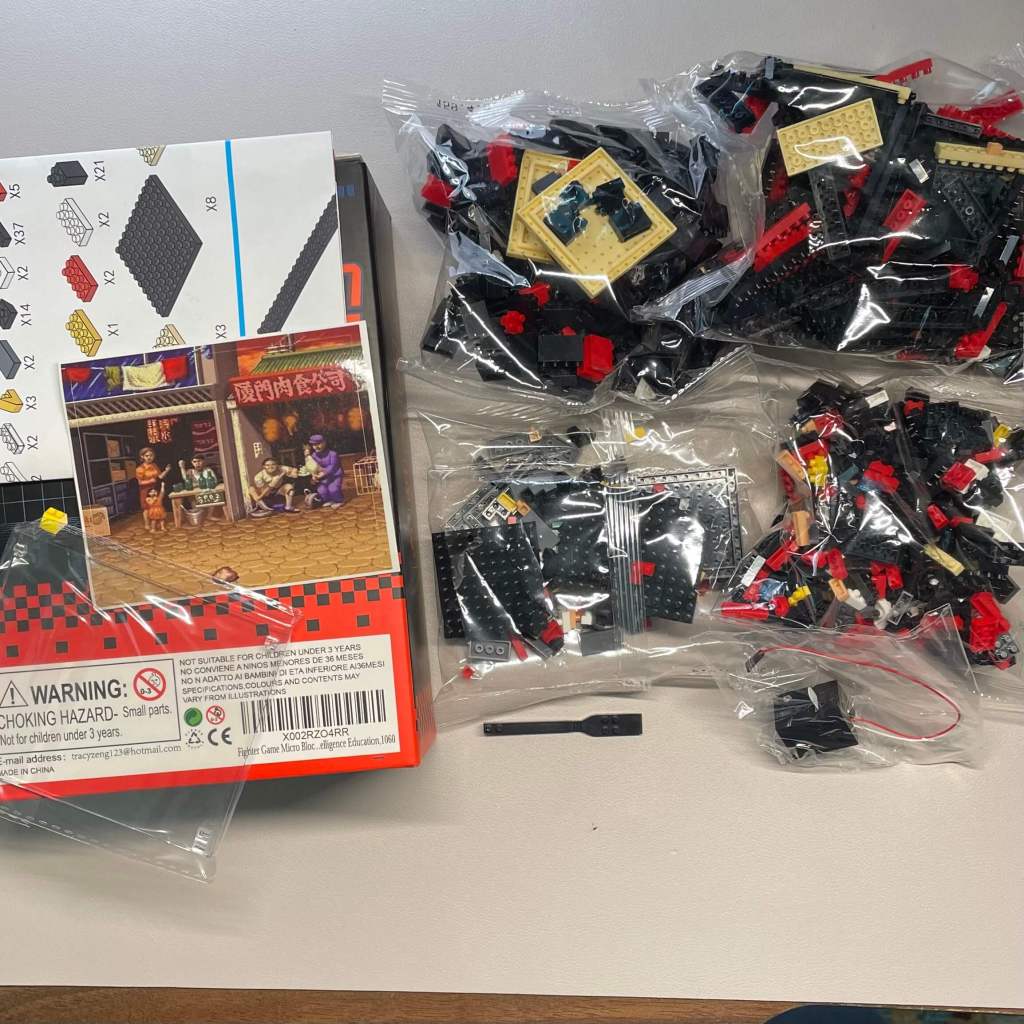
Opening the box of my..um…Sajimeicy Fun Game set was an interesting experience. Inside, I found four bags containing various bricks, two clear panes, a brick separator, a light piece, a sticker, and a double-sided instruction sheet.
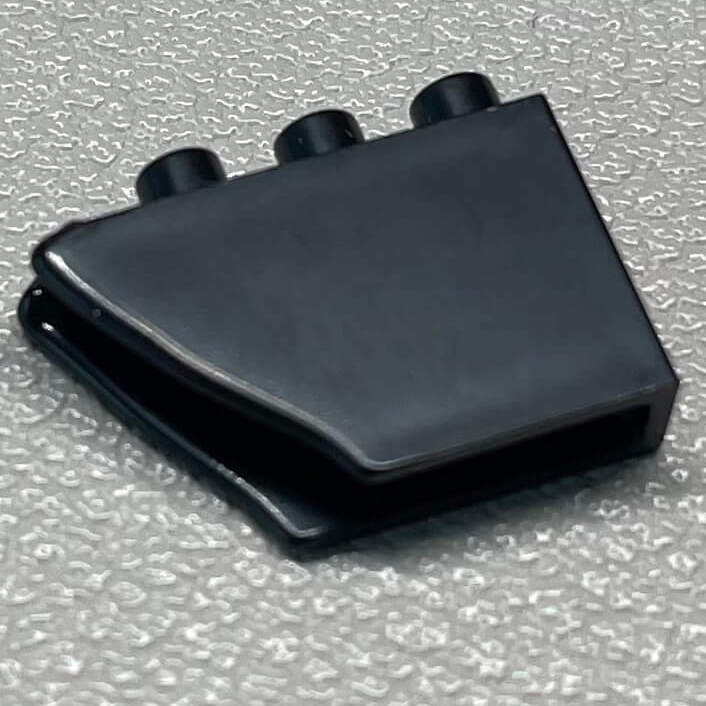
Here’s a closer look at the brick separator that came with the set. It’s pretty unique.
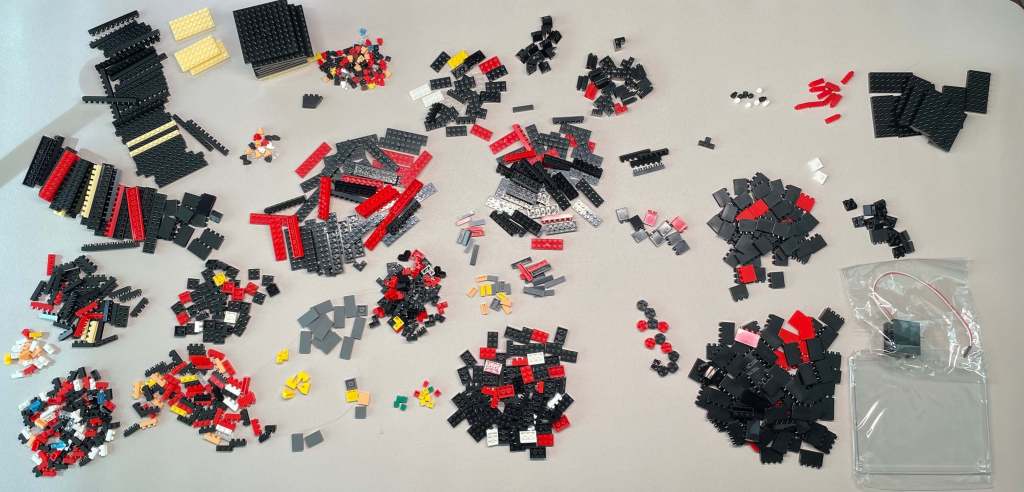
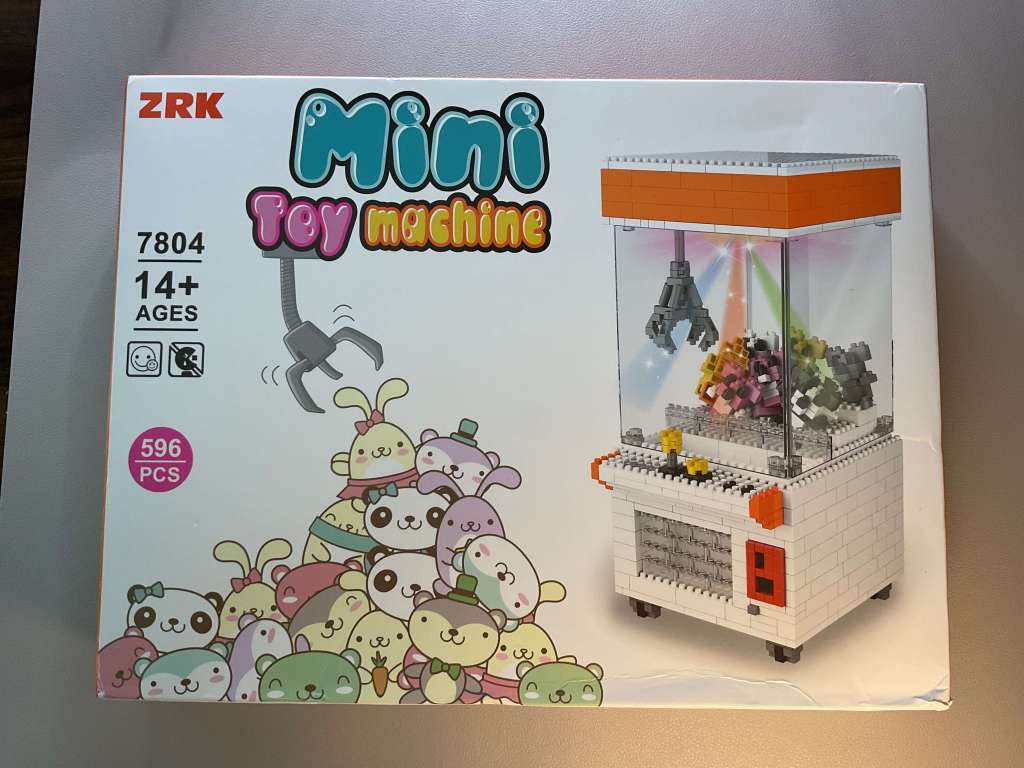
The box proudly claims this set includes a grand total of 1080 pieces. Yet, as I’ve learned from past experiences, those numbers on the packaging can sometimes be a tad unreliable. In fact, I encountered a similar situation when assembling the claw machine set that preceded this one. Nevertheless, it’s evident that a substantial number of pieces are indeed part of the package.
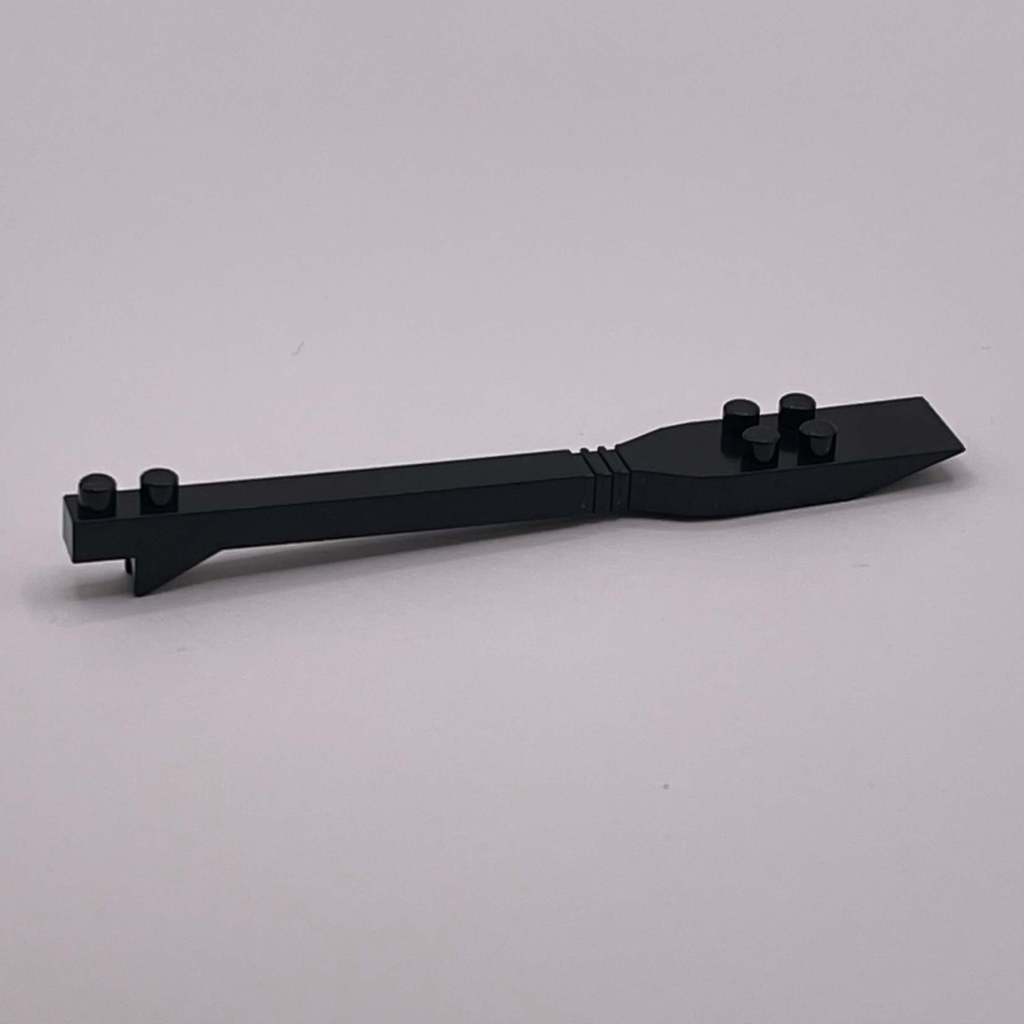
I also came across a pretty mangled piece. Hopefully I won’t need it for this build.
Building the Set
Now that we’ve sorted all the pieces by type, it’s time to dive into the real fun: assembling the set! We’ll go through each step as outlined in the provided instruction sheet.
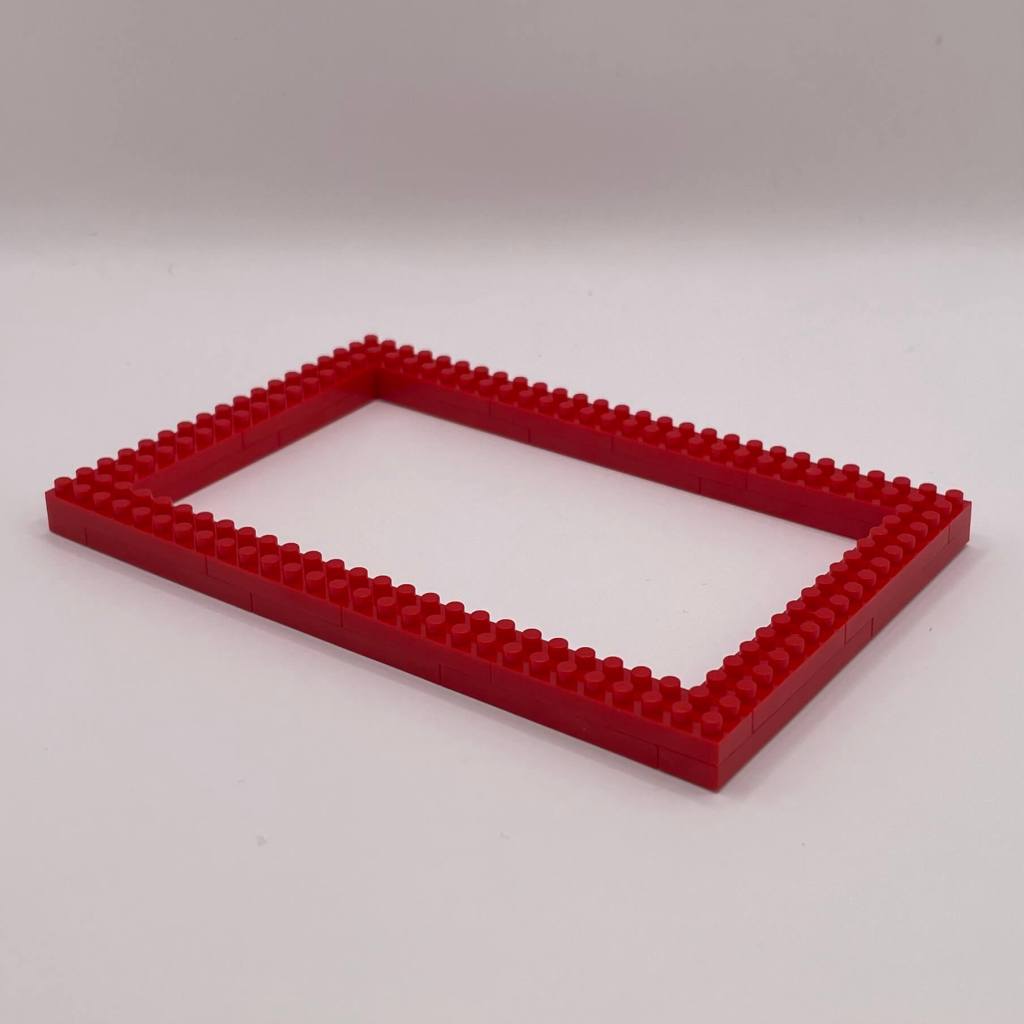
Step 1
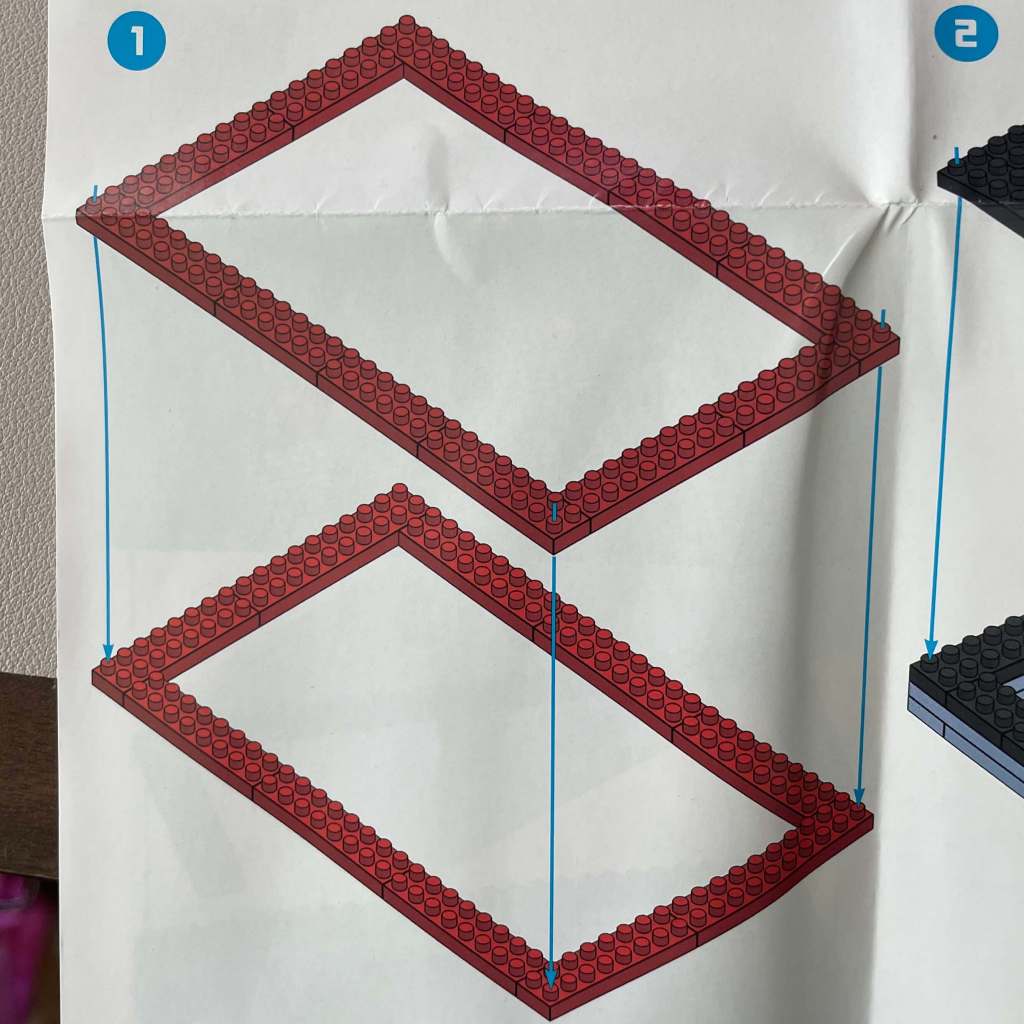
We begin by crafting a red rectangular perimeter with two layers. No need for the Nanoblock pad this time.
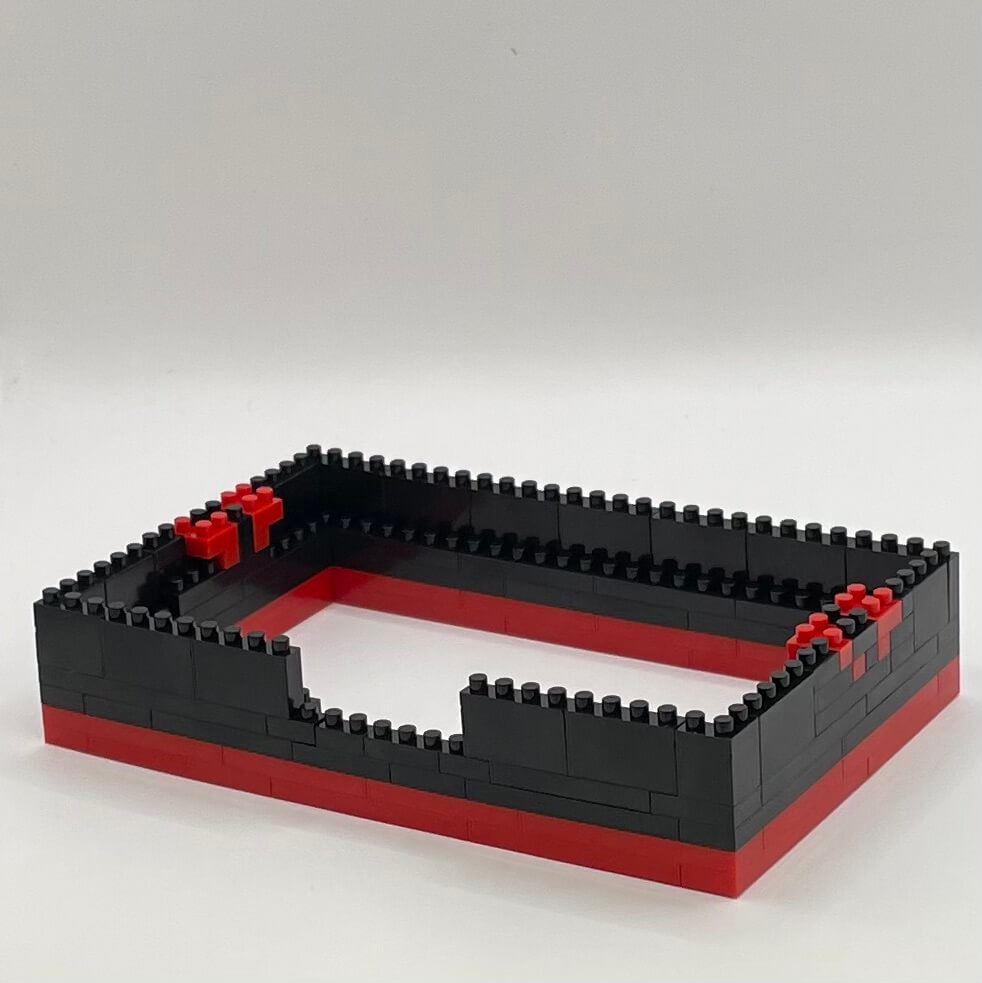
Step 2

Now, we’re introducing two layers of black bricks to create depth around the cabinet’s frame.

Step 3
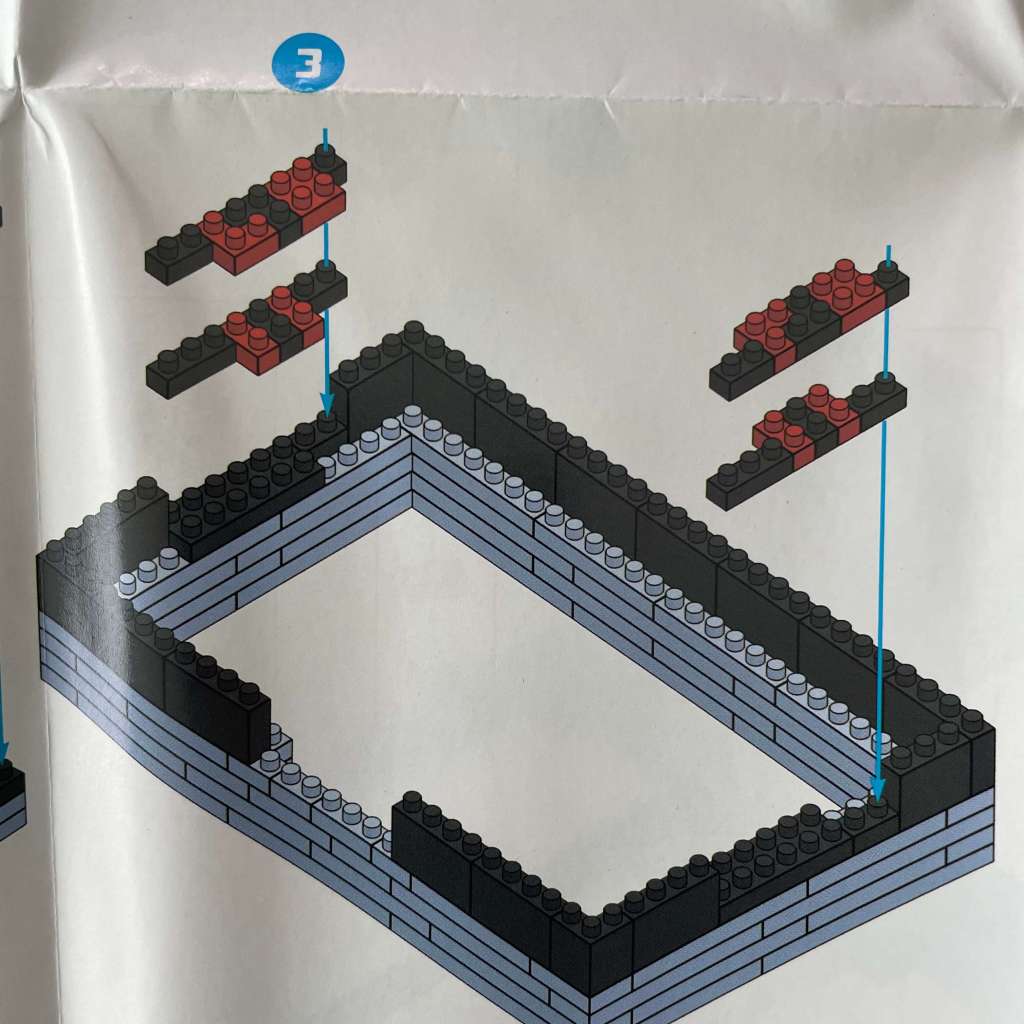
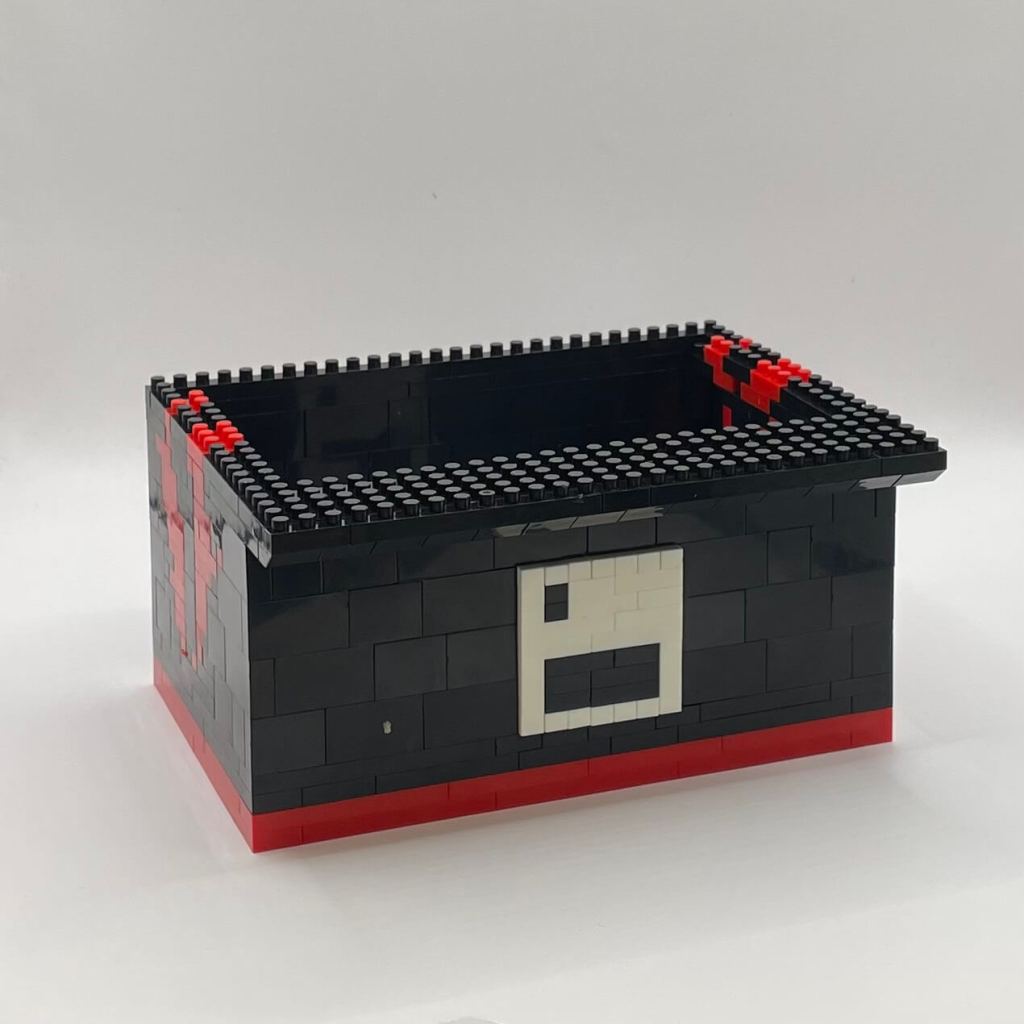
As we build higher, we’re unveiling intriguing new bricks. They’re being used to craft an internal cavity, with smaller red and black pieces on the shorter ends.
Step 4
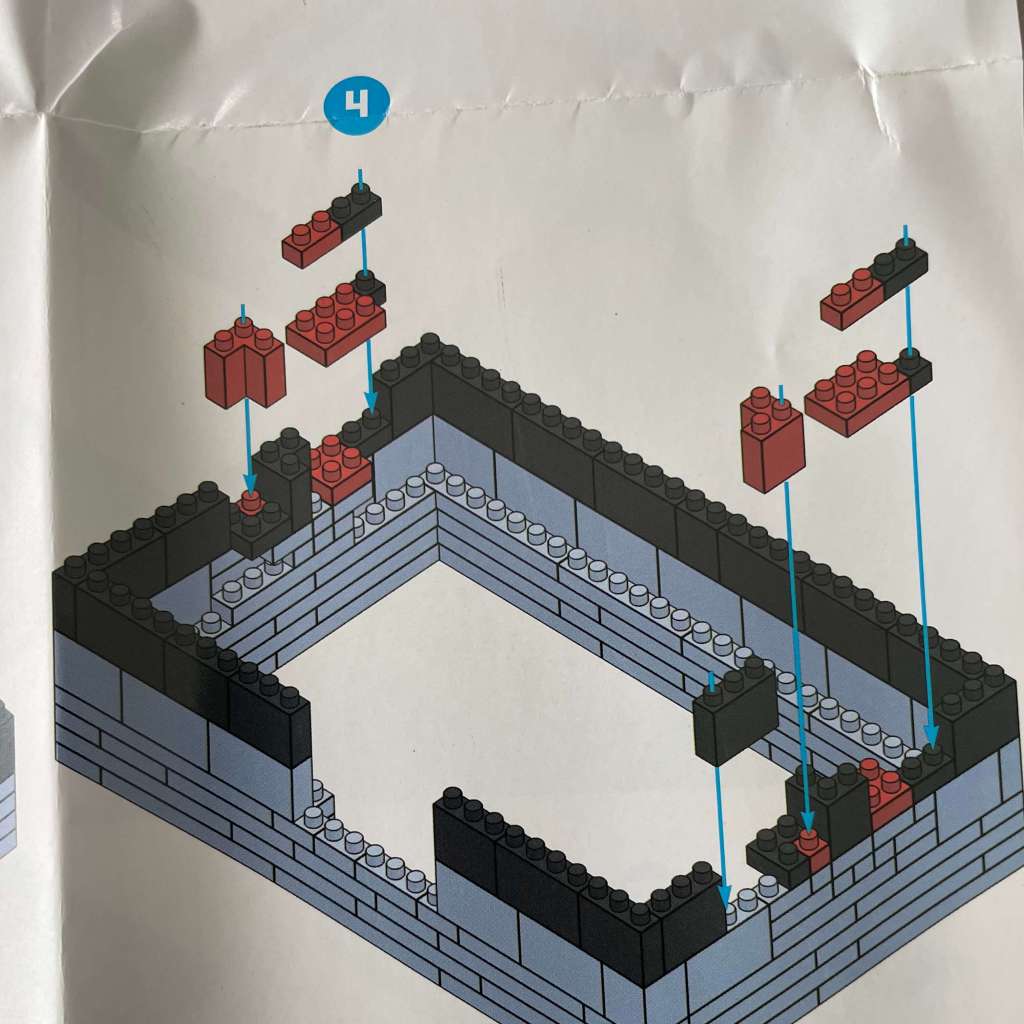
Look at this! We’re building up more with fascinating brick layers on the shorter sides. It’s starting to take shape.
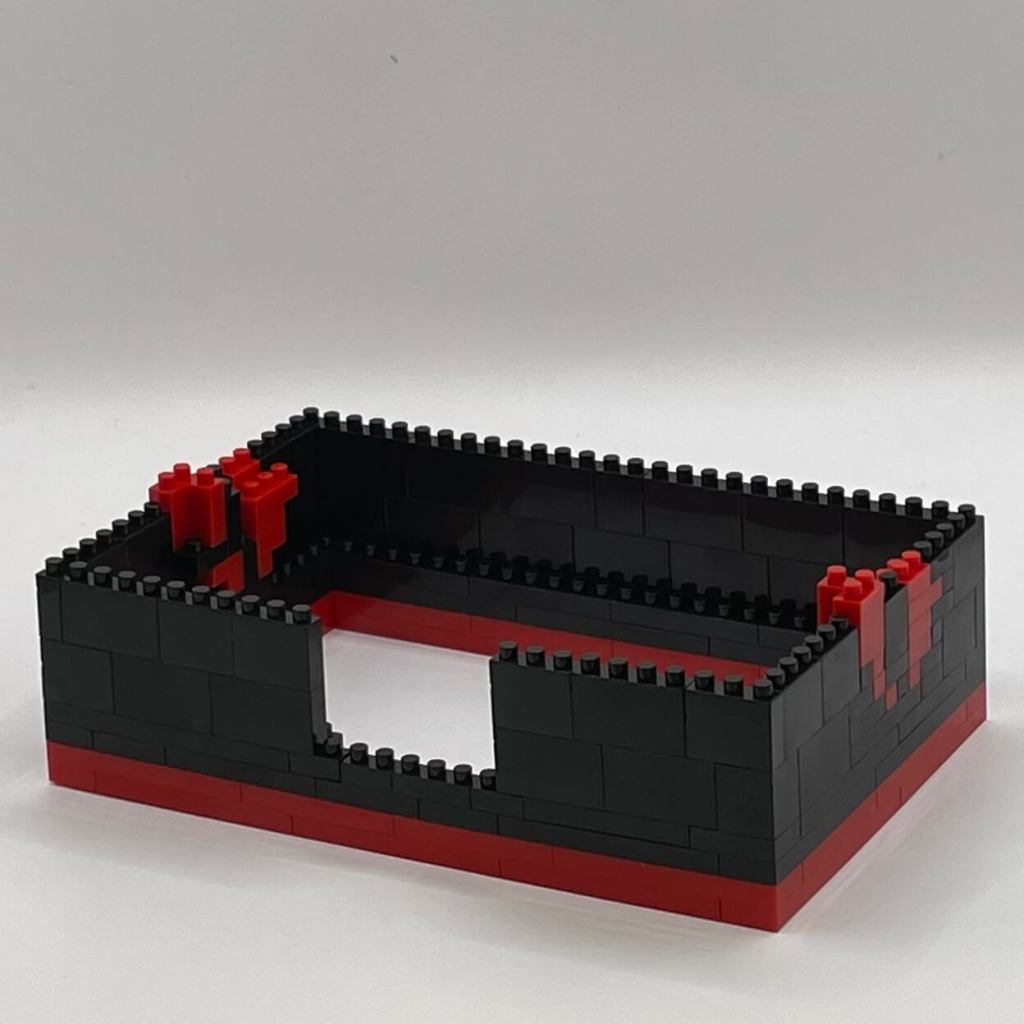
Step 5
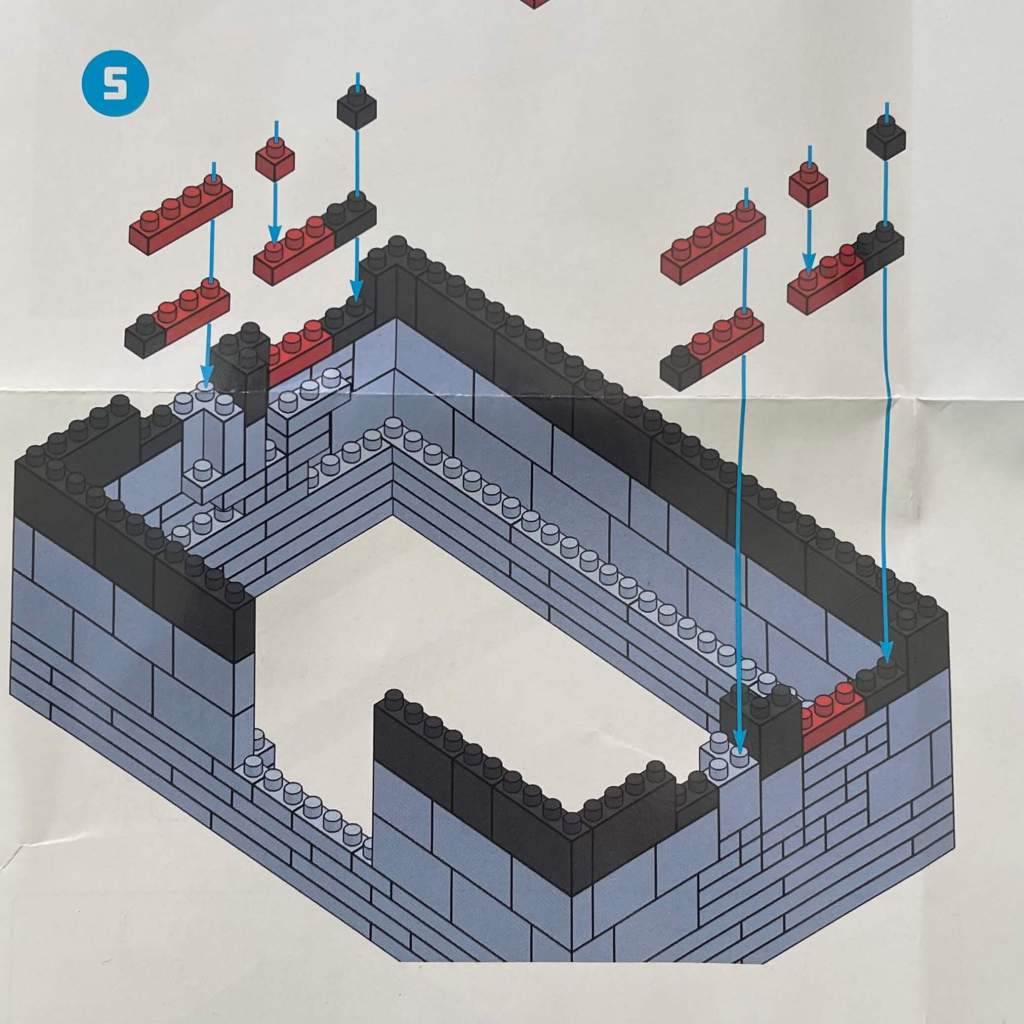
A pattern is emerging on the sides of the cabinet, shedding light on the purpose of those intriguing side bricks.
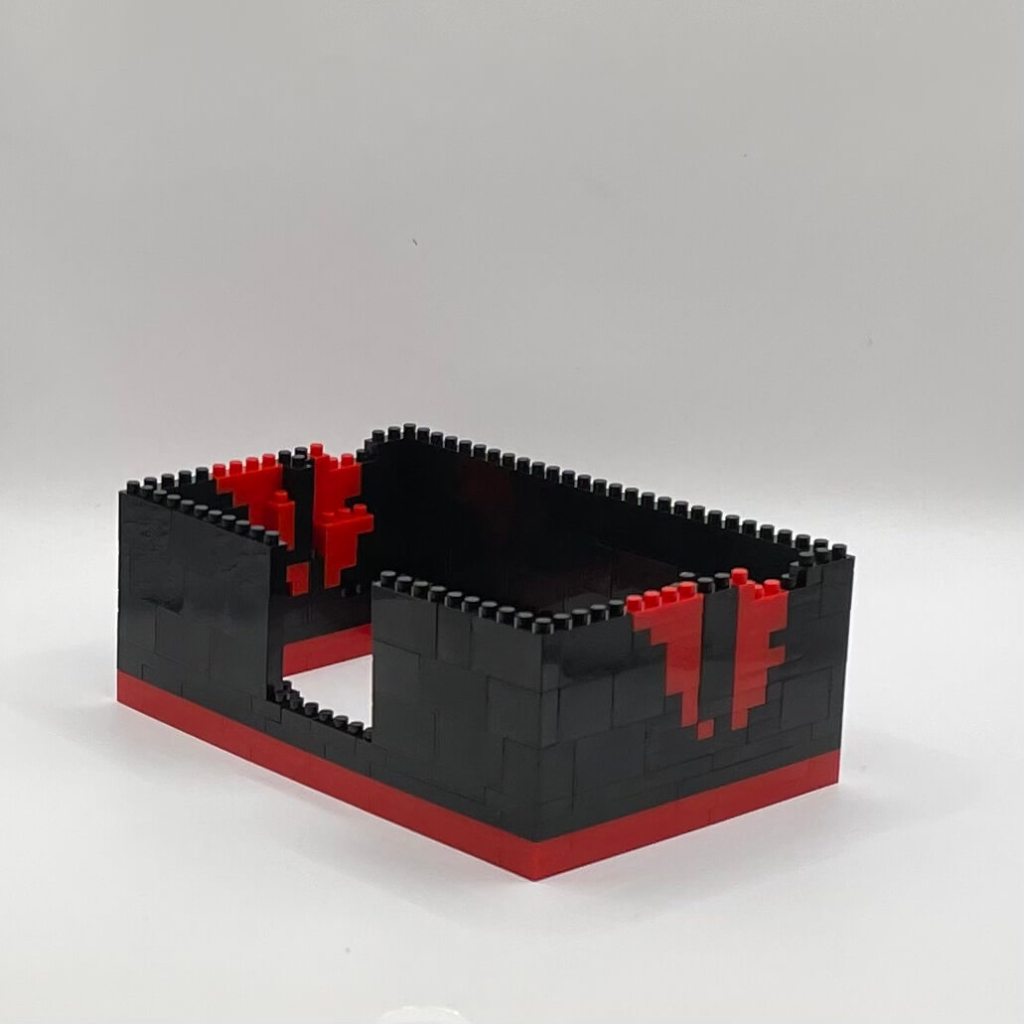
Step 6
It’s time to construct the entire coin-slot section and fit it into the gap we created while building the perimeter. Those side details are expanding too.
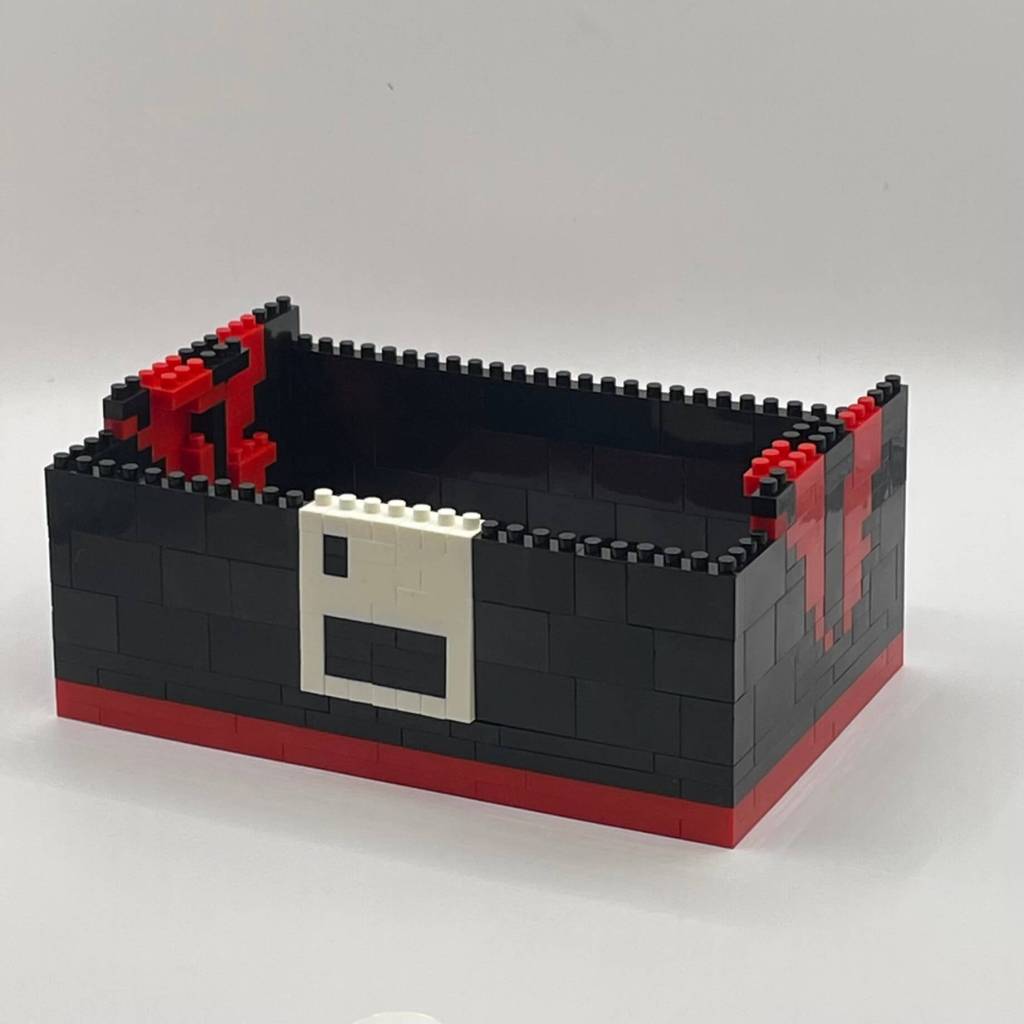
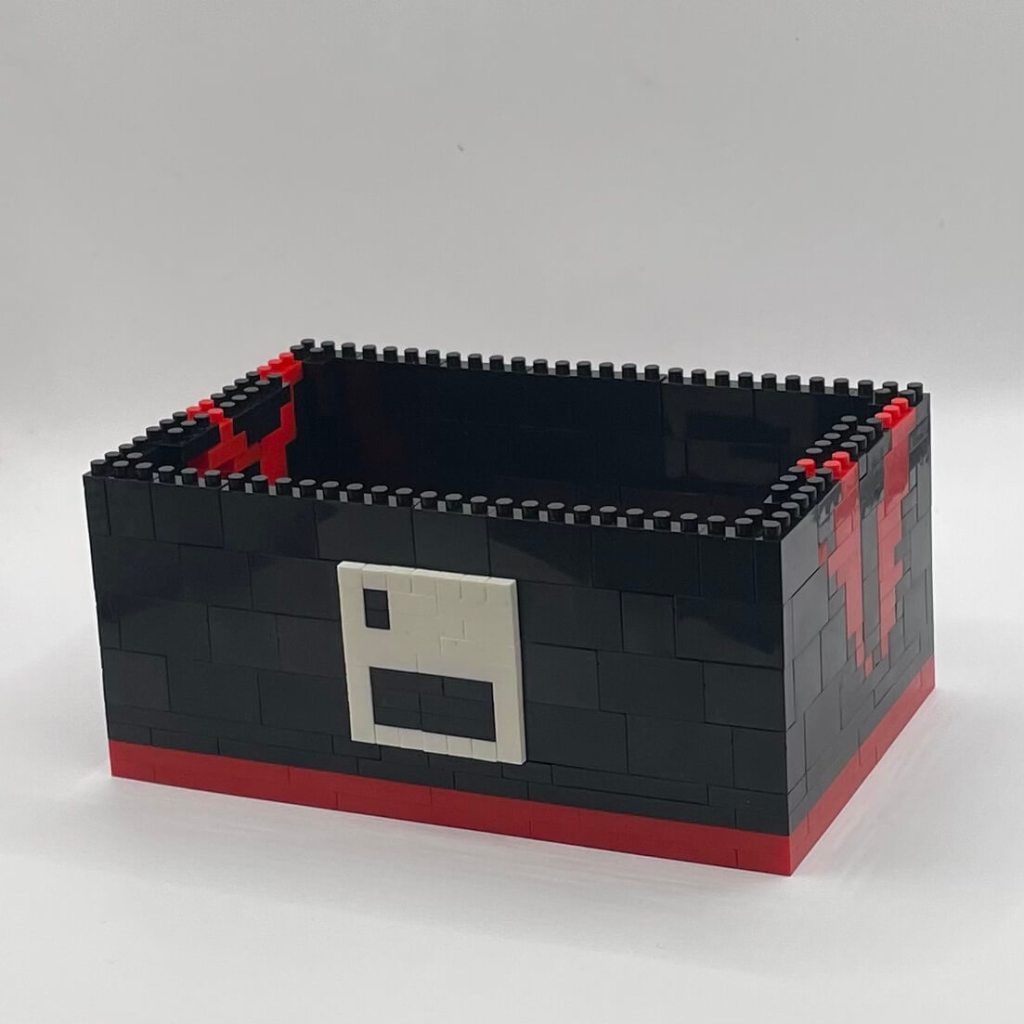
Step 7
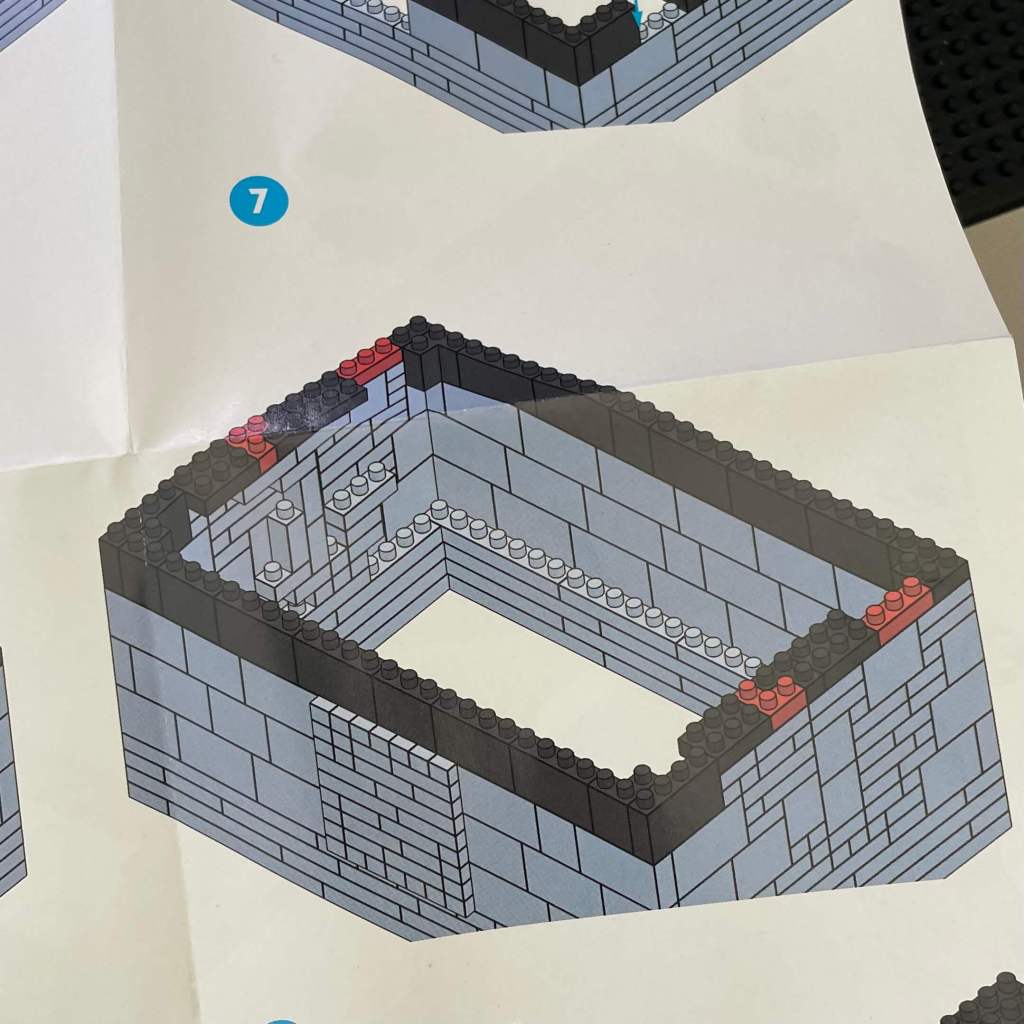
We’re adding a single layer of bricks to even out the perimeter and secure the coin-slot section in place.
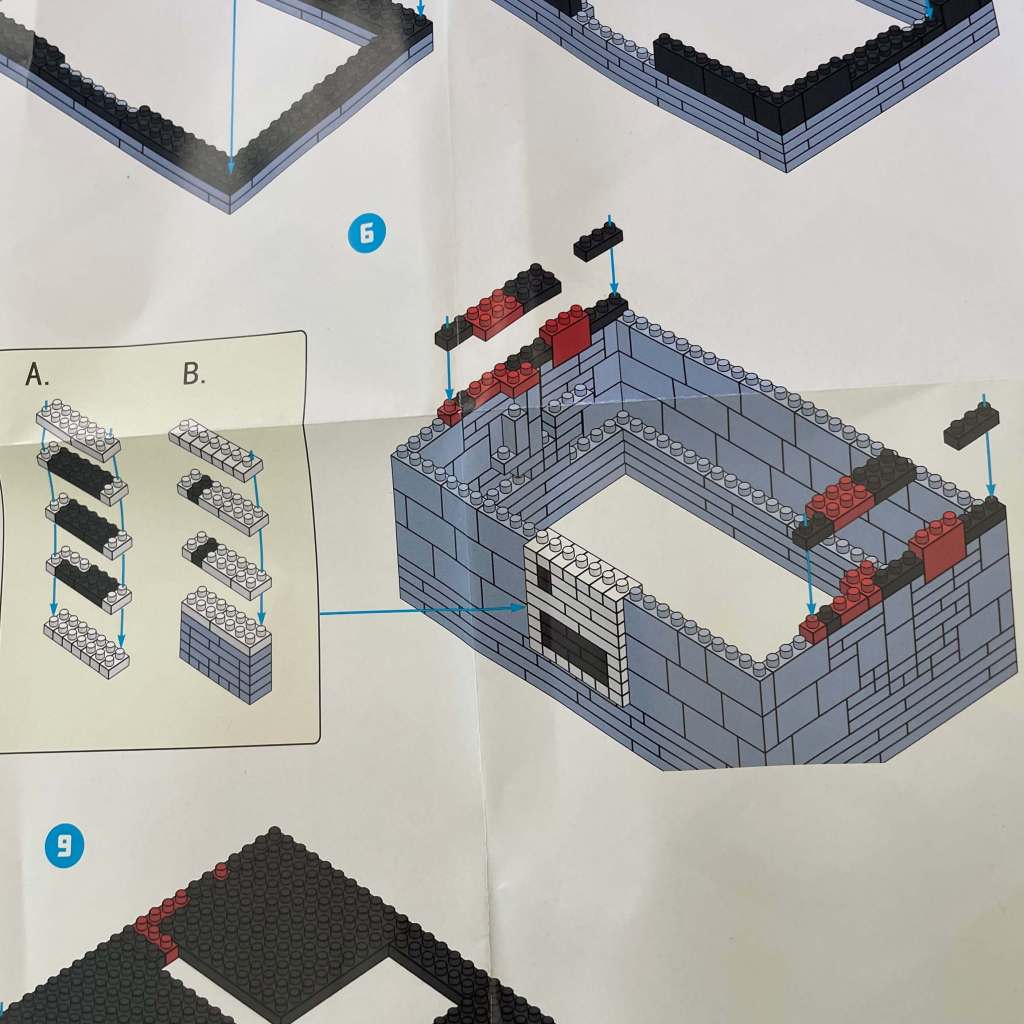
Step 8
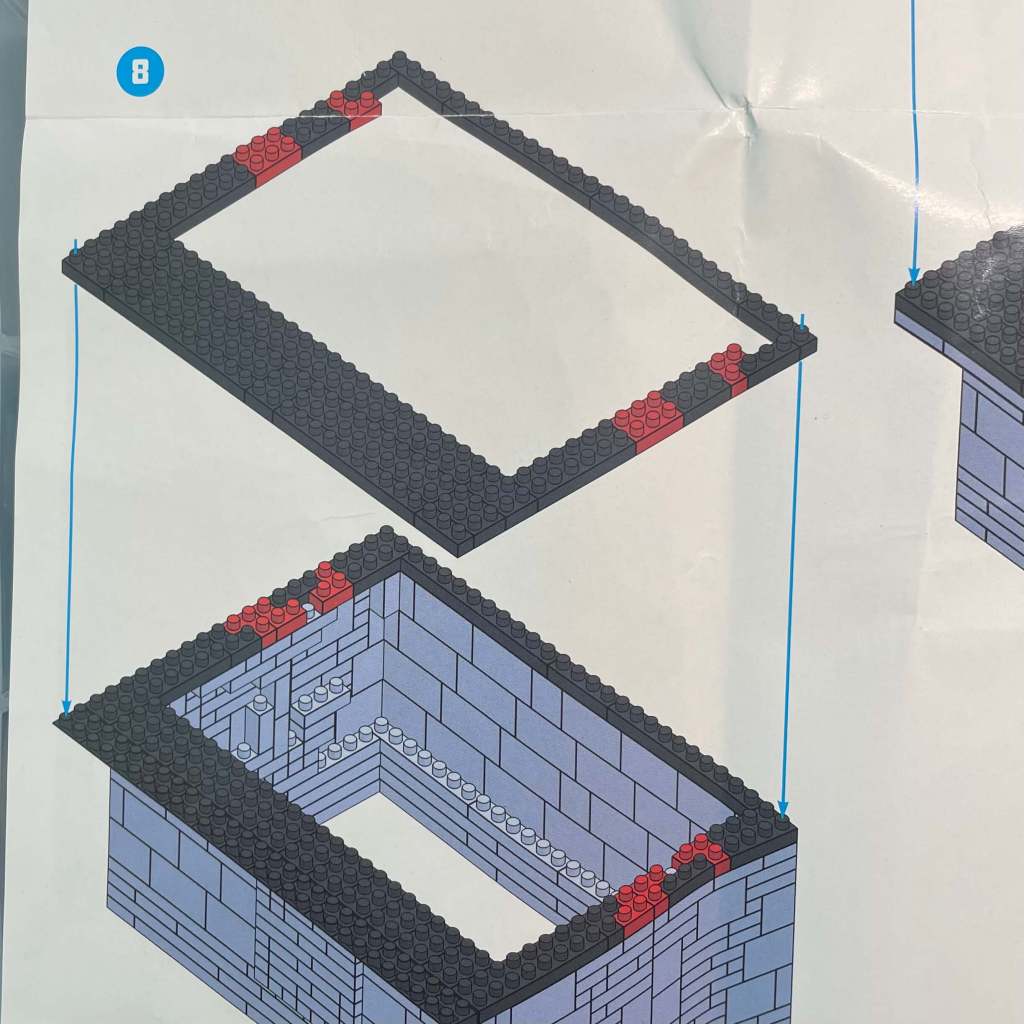
Check this out! A two-layer stage is bringing the cabinet’s control panel to life, setting the foundation for its unique design.
Step 9
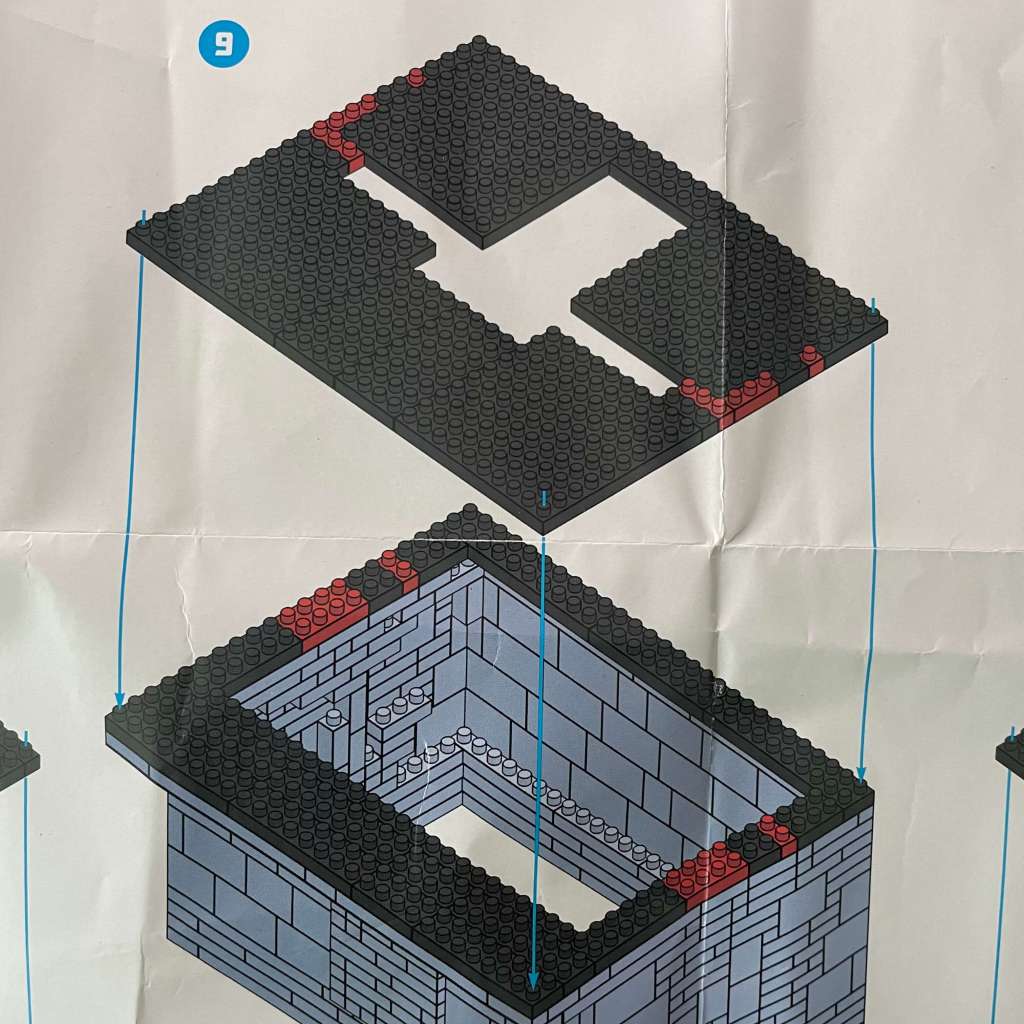
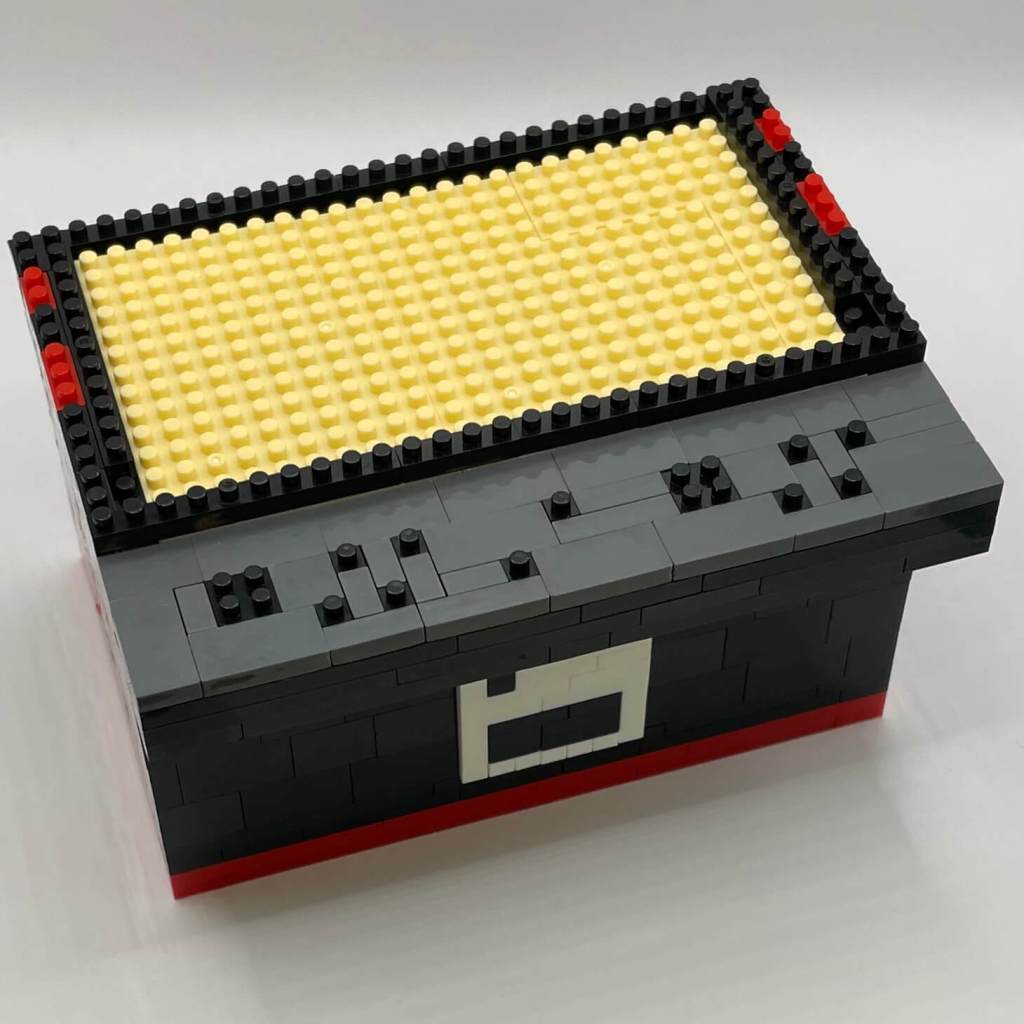
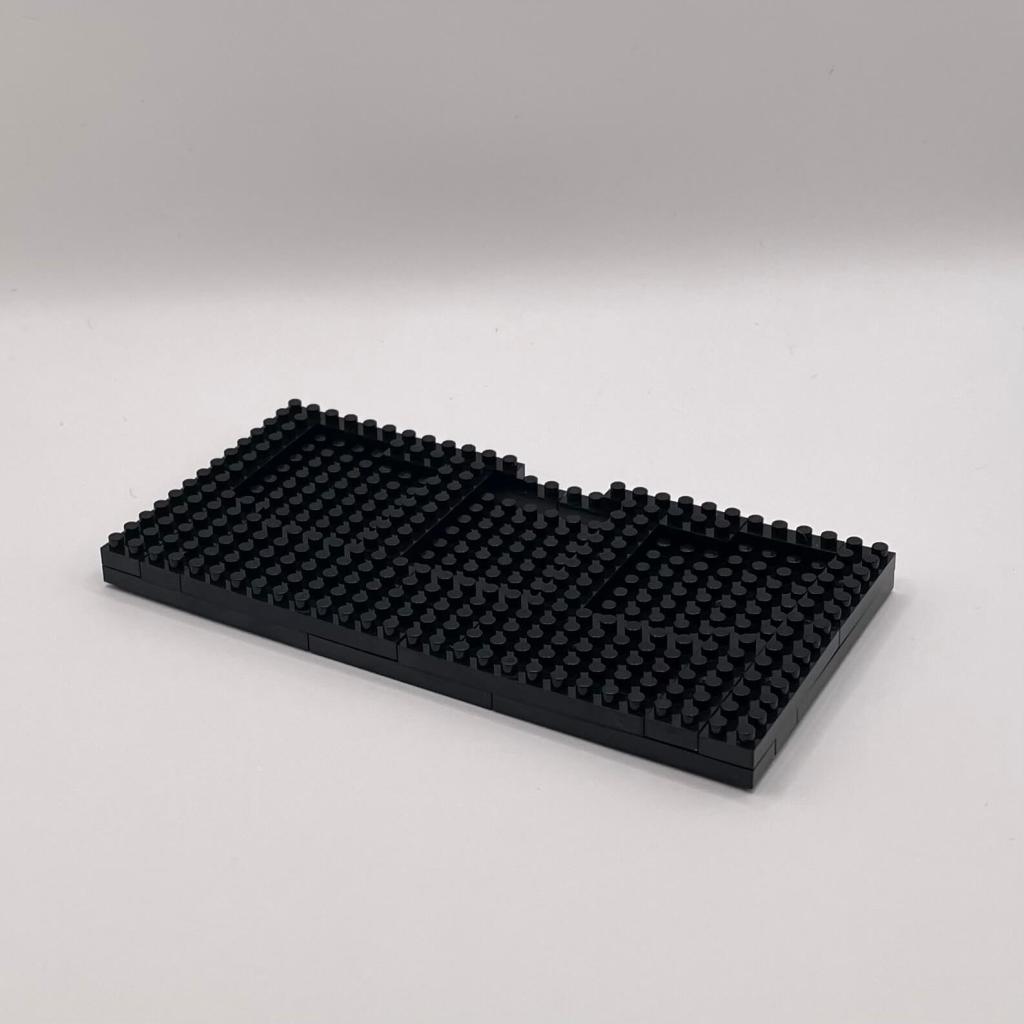
We’re adding two layers here, closing up the bottom part, and establishing a solid base for the top section, mostly with four 10×10 baseplates.
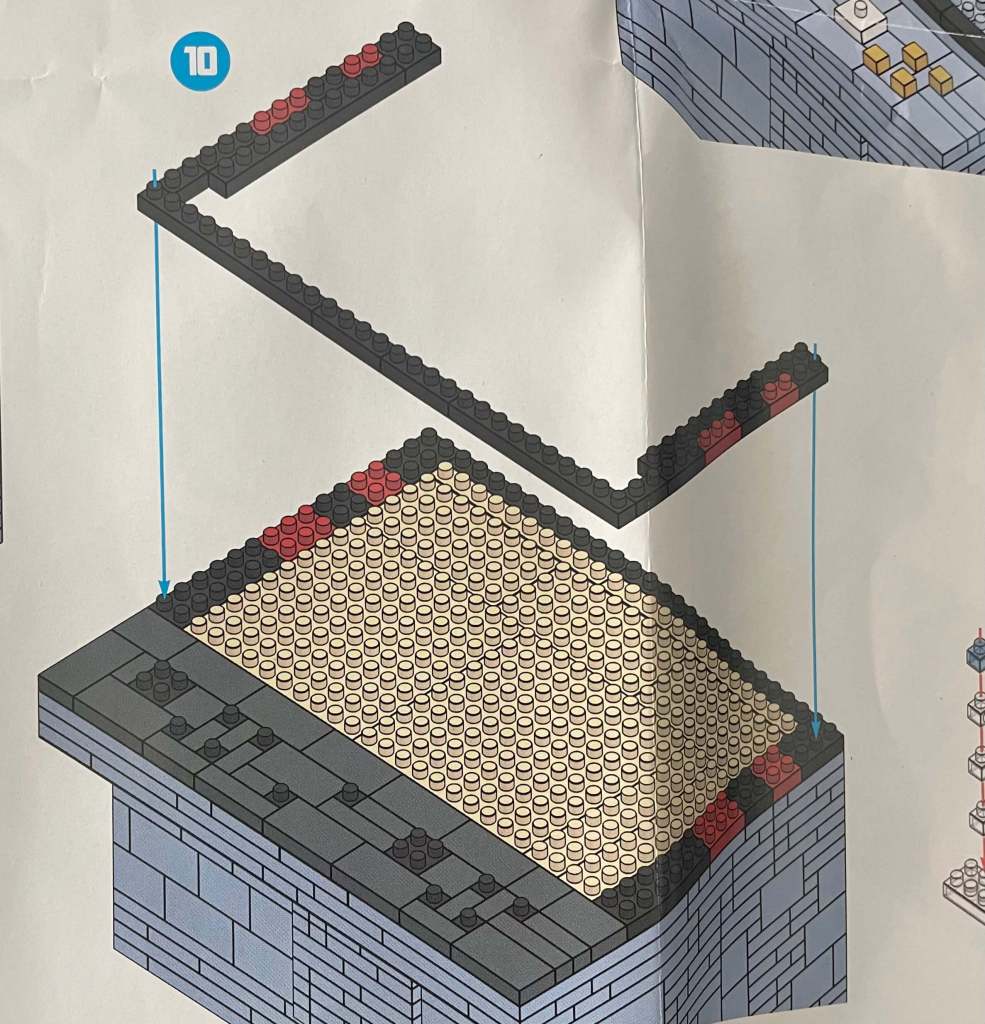
Step 10
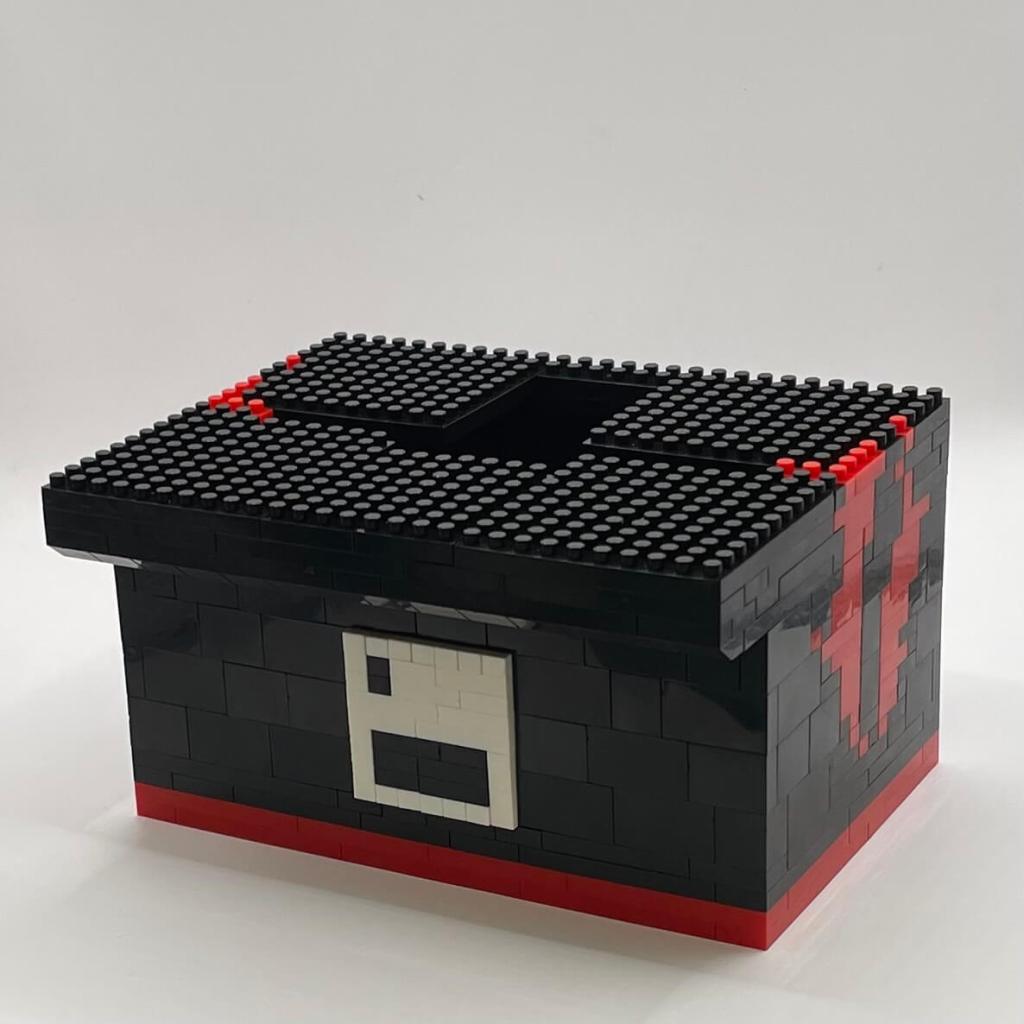
The top section is starting to come together. We’re closing off the bottom section and setting the stage for the screen and characters. The control panel is also getting its finishing touches.
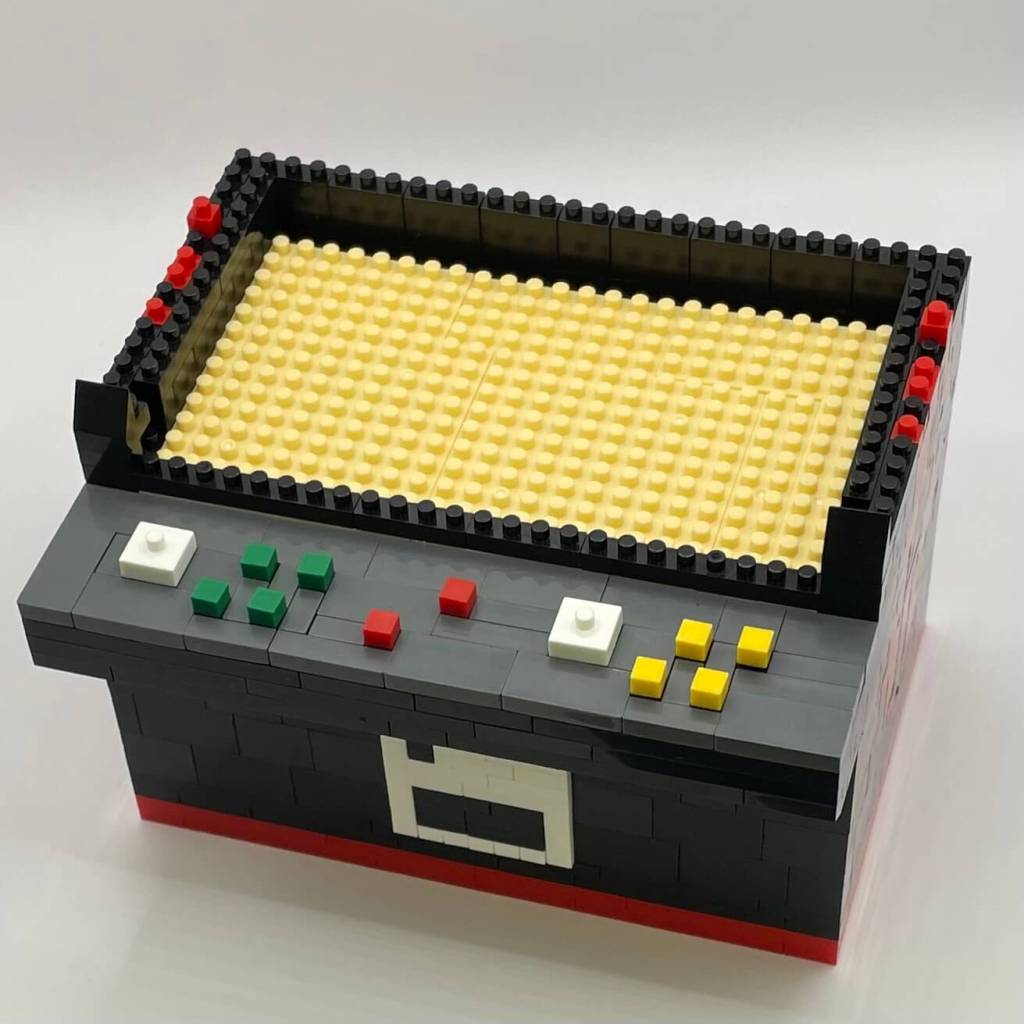
Step 11
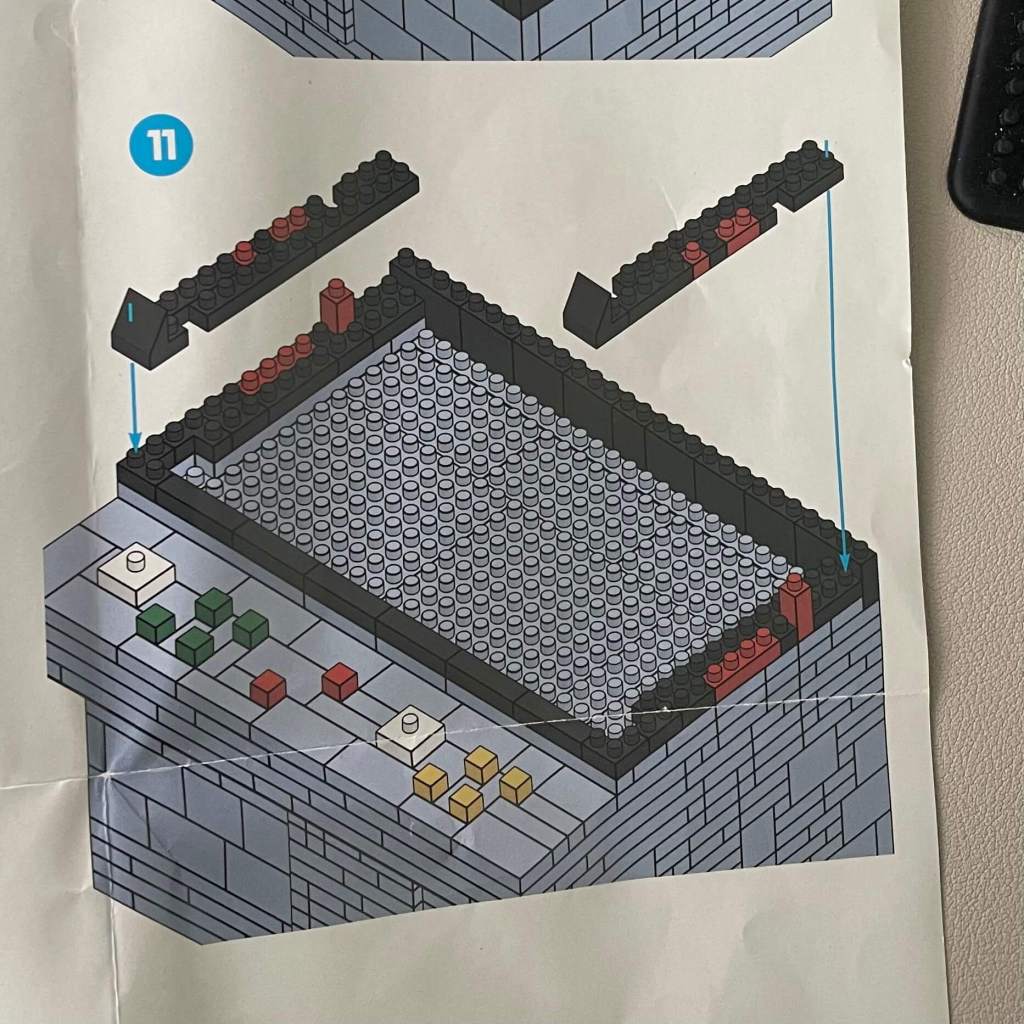
Buttons are finding their place on the control pad section, and the joysticks’ bases are getting prepared. The monitor section is evolving, with captivating details and an extended flame pattern on the cabinet’s sides.
Step 12
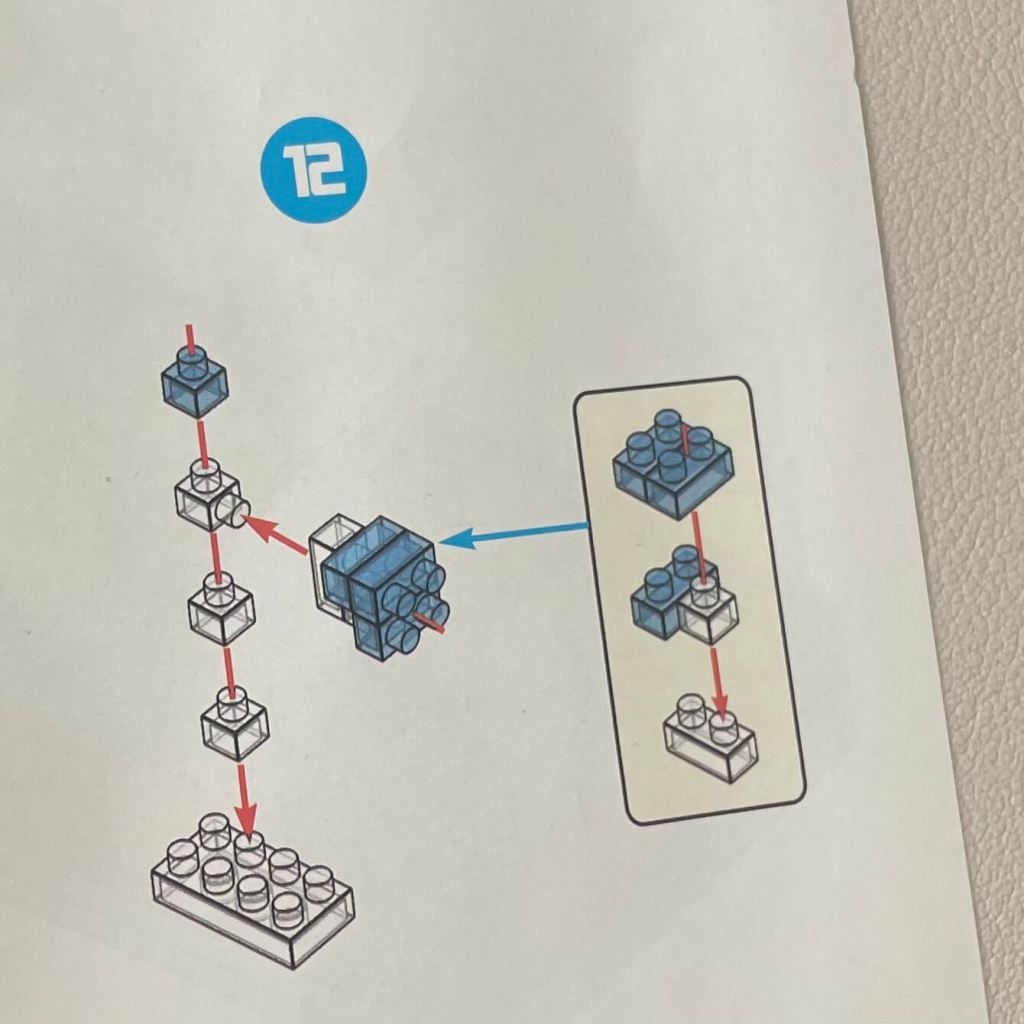
Now, we’re introducing a stand made of clear bricks, adding a scenic touch to the build.
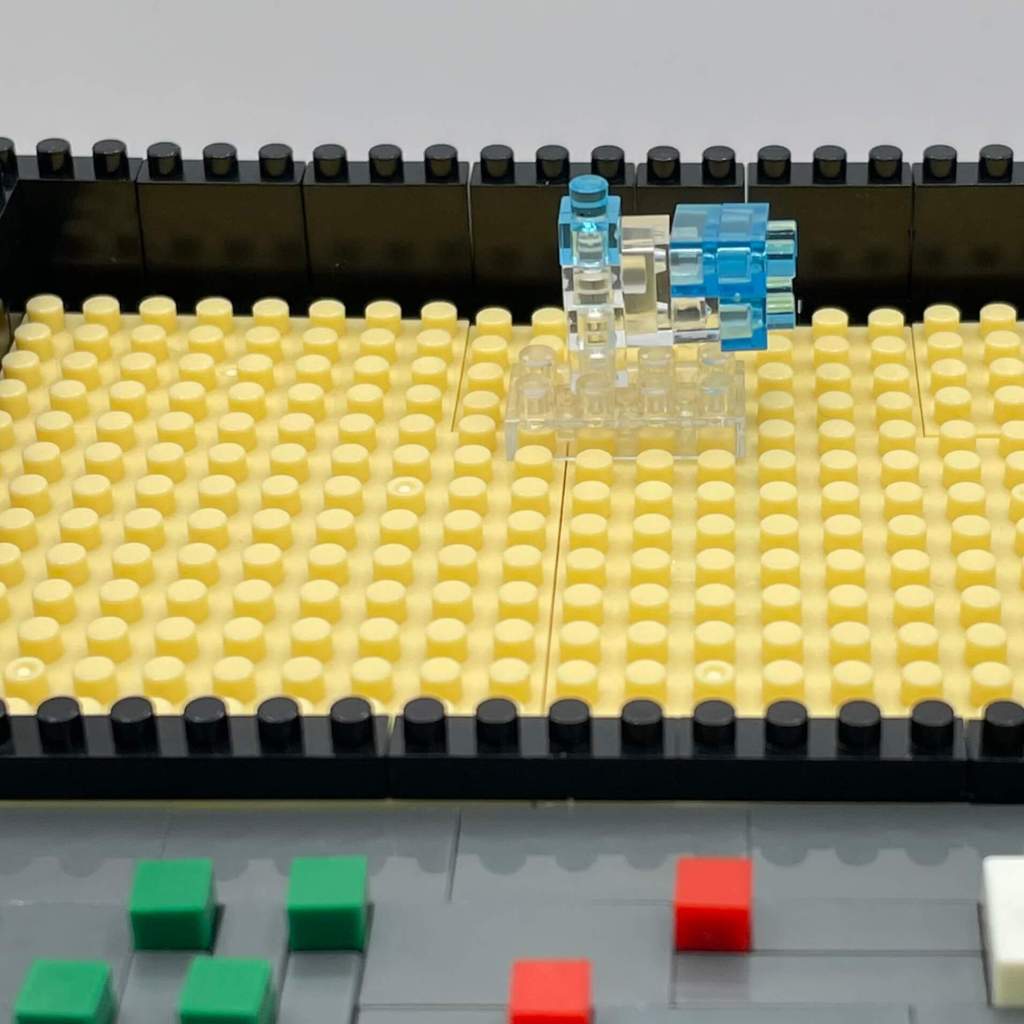
Step 13
Continuing to construct the sides of the monitor enclosure and assembling the joysticks.
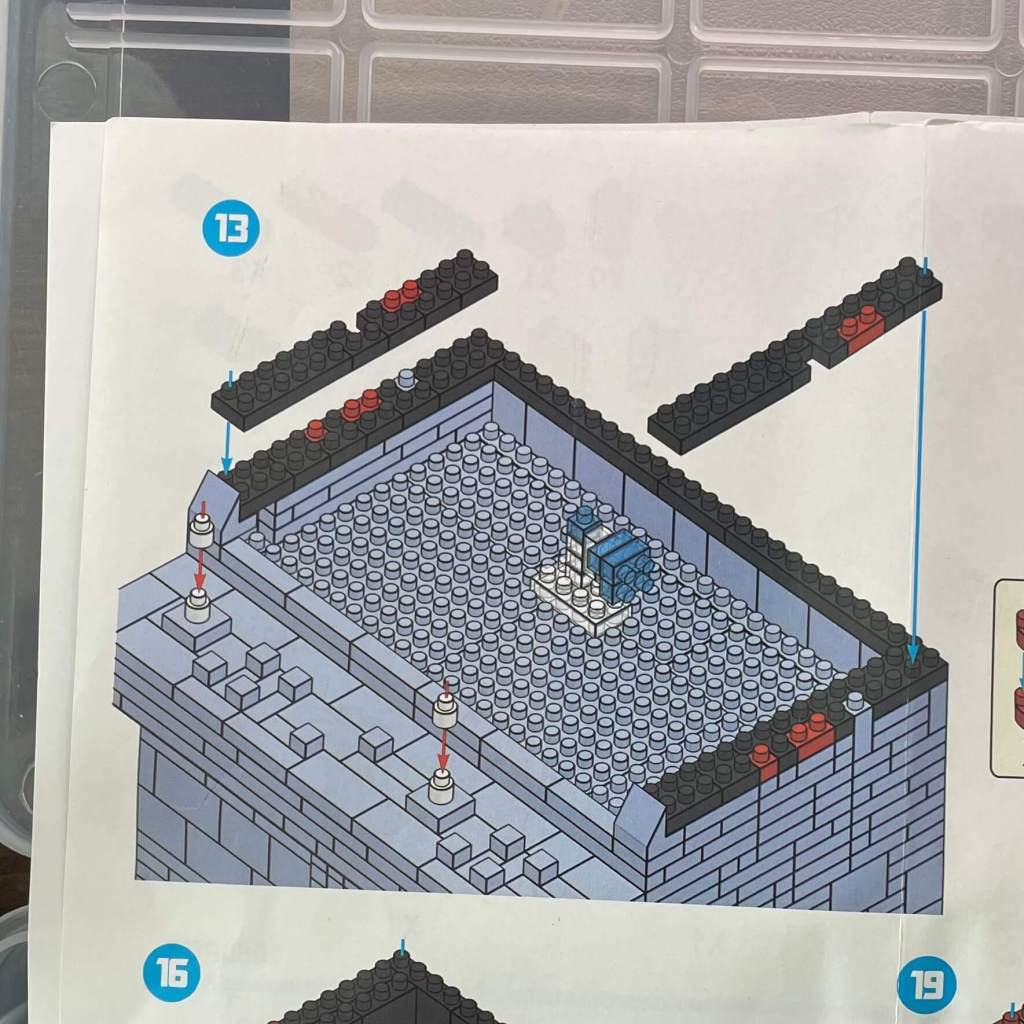
Step 14
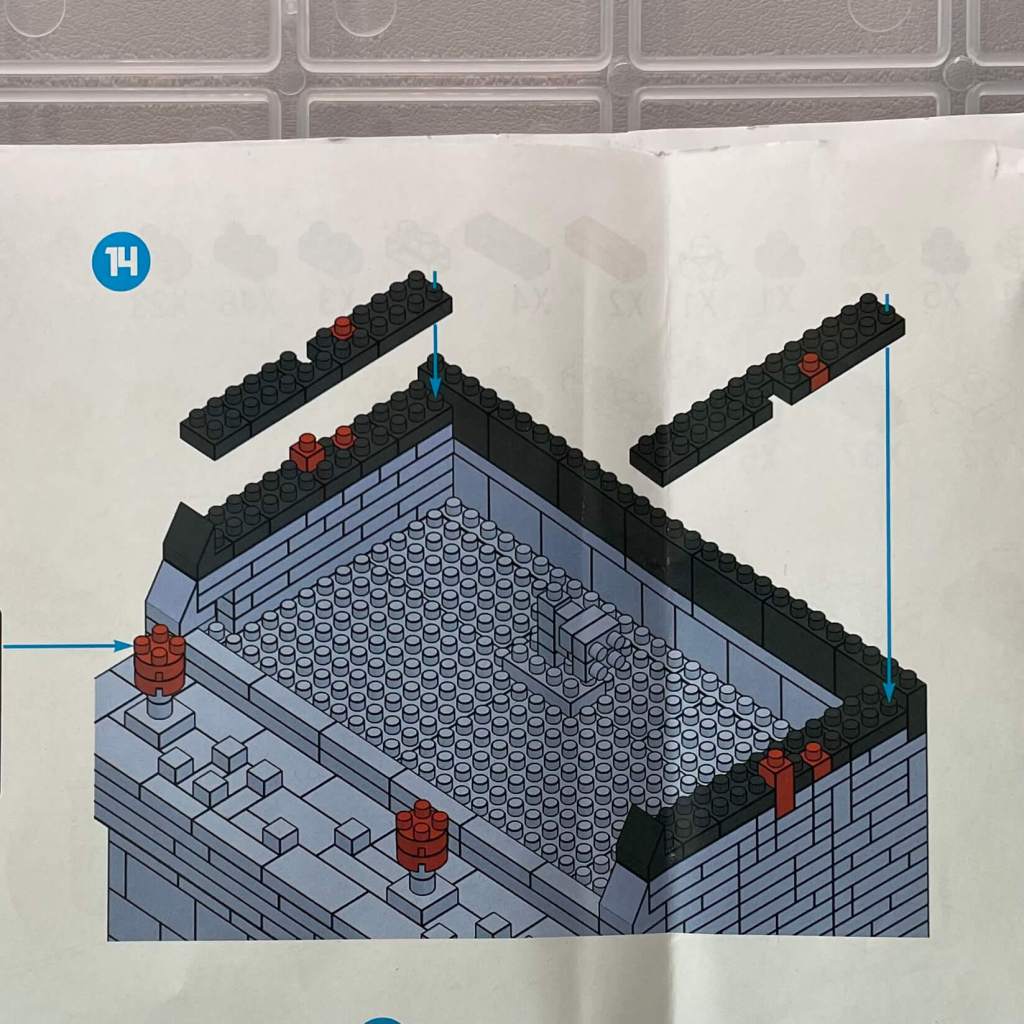
Adding more layers to the monitor enclosure, effectively completing the control panel section by capping off the joysticks.
Step 15
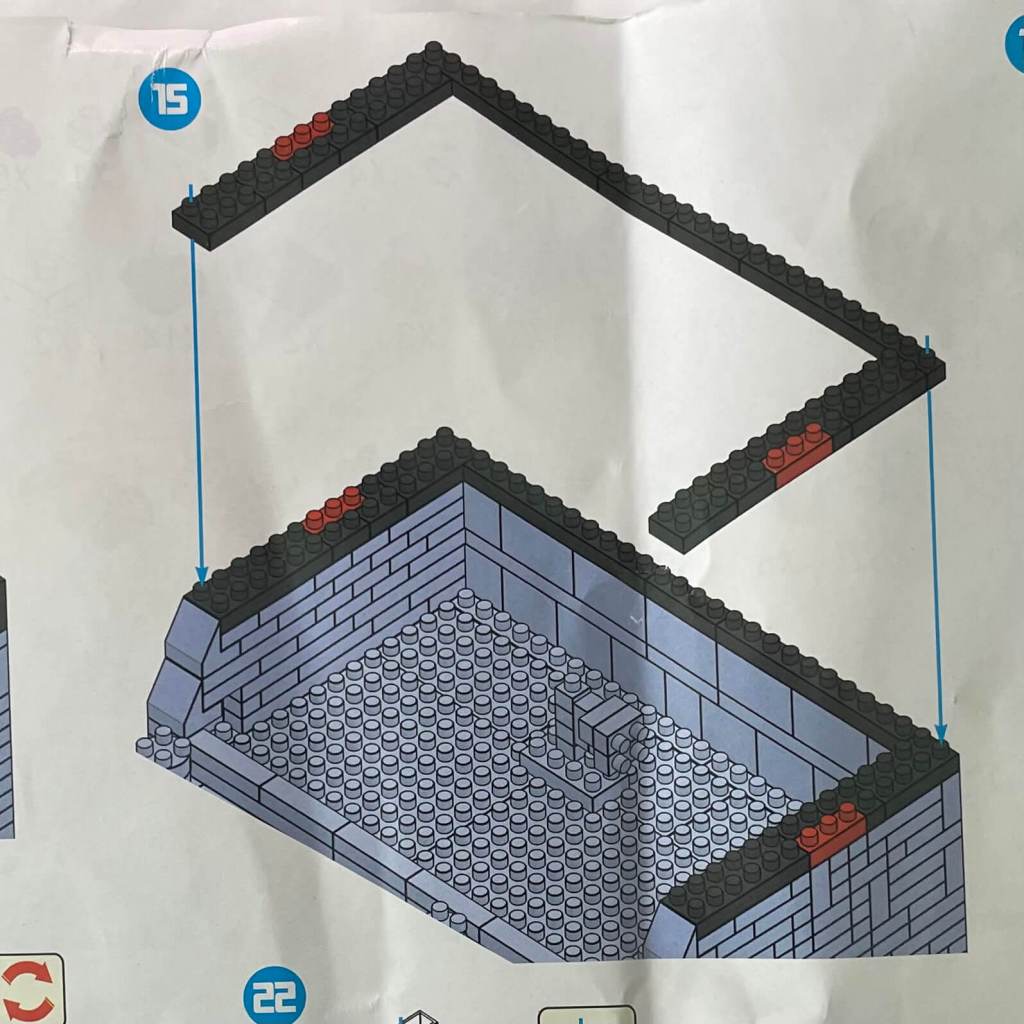
We’re adding two more layers around the perimeter of the monitor section.
Step 16
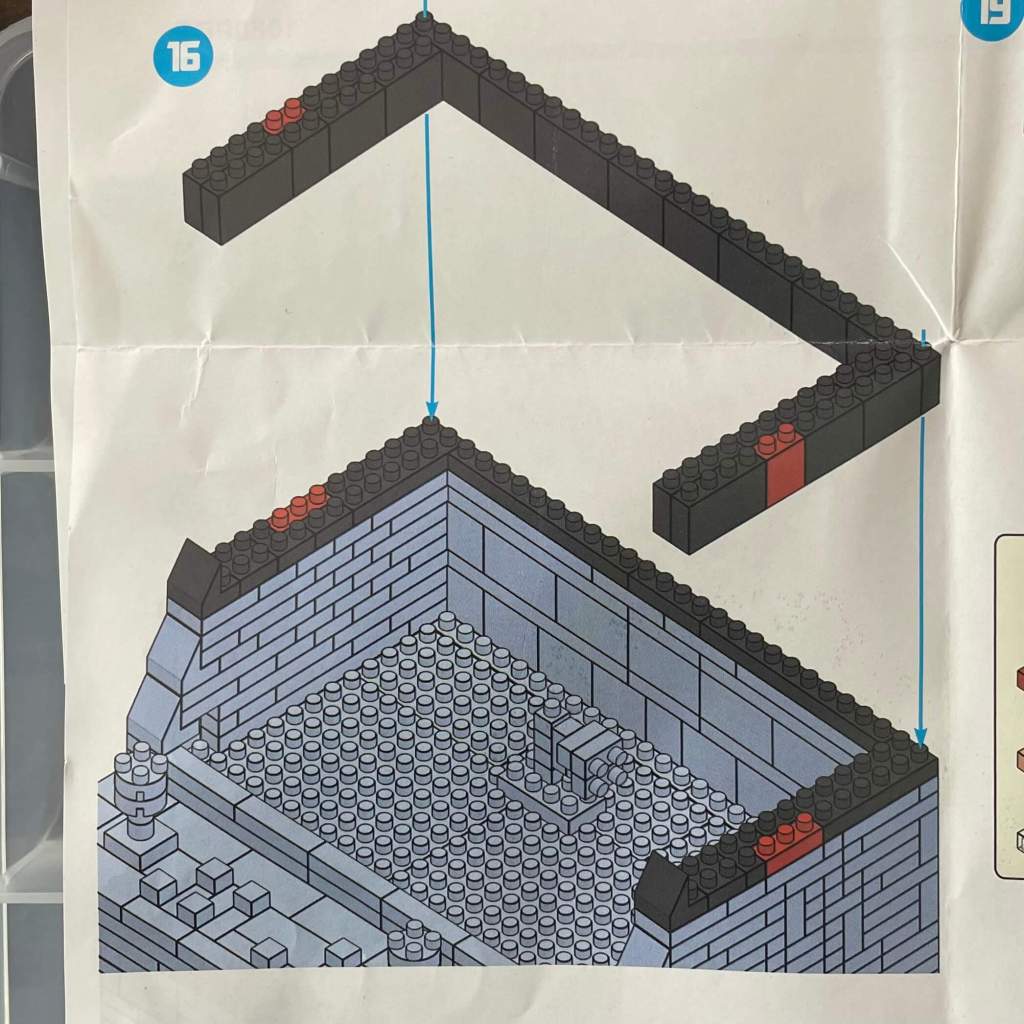
Adding two more layers to the monitor section’s perimeter, making extensive use of taller pieces. Sticking to the standard Nanoblock-width pieces for stability.
Step 17
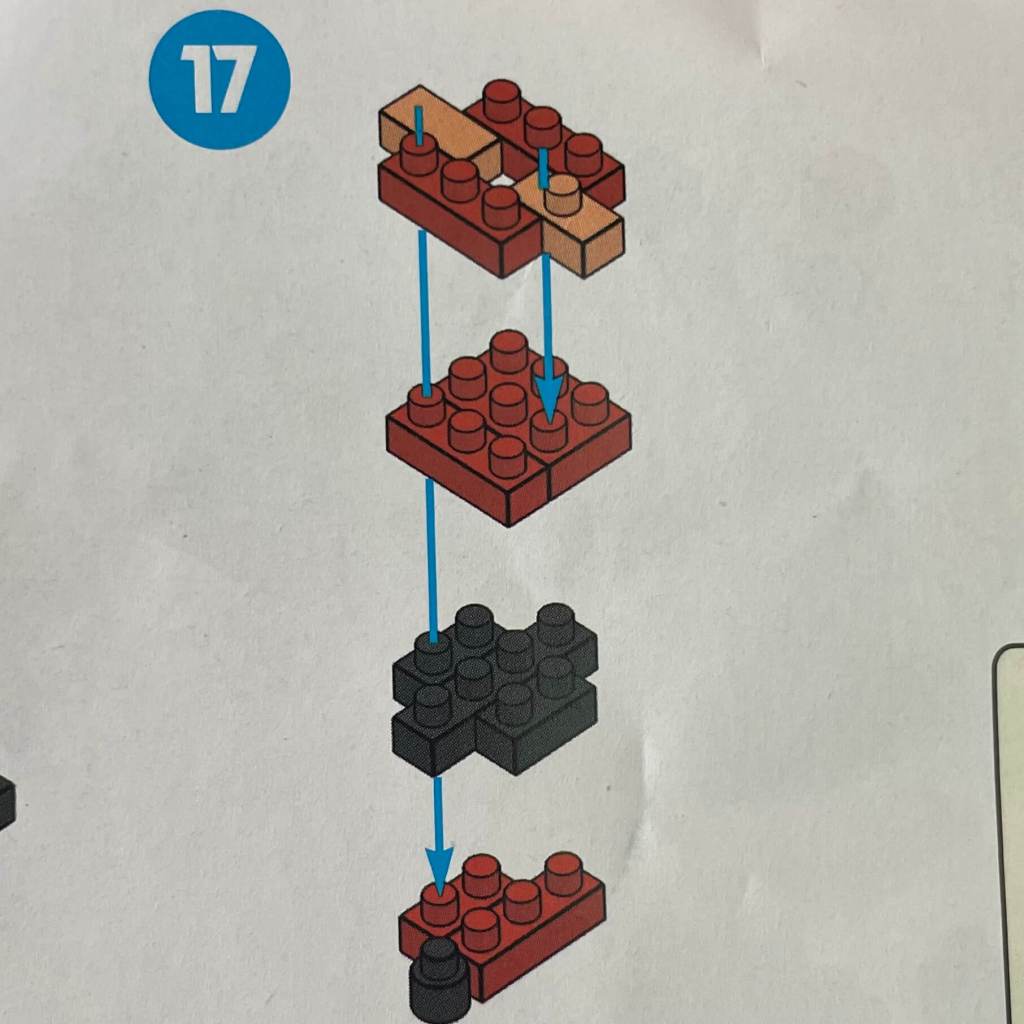
We’re taking a break from the cabinet and starting to build internal details and one of the fighters.

Step 18
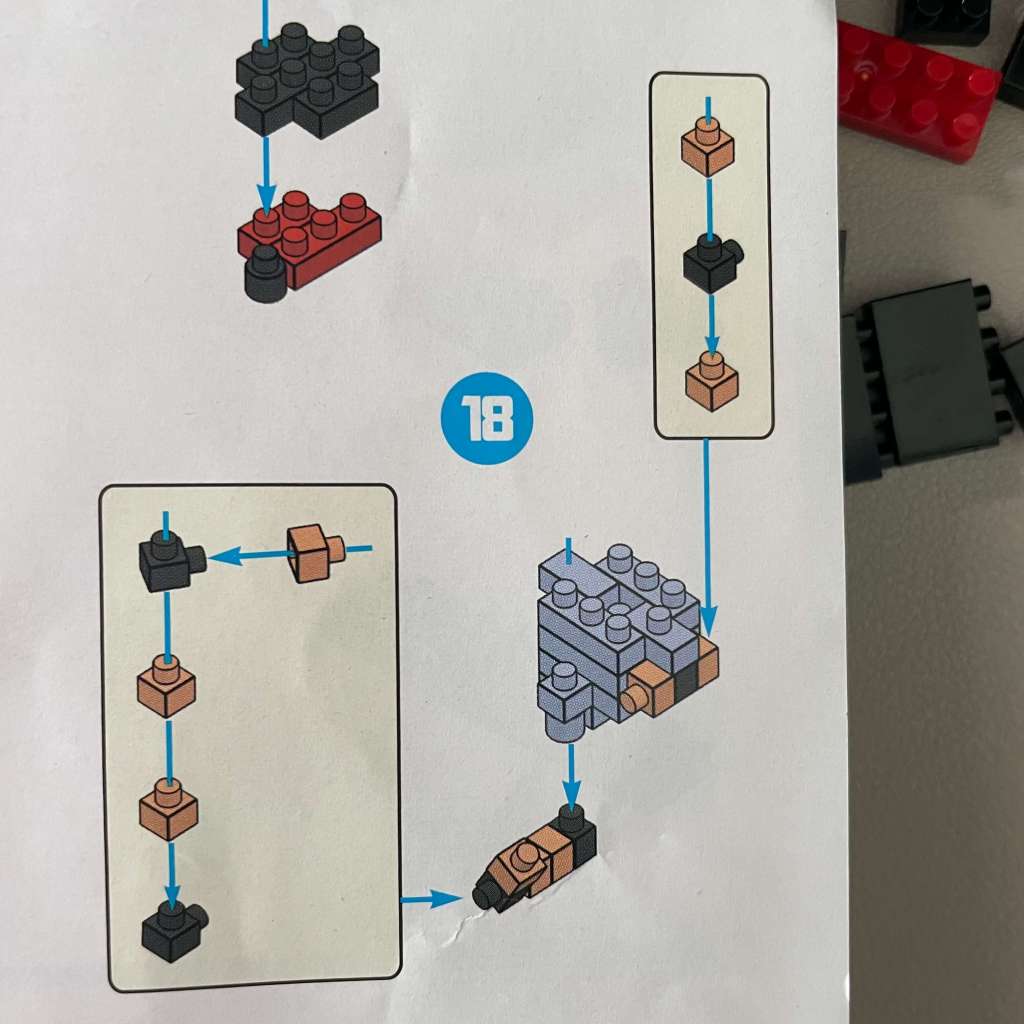
Limbs are being added to the fighter character, requiring precise positioning of 1×1 bricks.
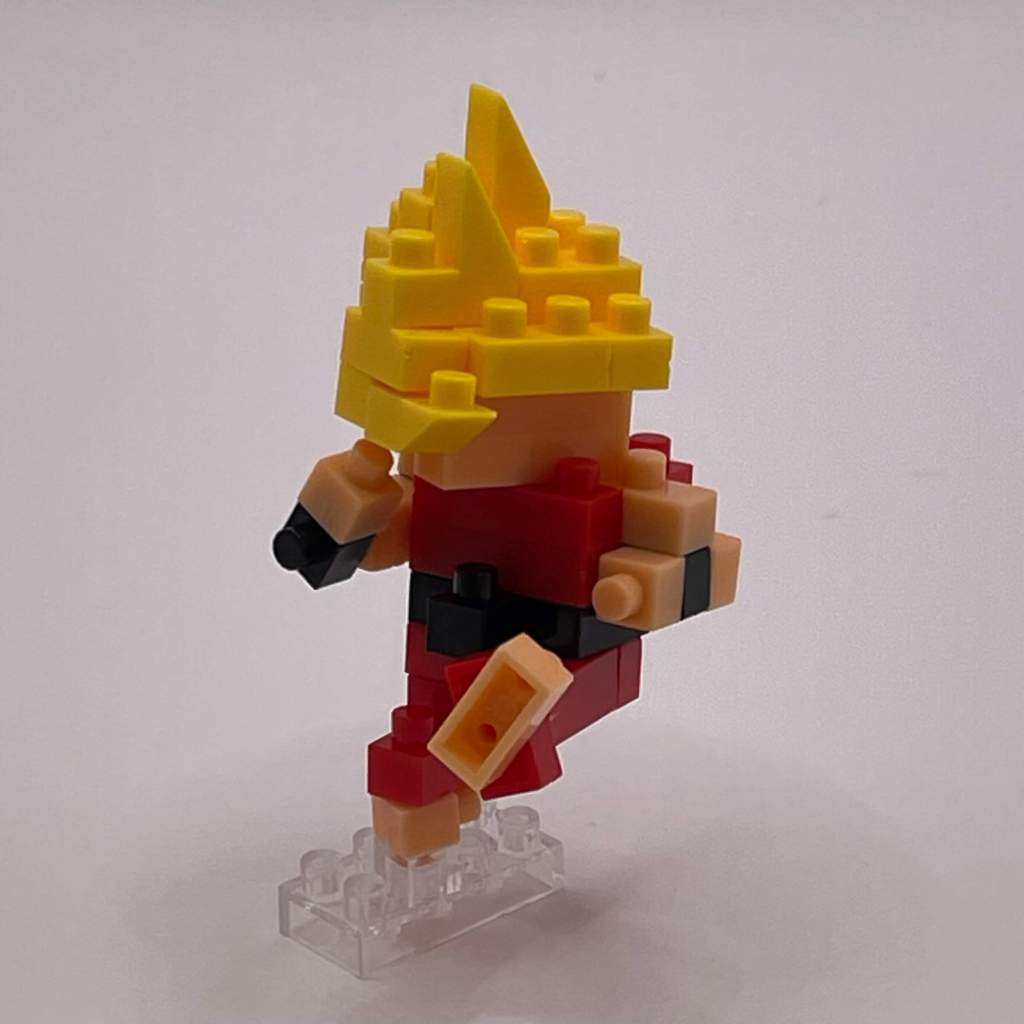
Step 19
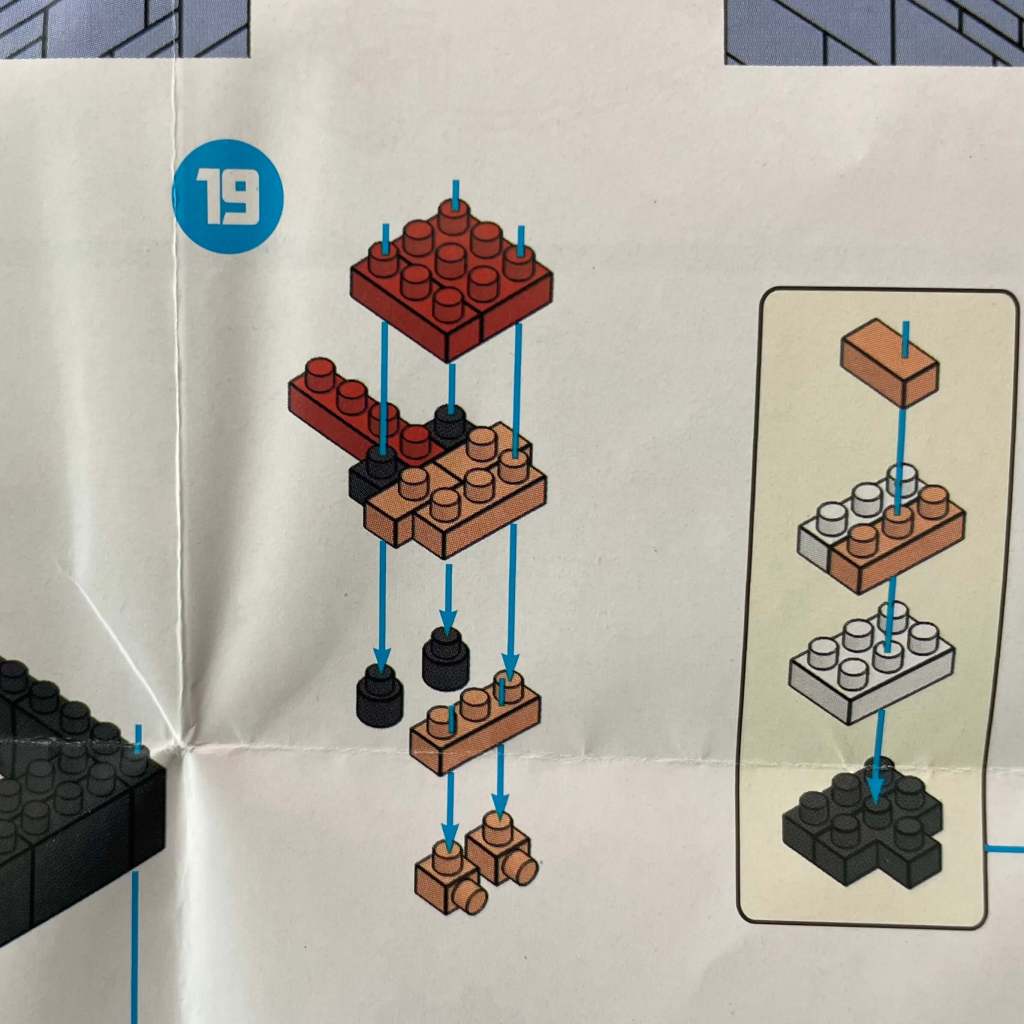
We’re constructing another part of the fighter character, gradually revealing its identity as a stand-in for Street Fighter’s Ryu.
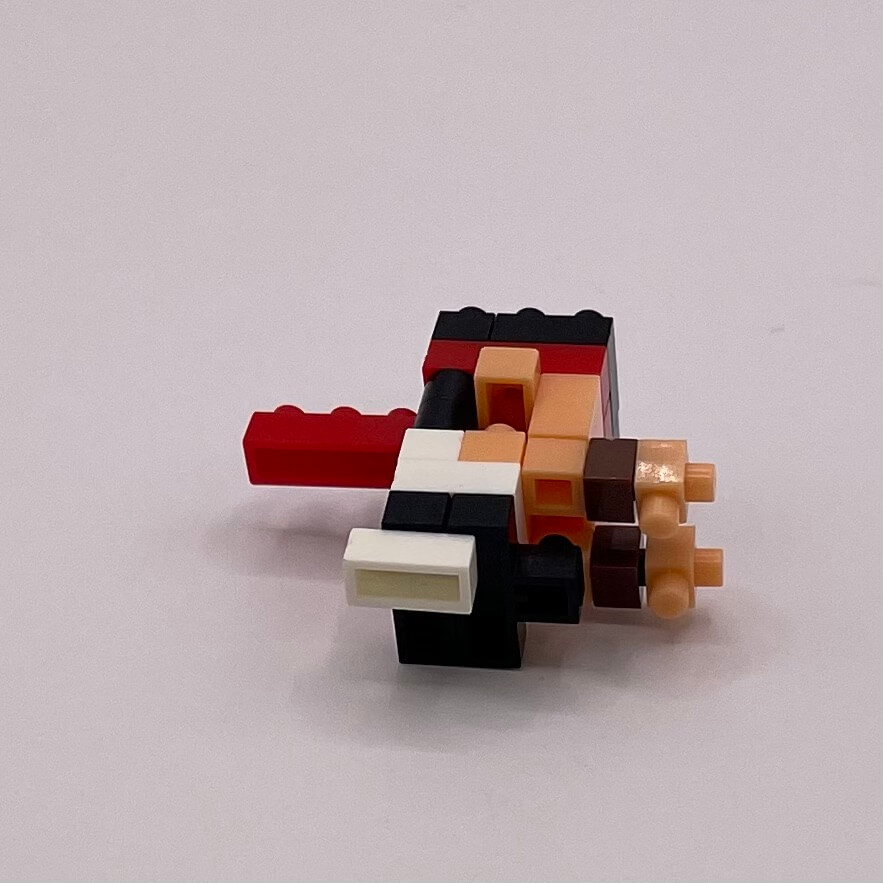
Step 20
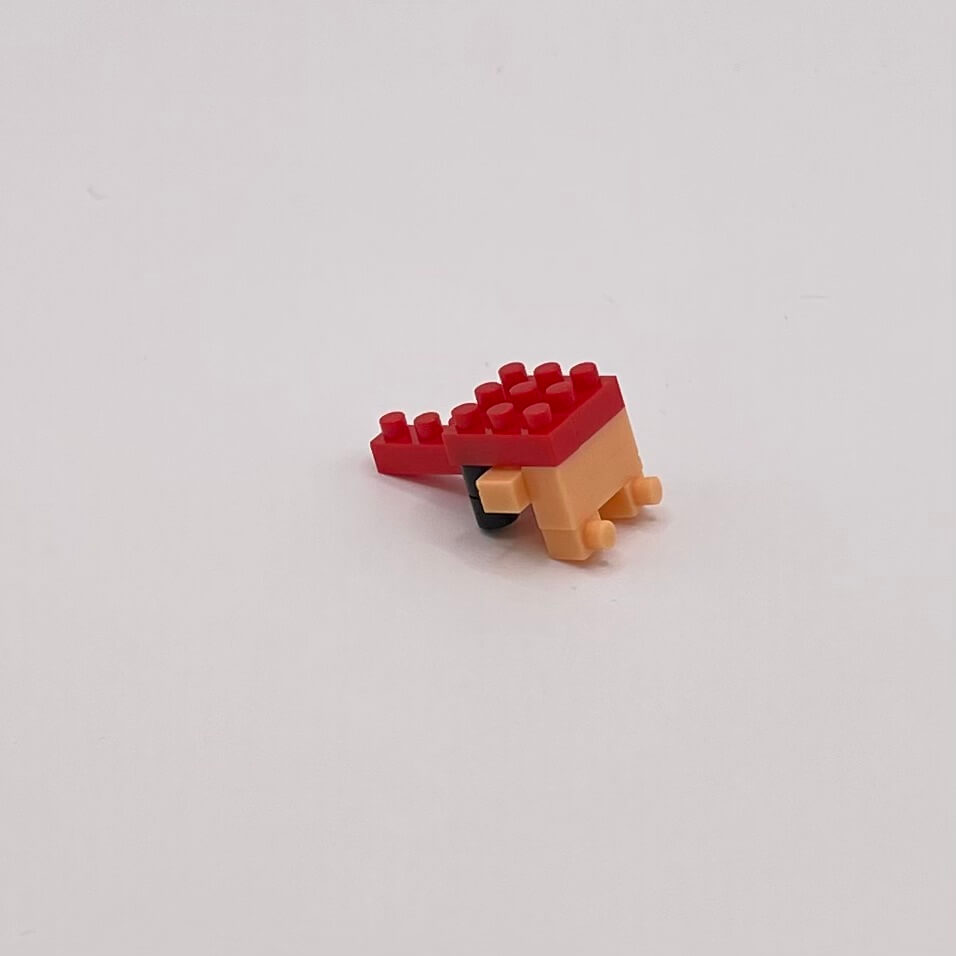
The expansion continues, confirming that this character closely resembles Ryu from Street Fighter.
Step 21
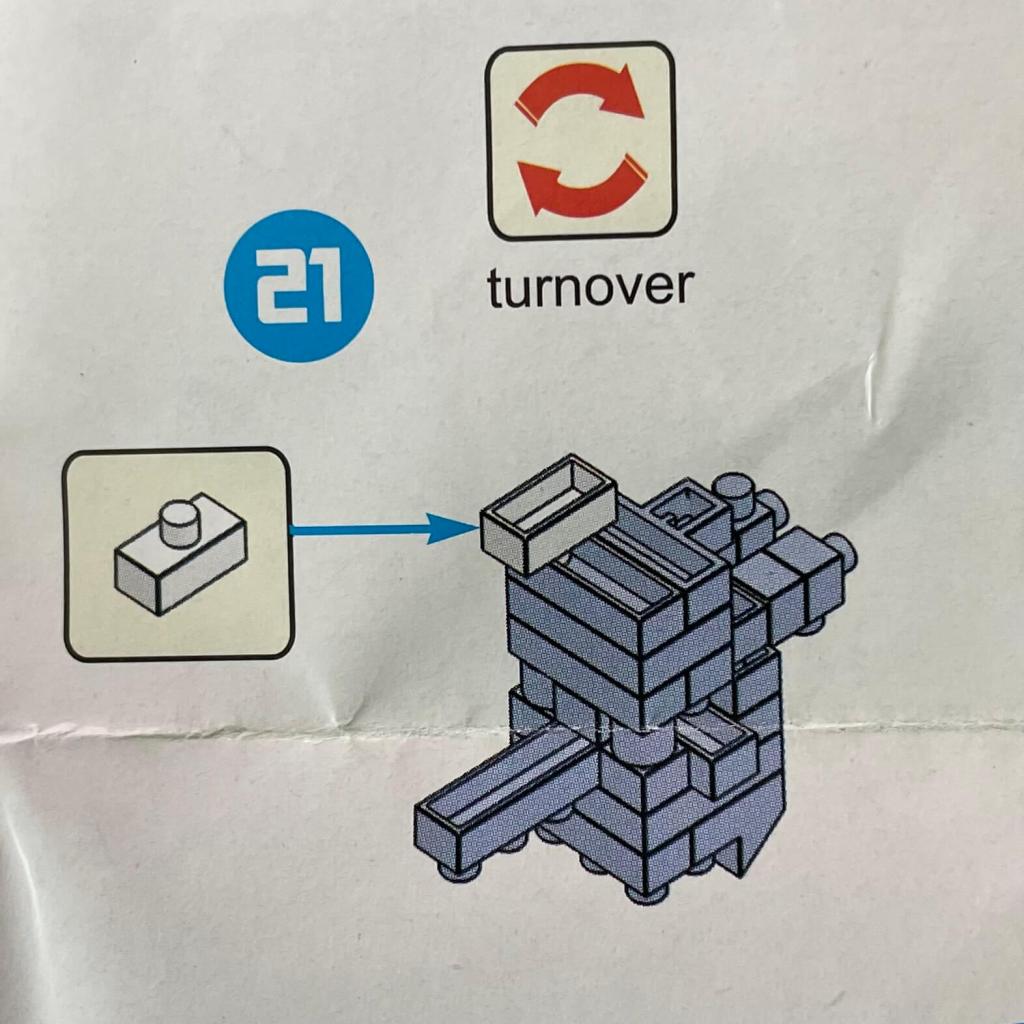
A simple step has us turning the character over and attaching a single studded 2×1 piece to the bottom.
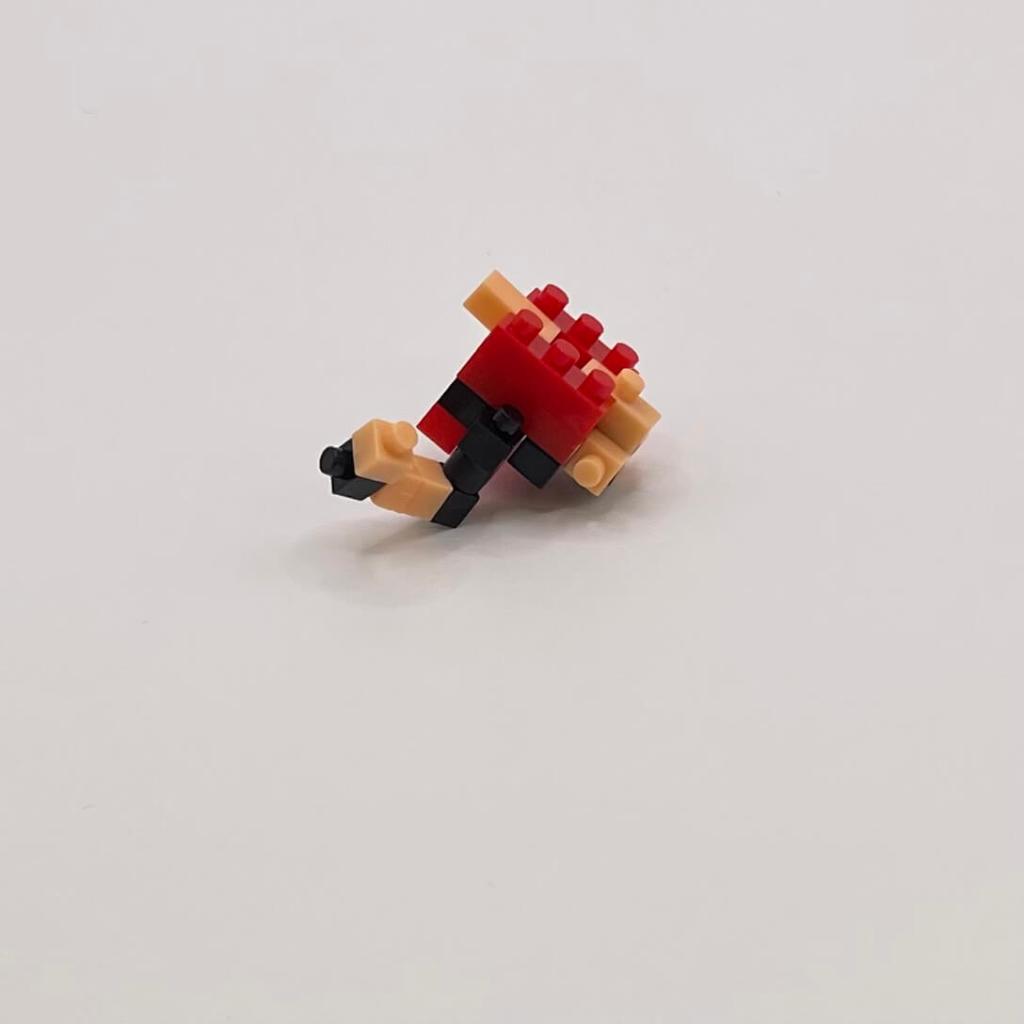
Step 22
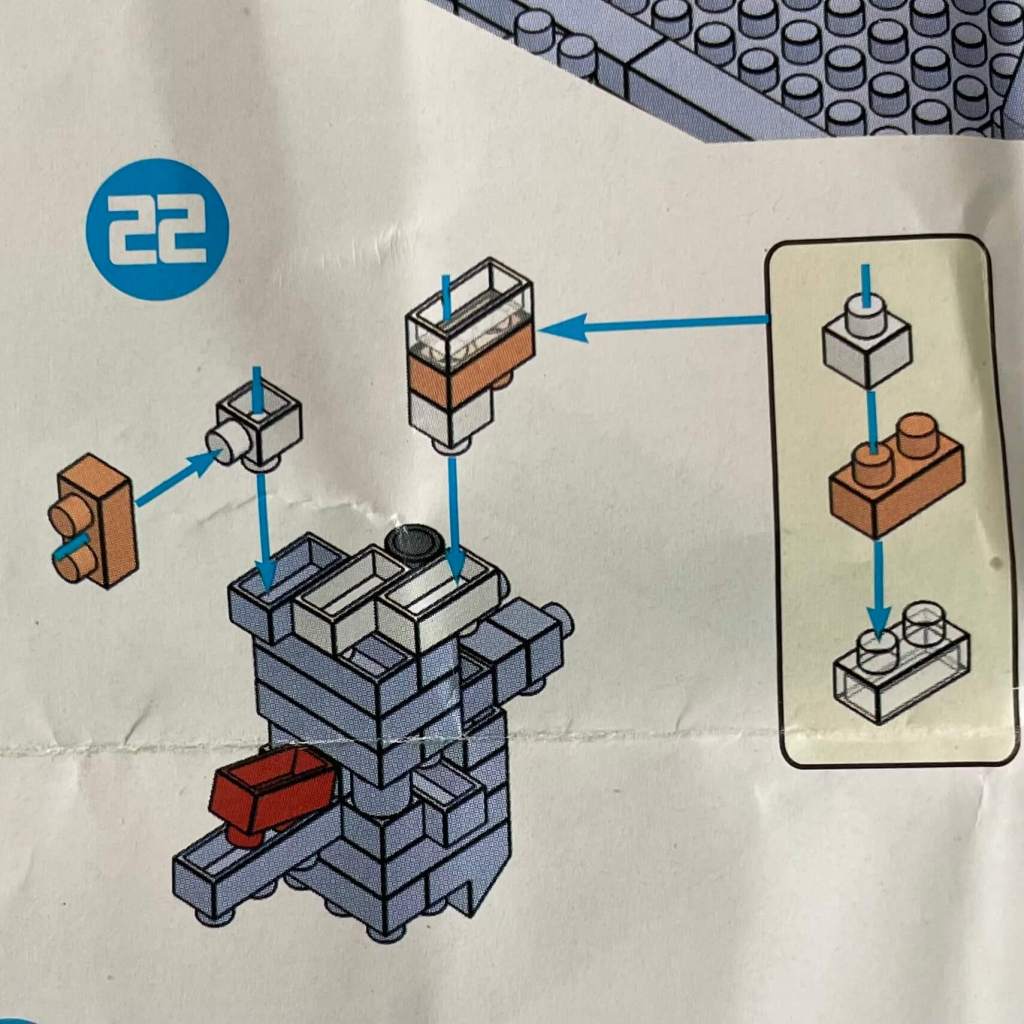
Here we conclude the build of Ryu’s doppelgänger.
Step 23
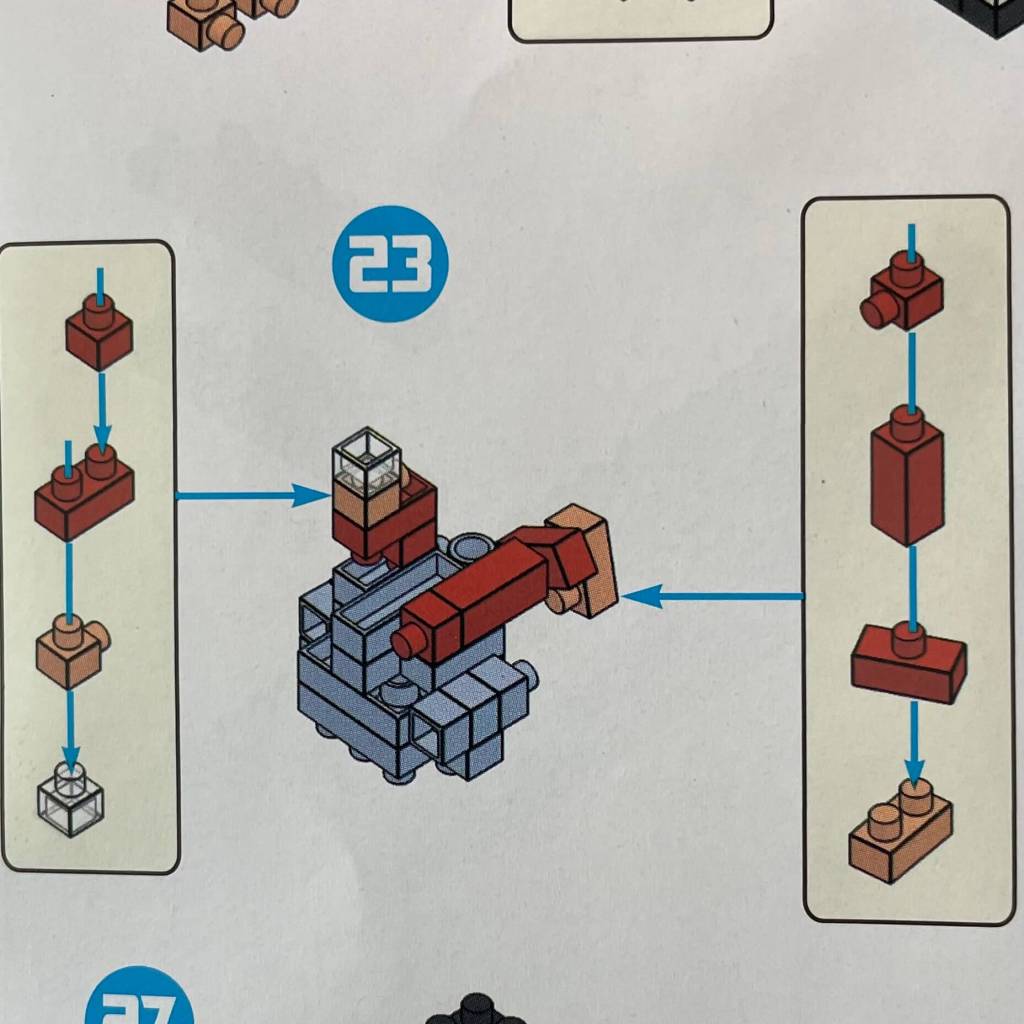
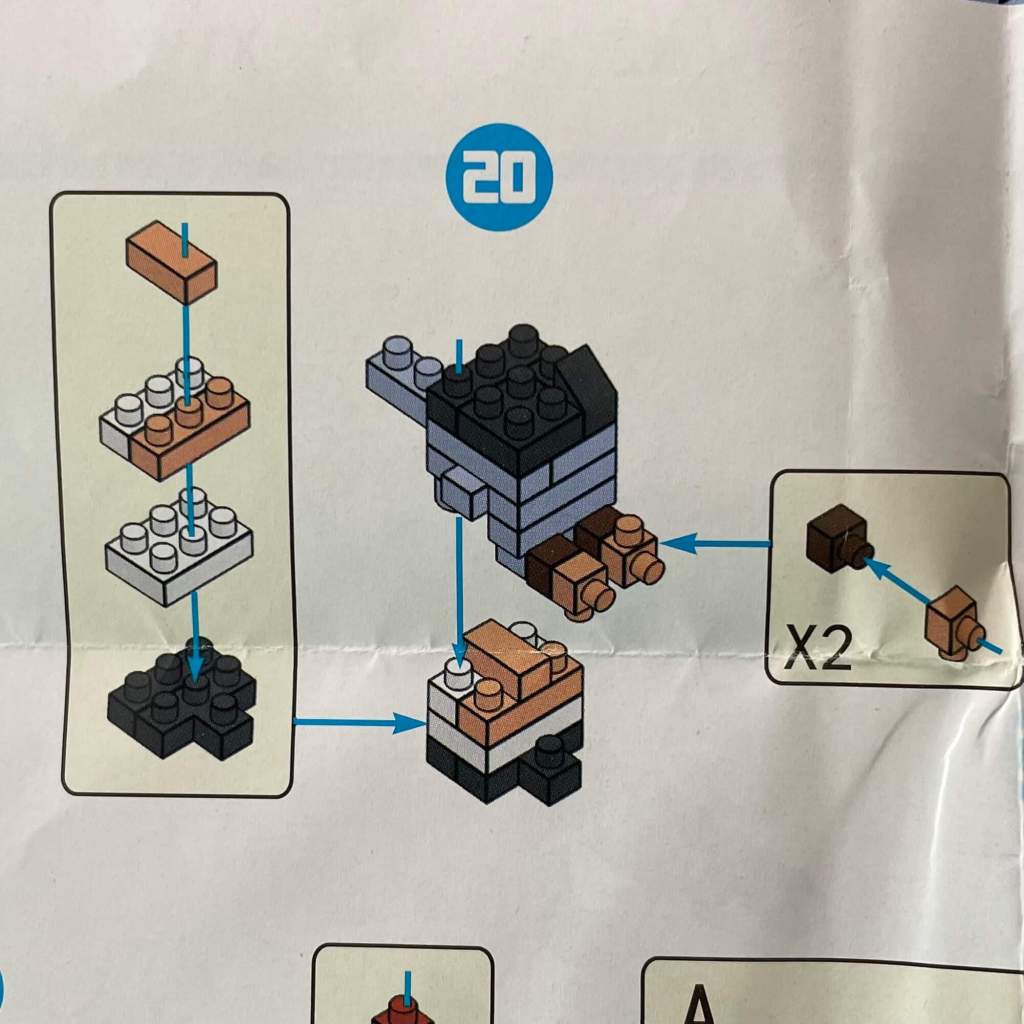
Returning to the first character we started with, we’re adding limbs. It’s clear that this character is a stand-in for Ken, Ryu’s friendly rival. However, these characters are quite delicate.
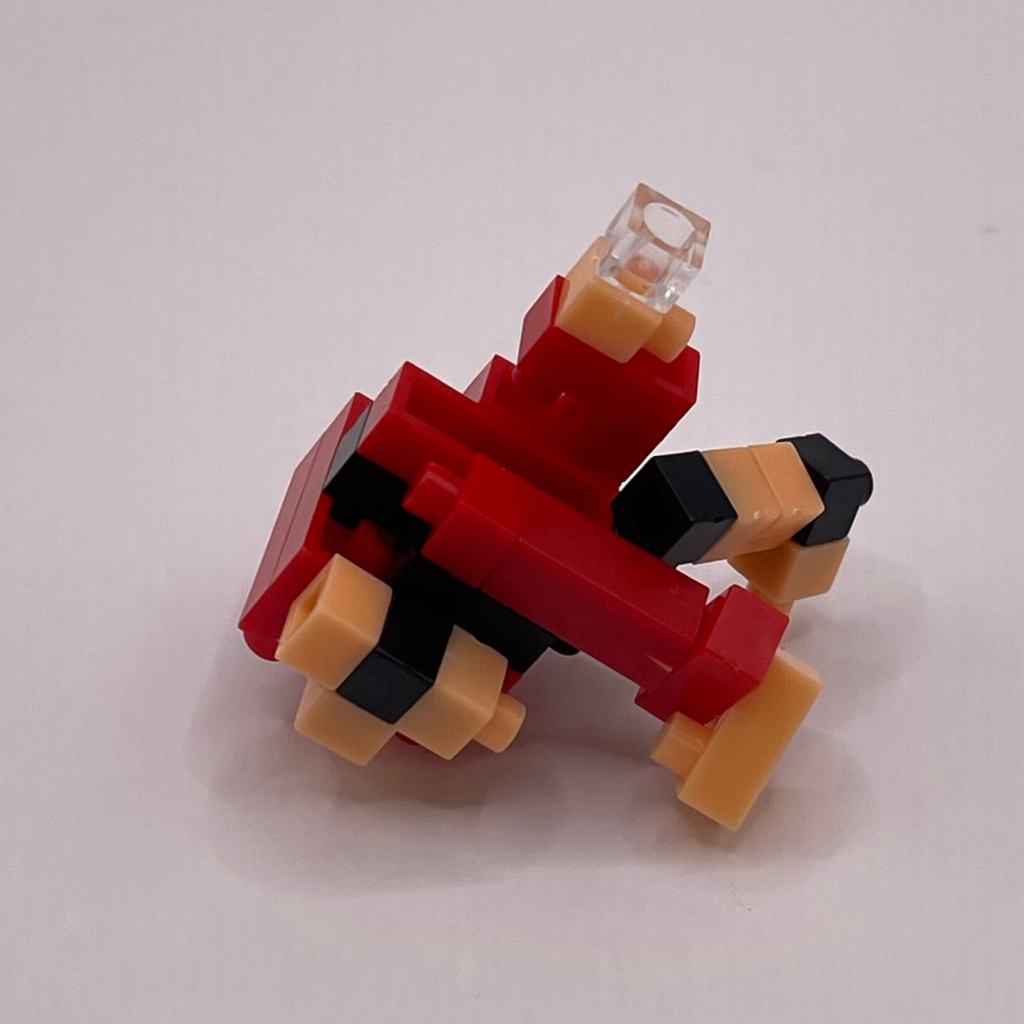
Step 24
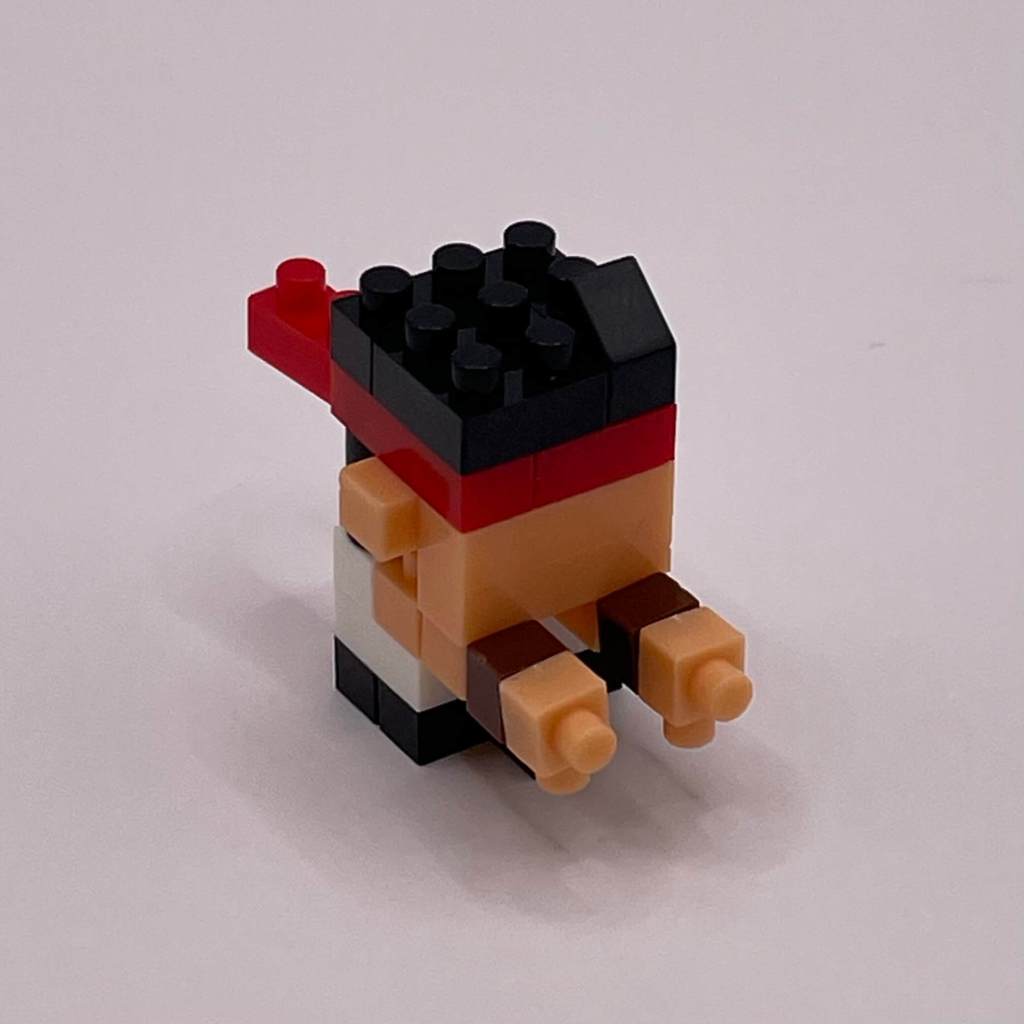
We’re completing Ken’s doppelgänger in this step. He looks impressive but requires careful handling.
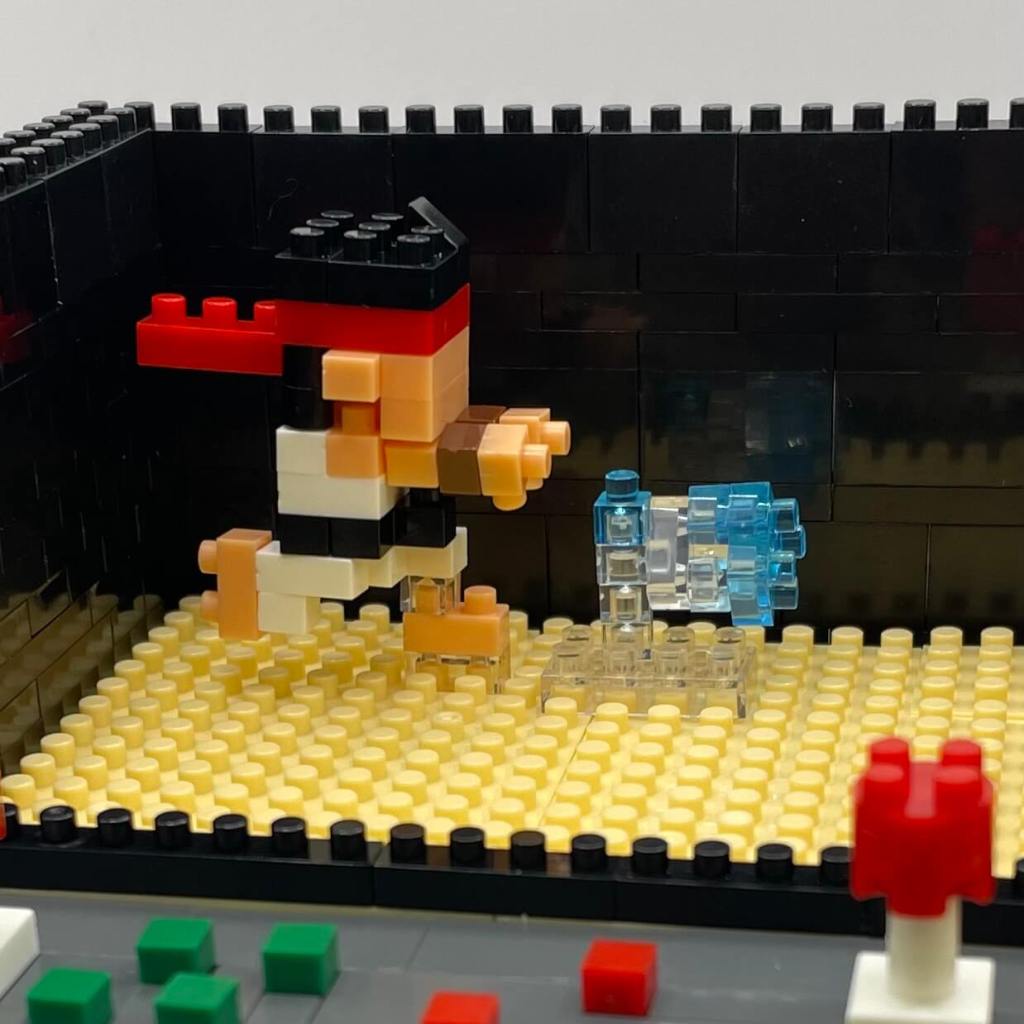
Step 25
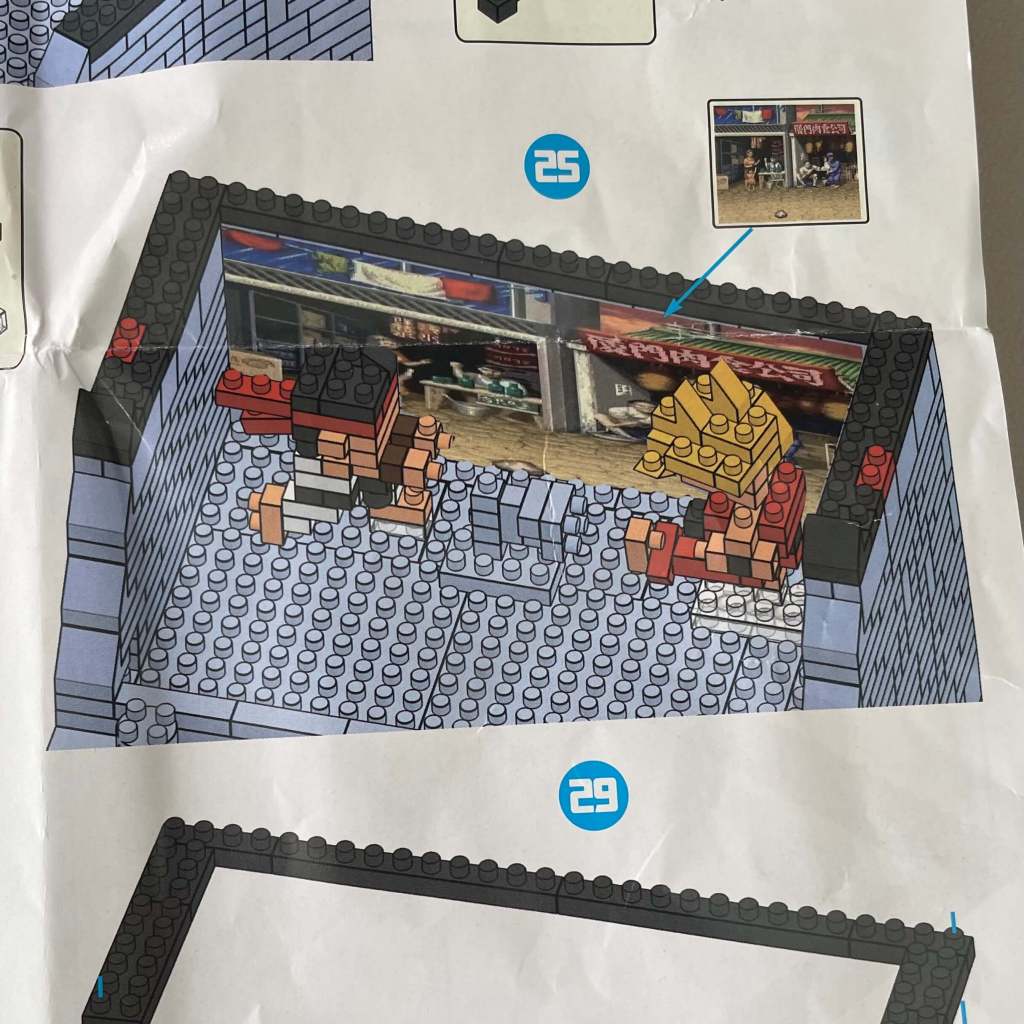
Placing the fighters, building another layer around the cabinet’s perimeter, and adding the background sticker. Note that while the sticker goes in easily, it lacks sufficient surface behind it for stability. In hindsight, it might have been better to apply the sticker later in the build.
Step 26
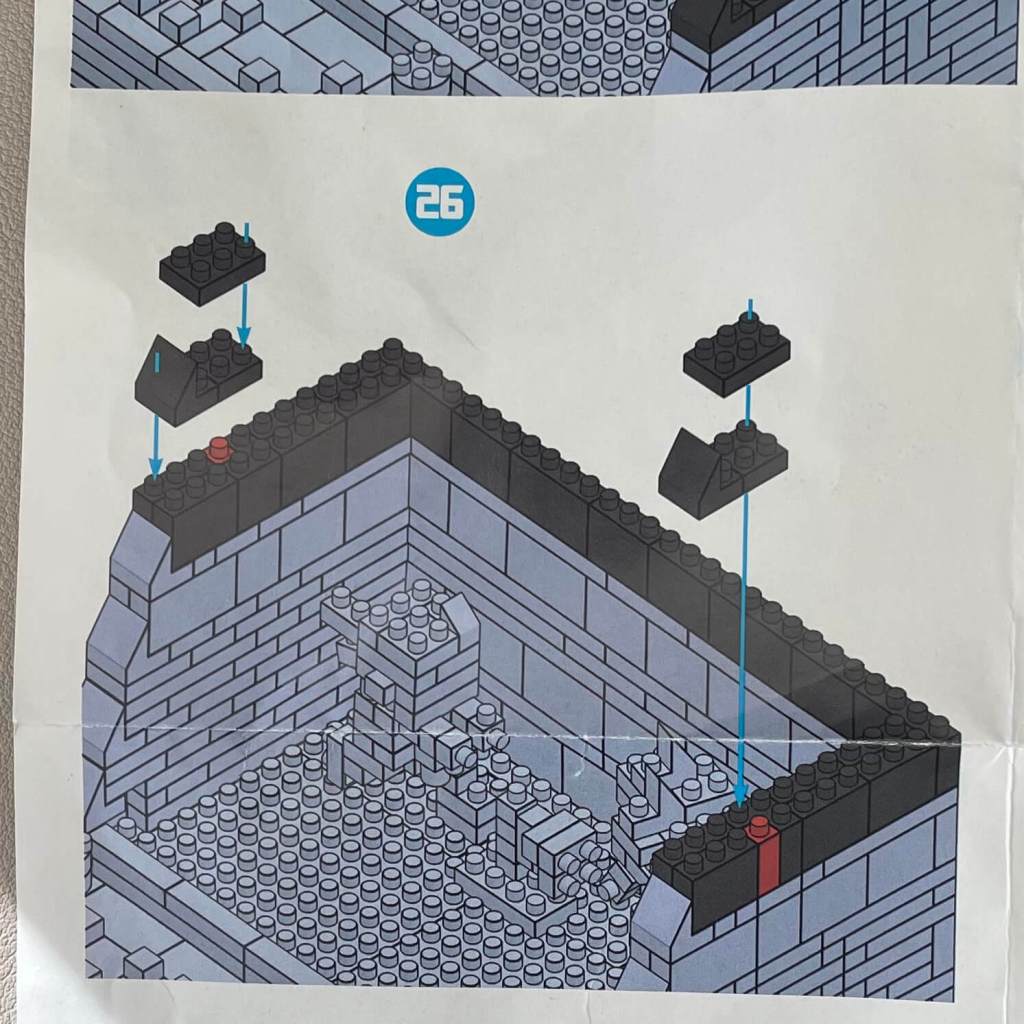
Adding another layer to the cabinet’s perimeter.
Step 27
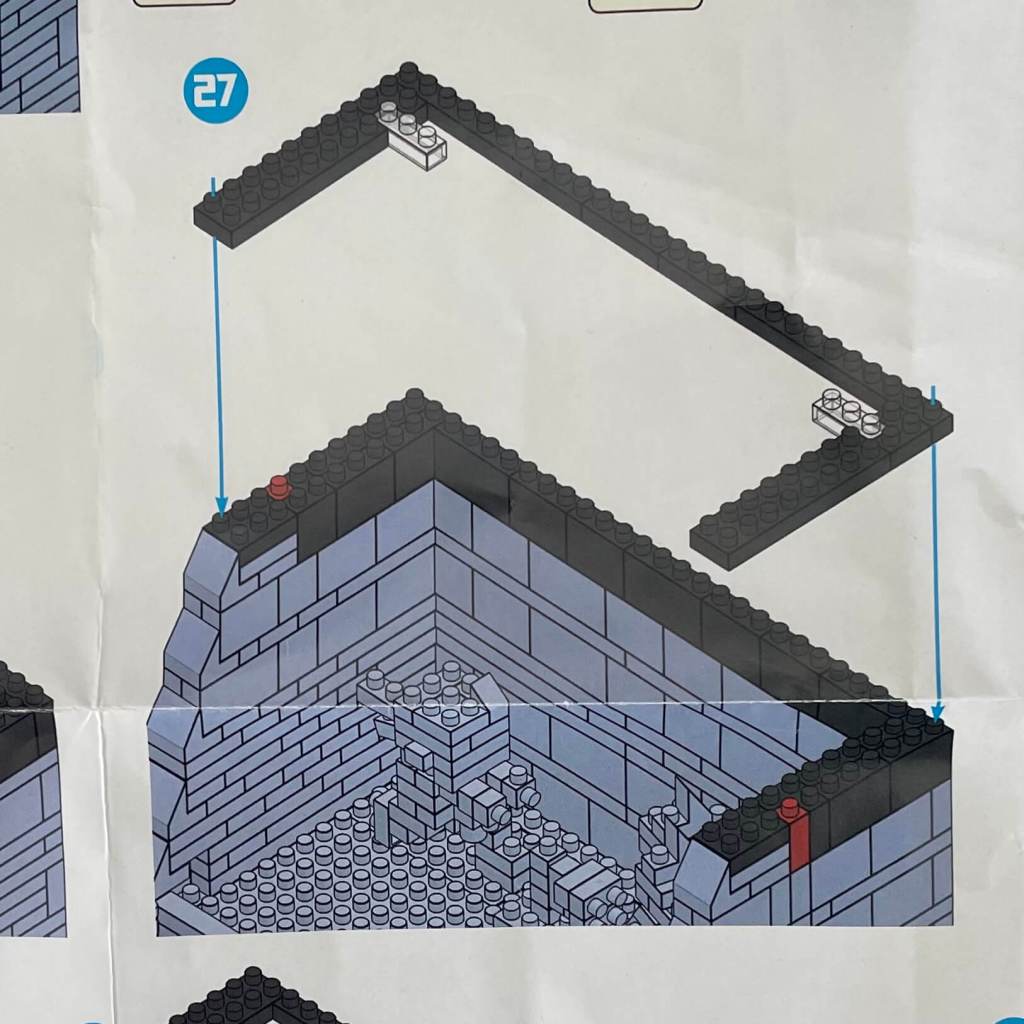
In this step, we add two more layers to the cabinet’s perimeter, providing much-needed support for the background sticker.
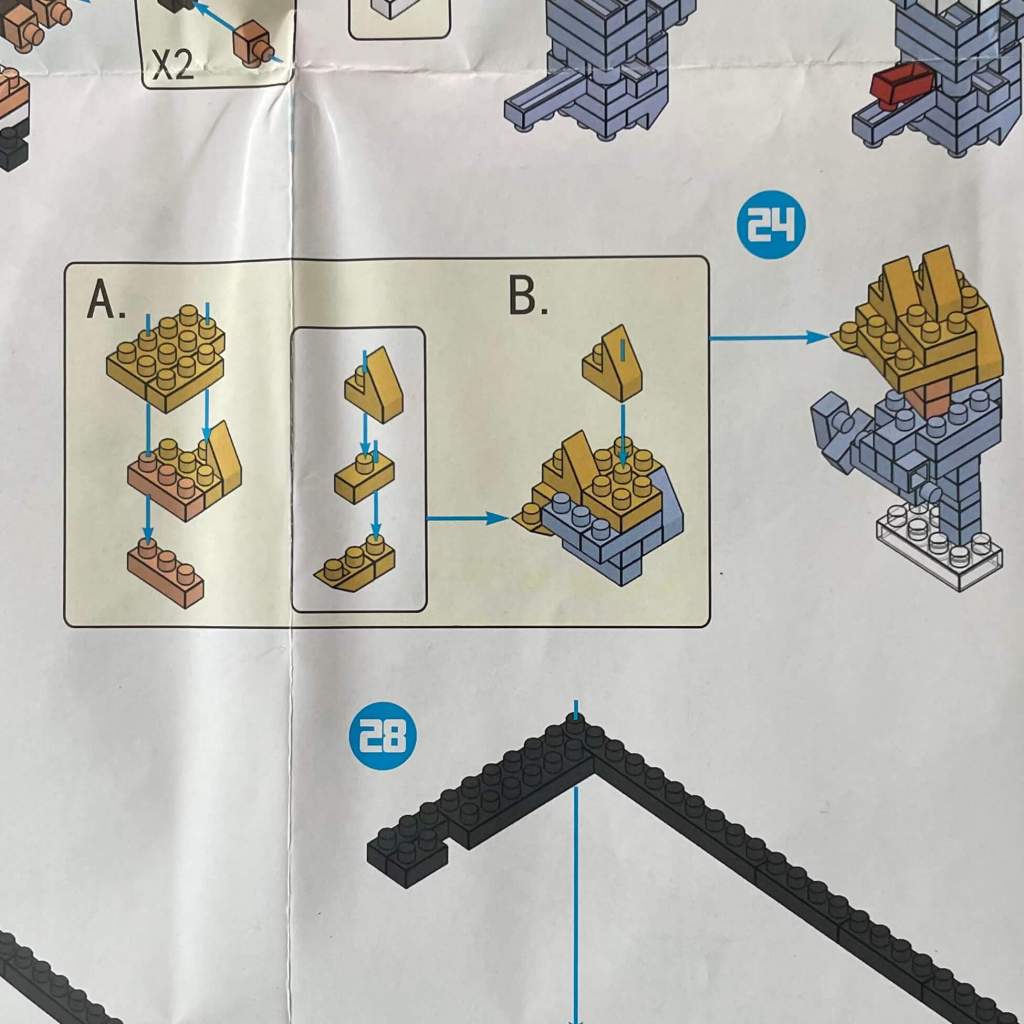
Step 28
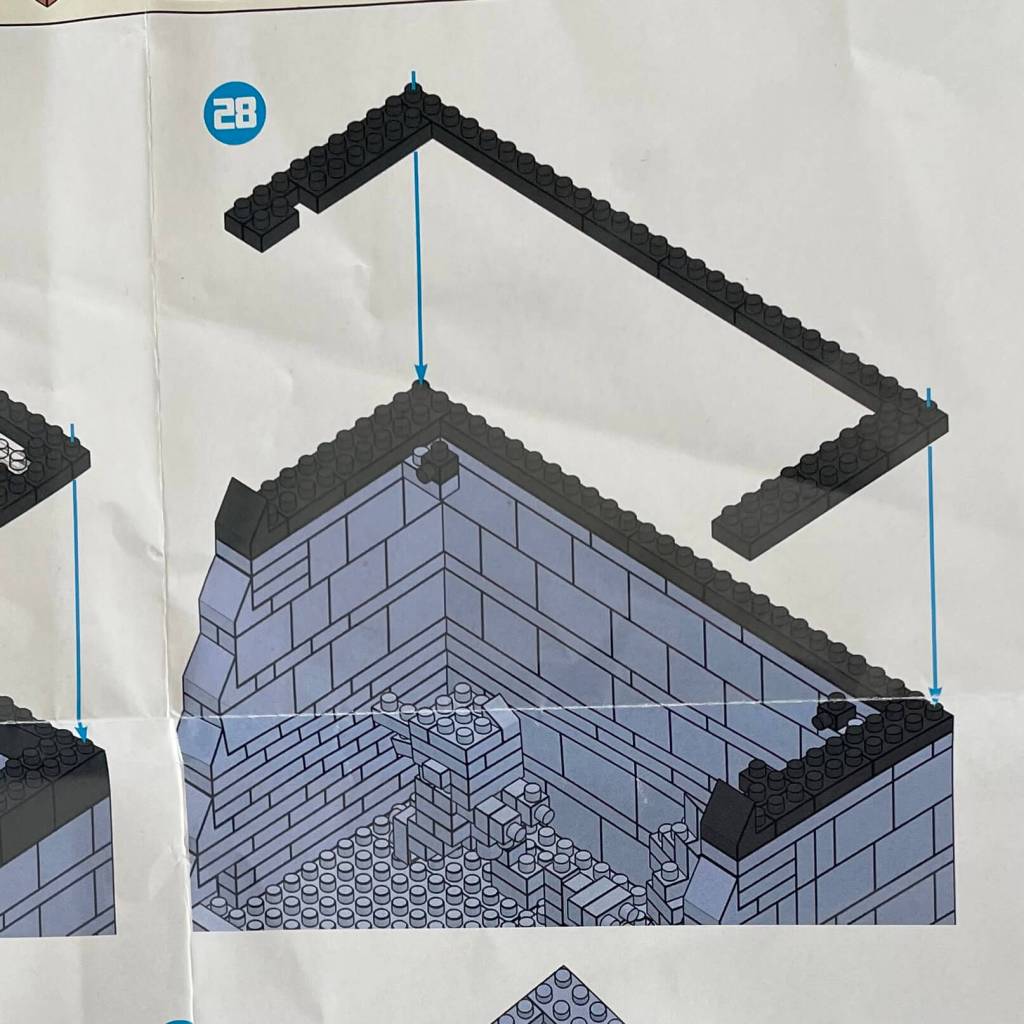
We’re adding more layers around the perimeter, and the background sticker finally has the support it needs. This step also introduces support for an additional background feature.
Step 29
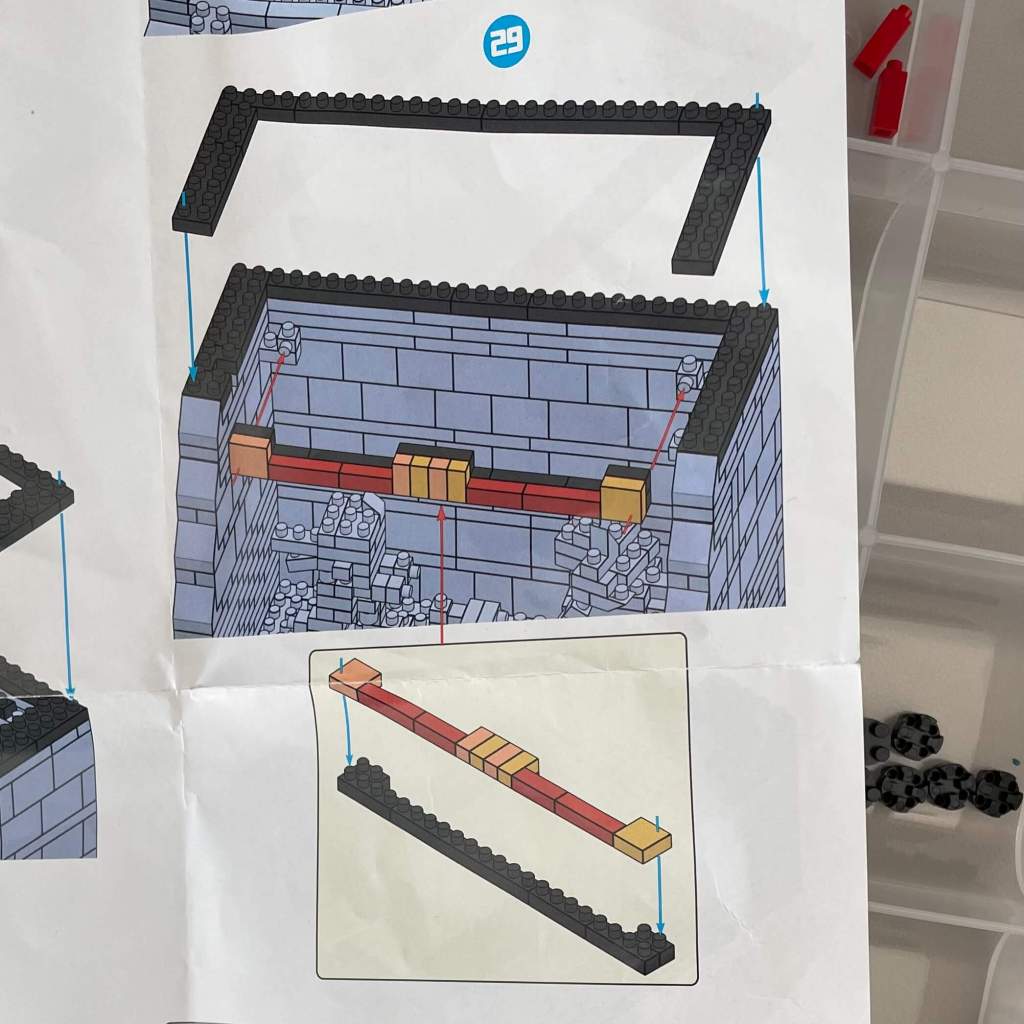
Two more layers are added to the perimeter, and health bars are constructed and placed into the background.
Step 30
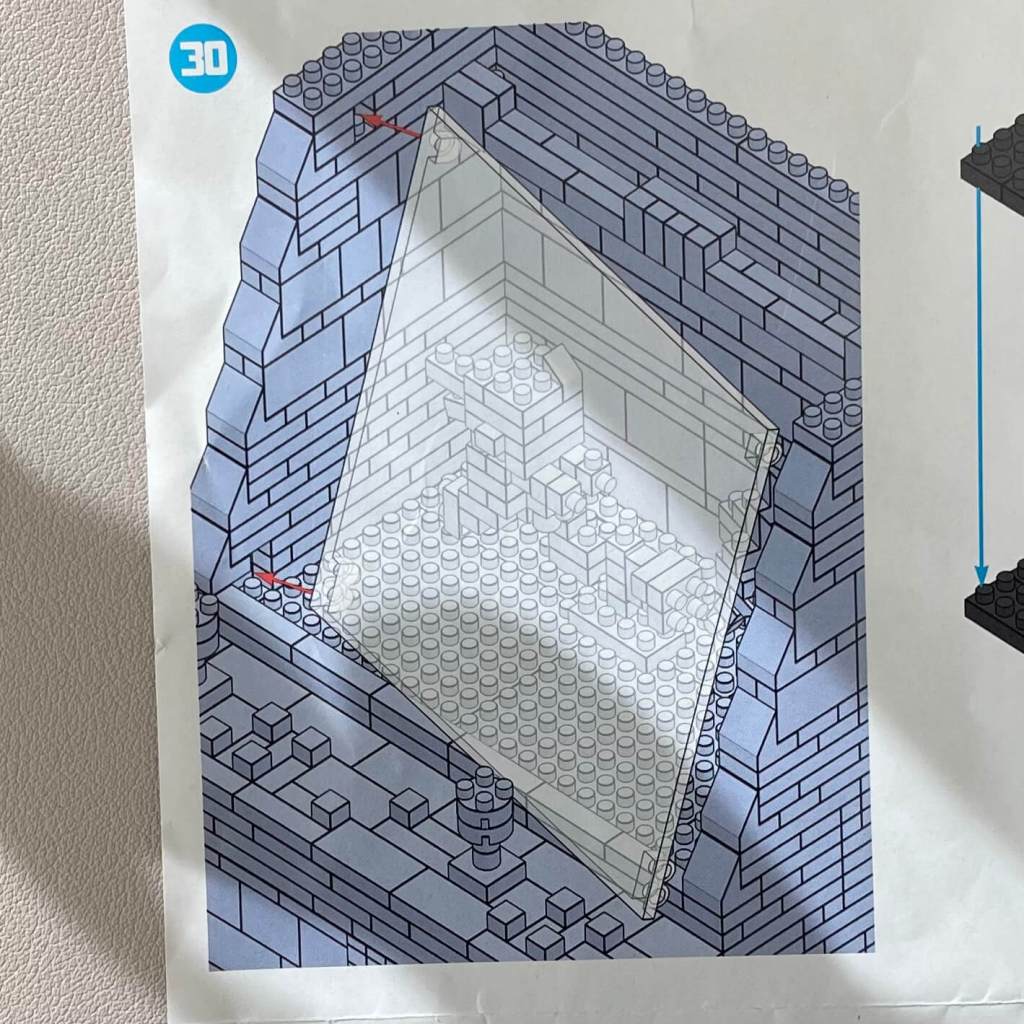
Now, we’re placing the screen. It’s the same clear panel we used in the claw machine build. It doesn’t latch on but fits securely into notches left during the cabinet’s construction—a clever design.
Step 31
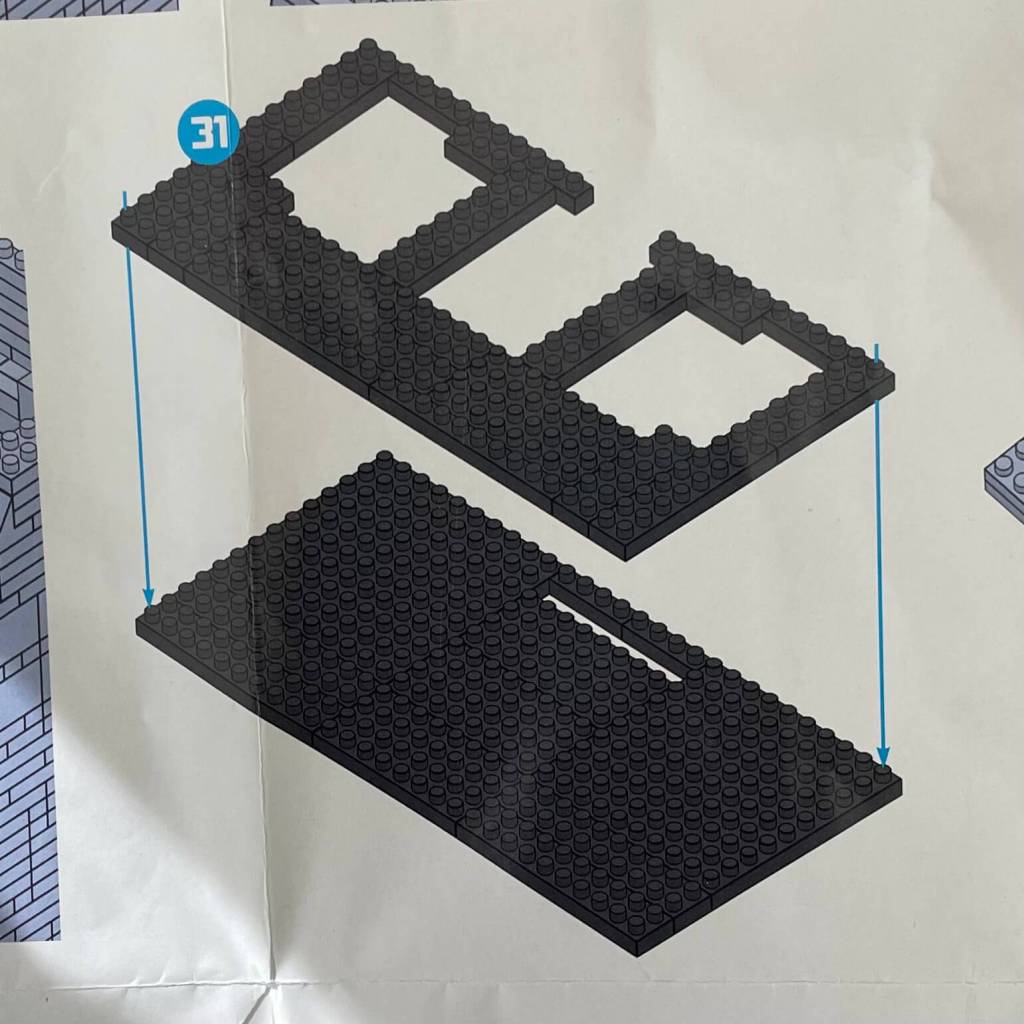
We’re beginning to build the lid for the arcade cabinet with a two-layer step.
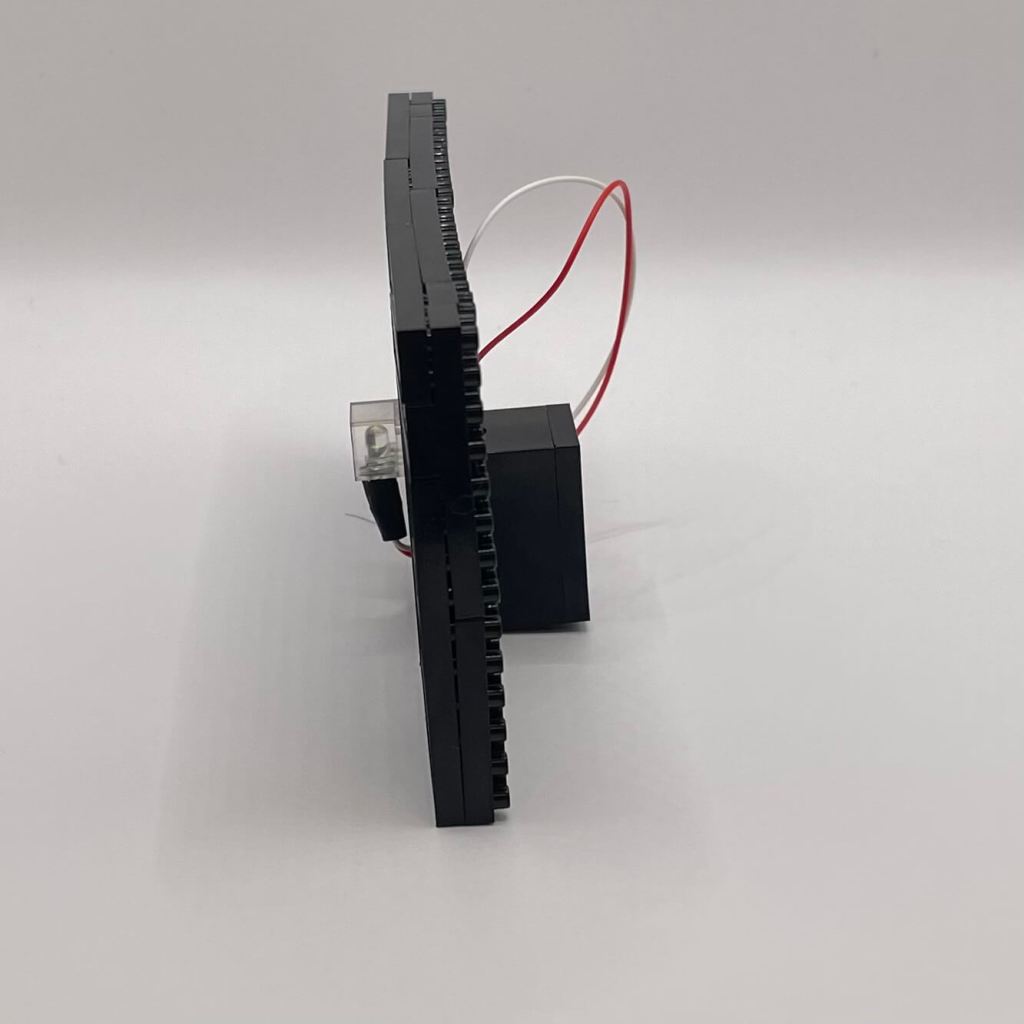
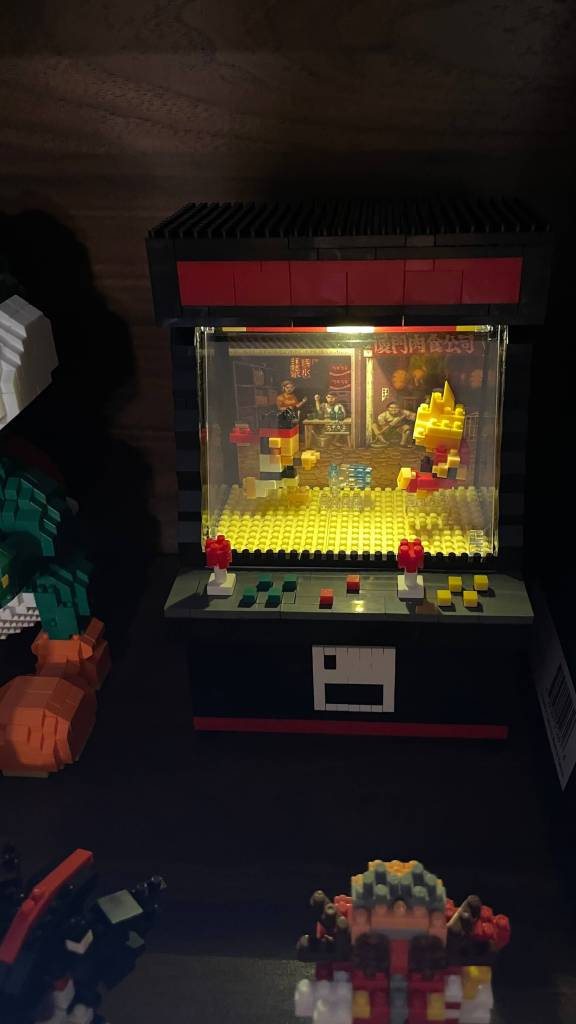
Step 32
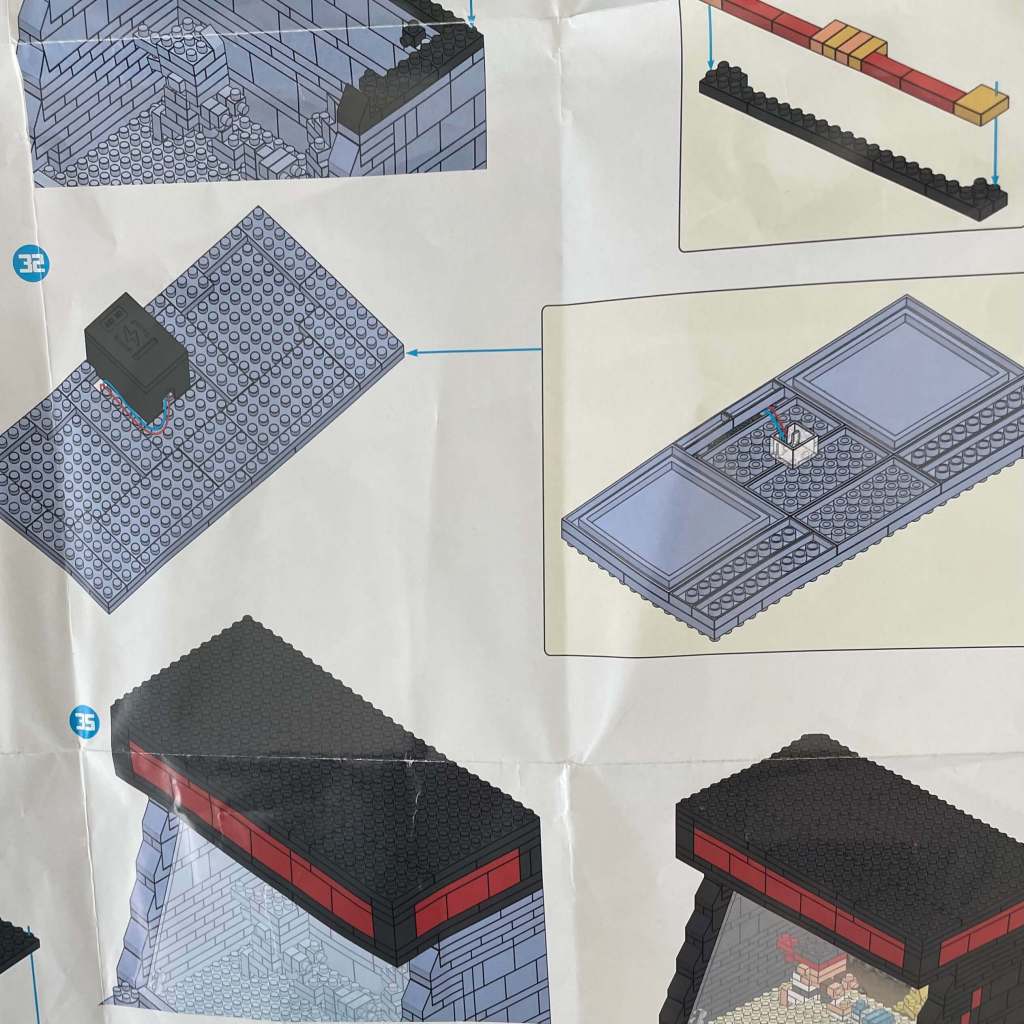
In this step, we’re attaching the light piece and battery to the lid. A bit of disassembly from the previous step is required.
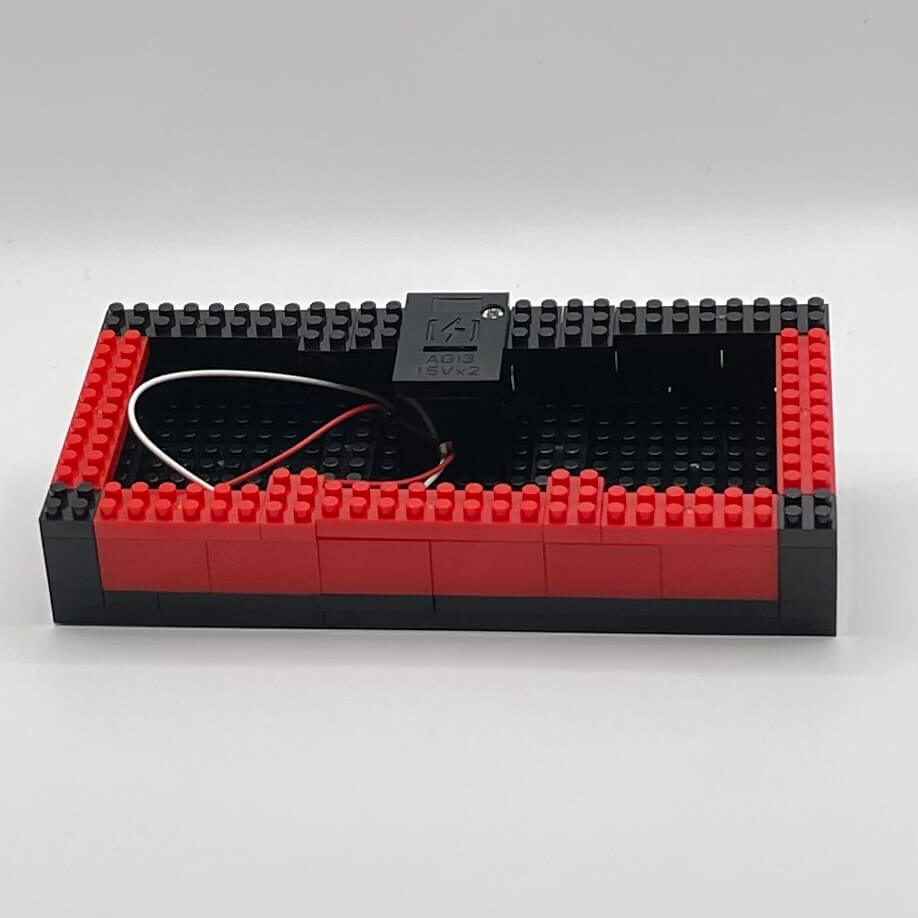
Step 33
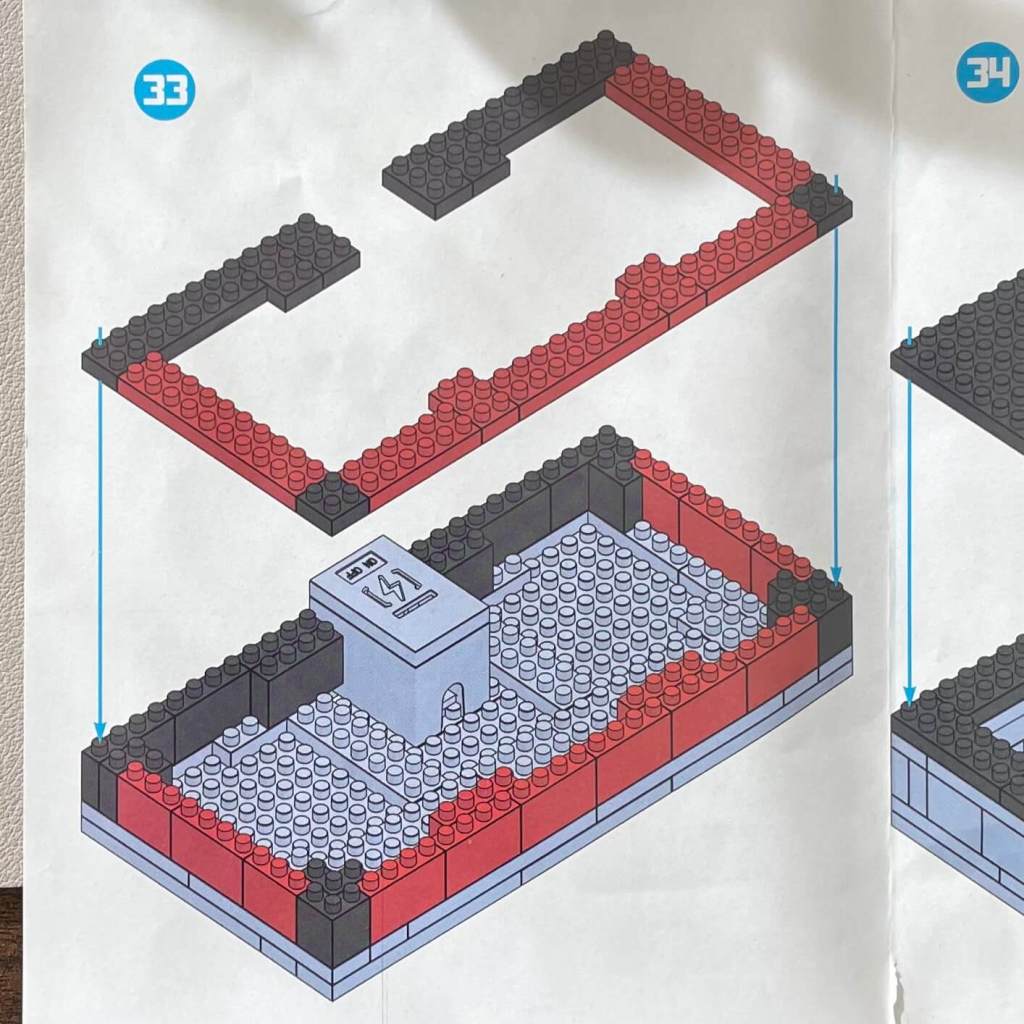
Continuing to build the lid, we create a space to hide the power wire. Worth noting that we ran out of raised 4x1s for this step but easily solved it with some spare pieces.
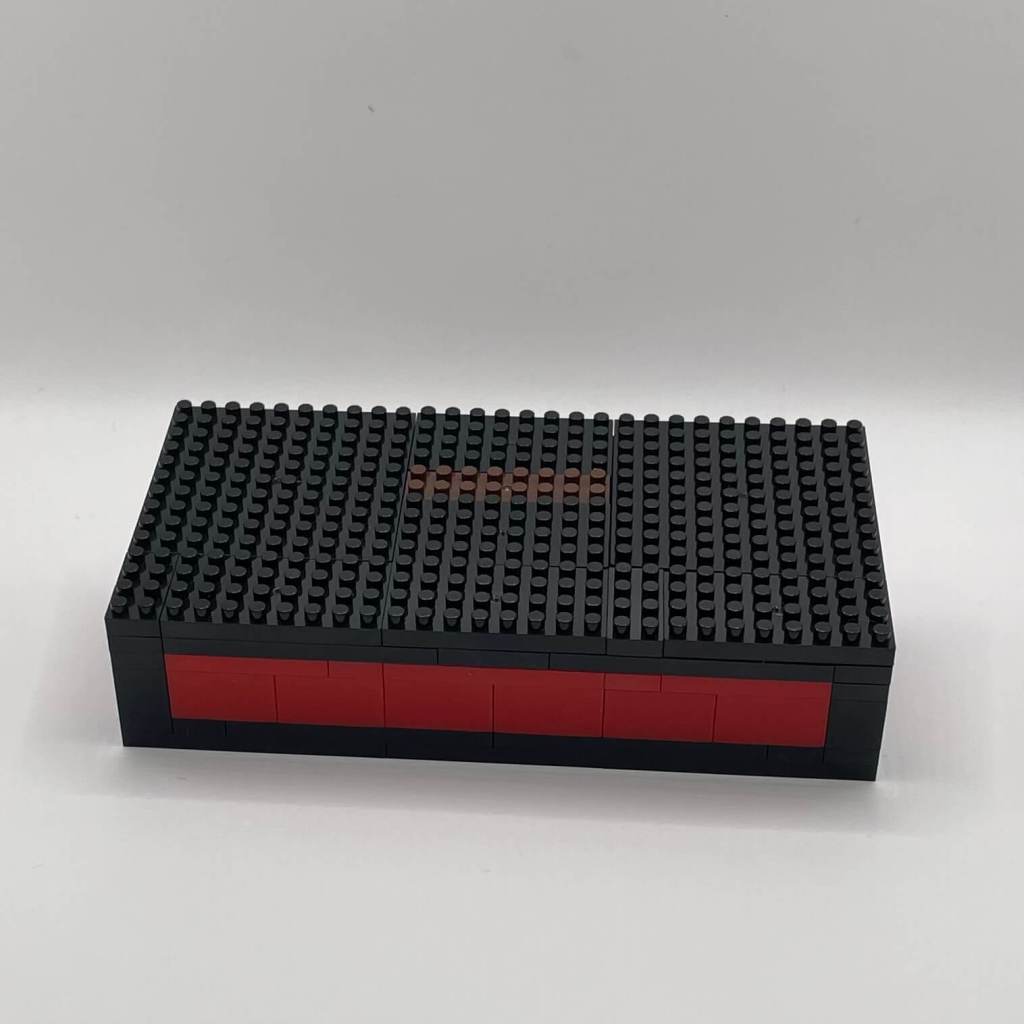
Step 34
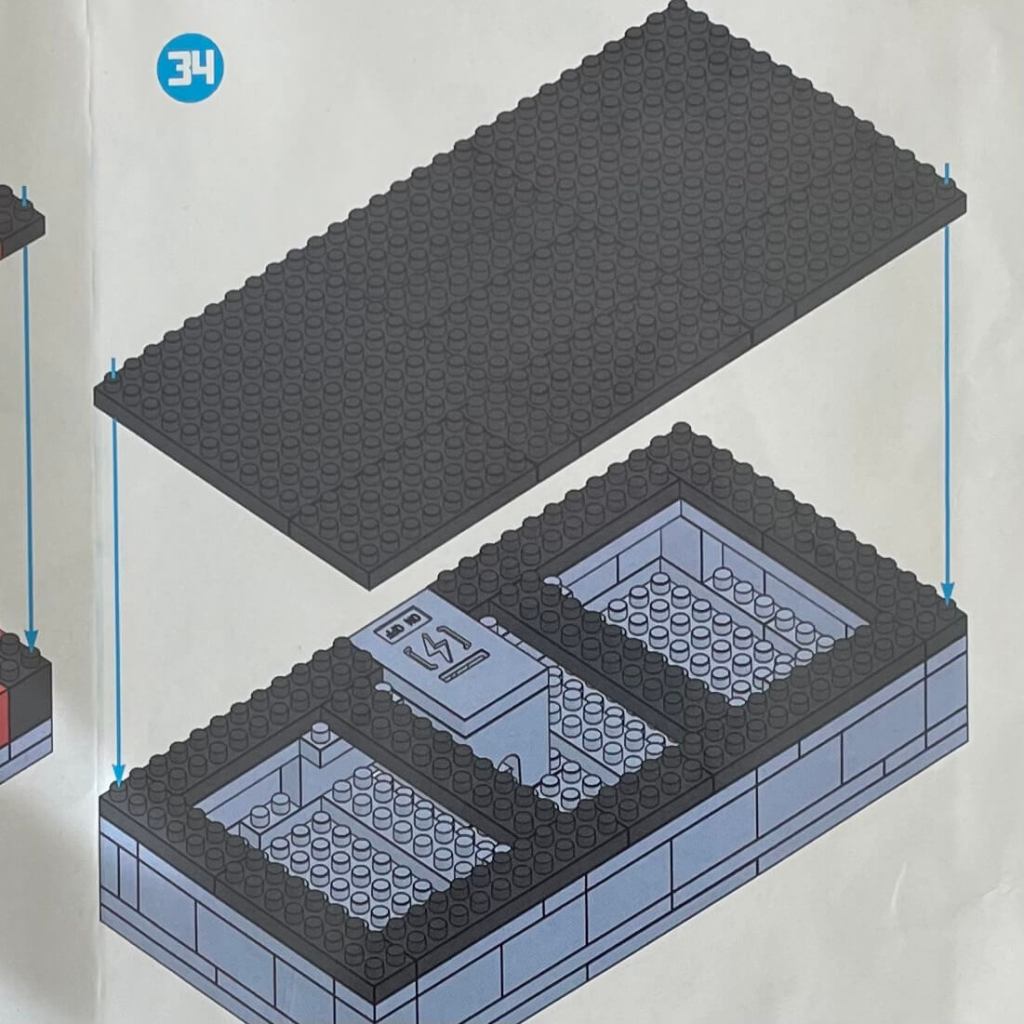
Here, we see the lid being closed up, with the power wire completely enclosed. There’s a minor hiccup where we thought we might have been short a black brick, but we improvised with a brown one.
Step 35
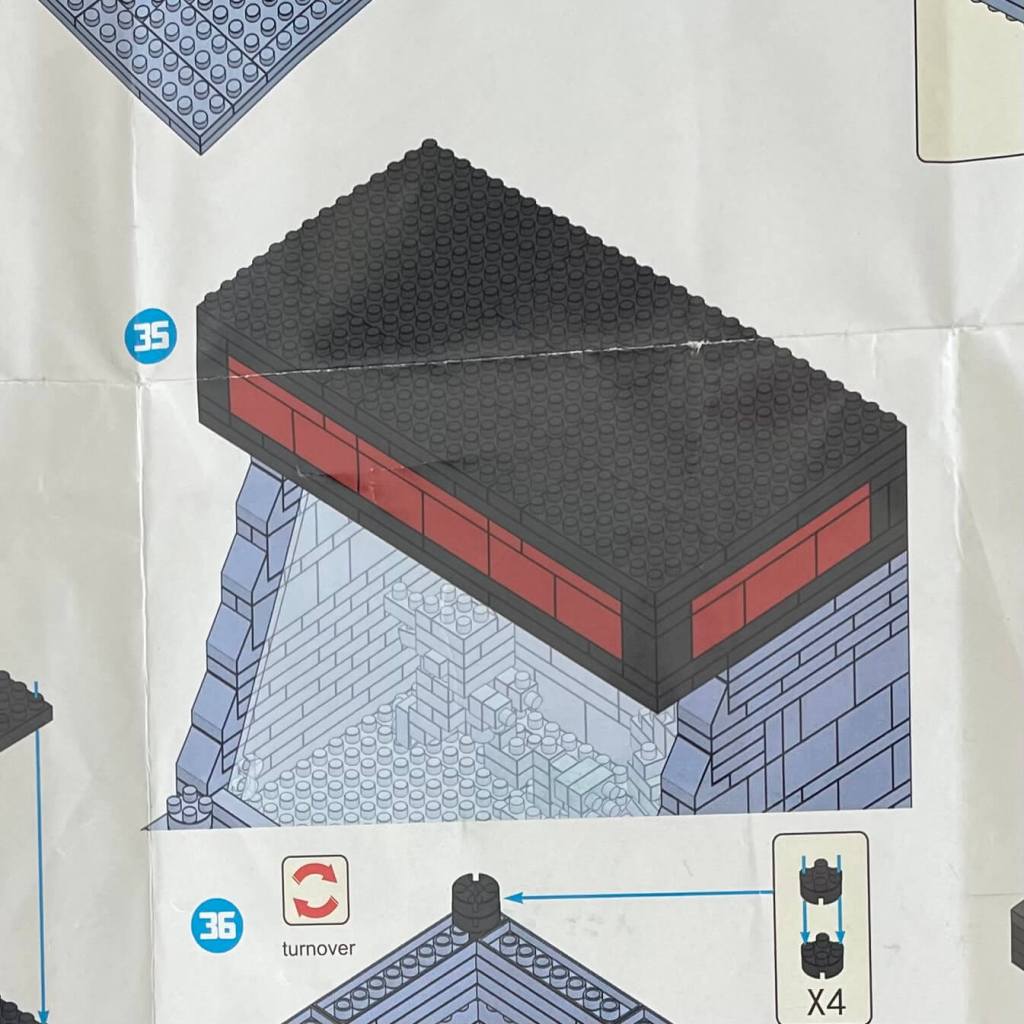
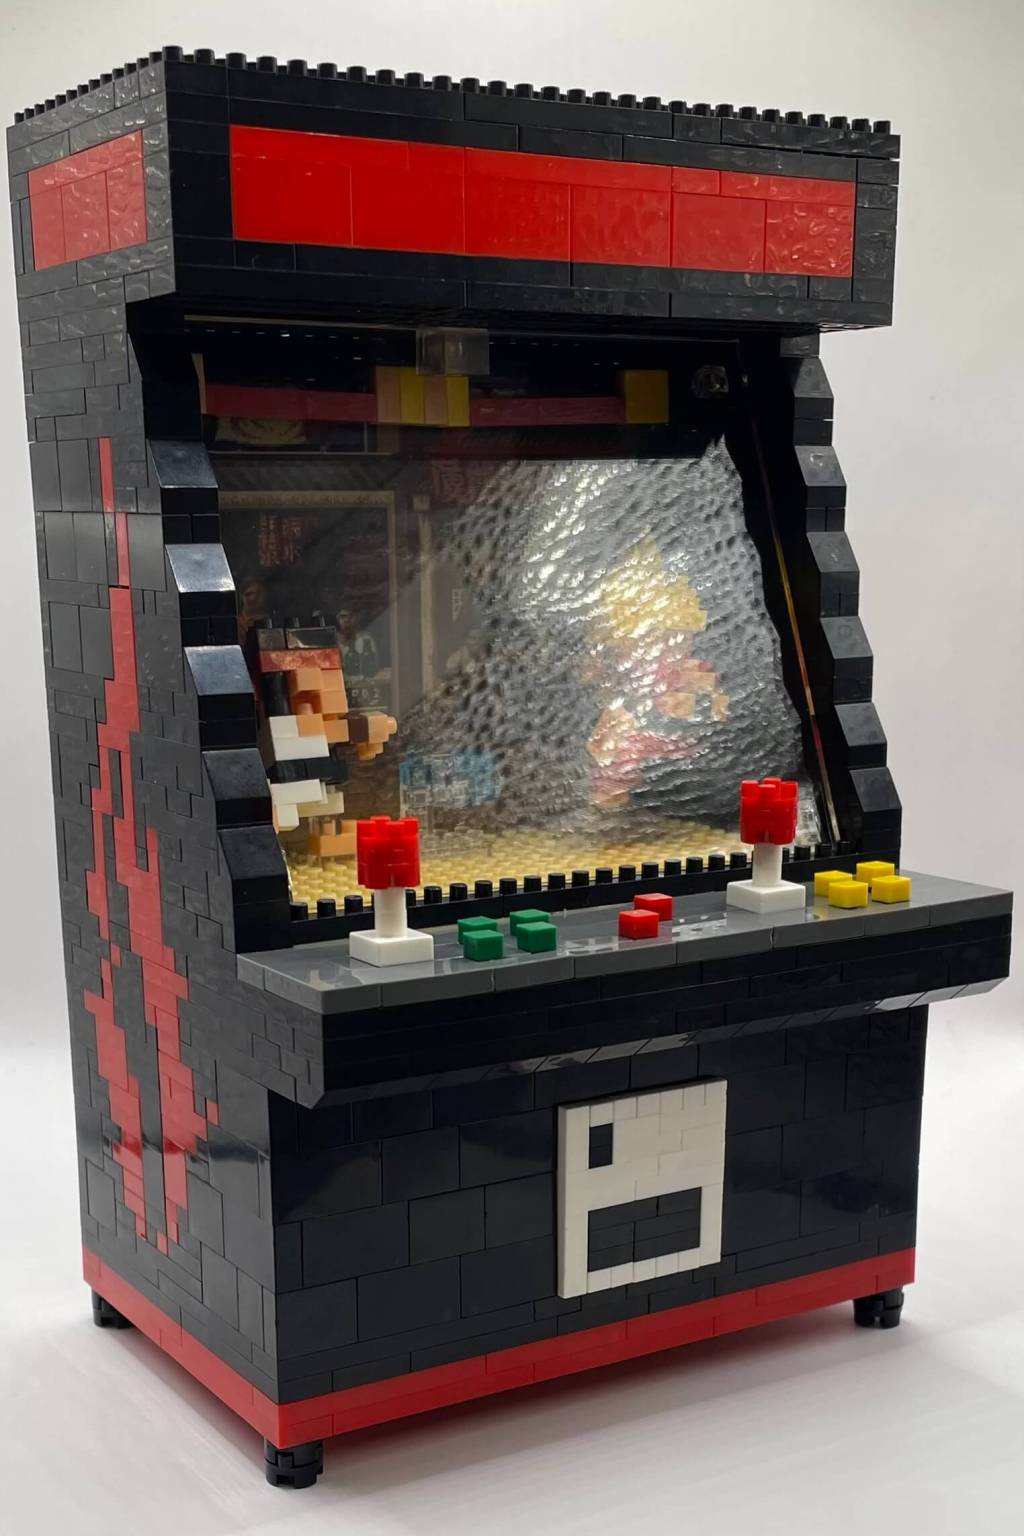
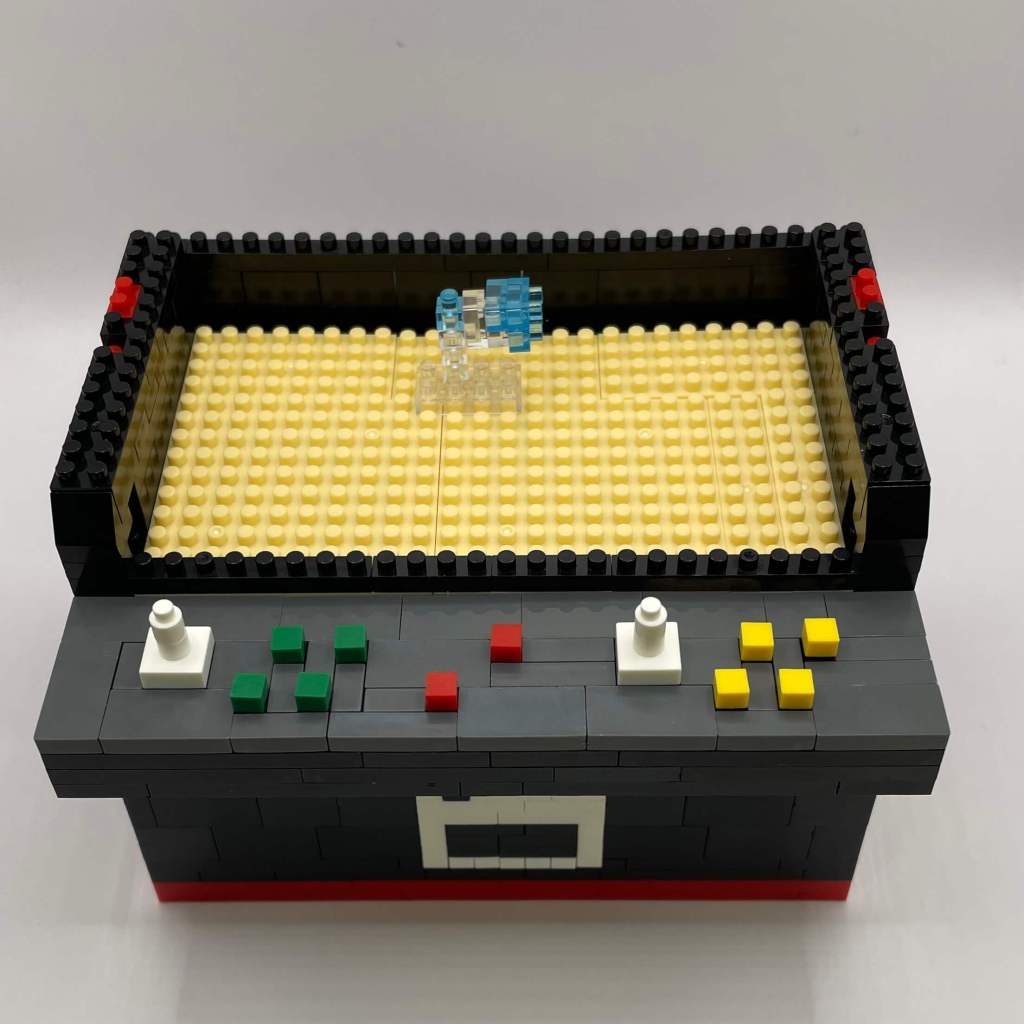
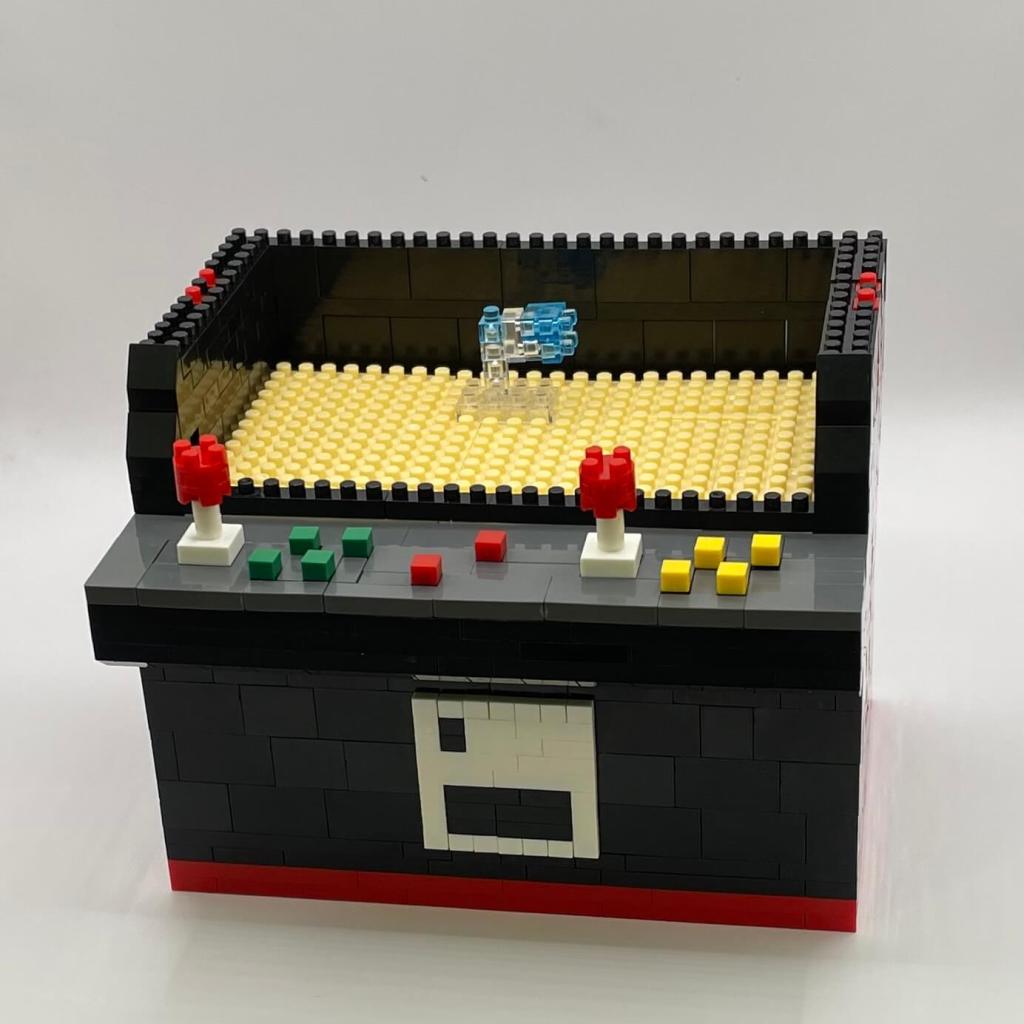
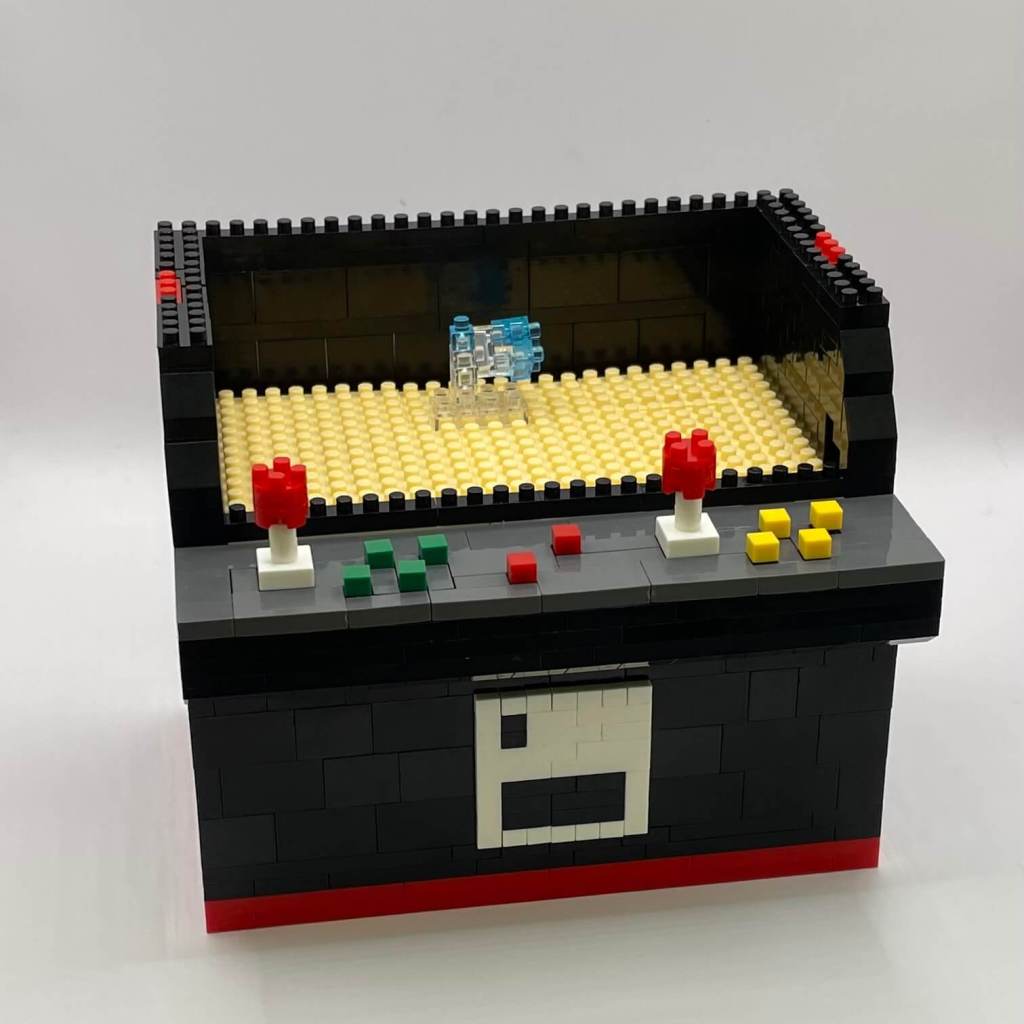
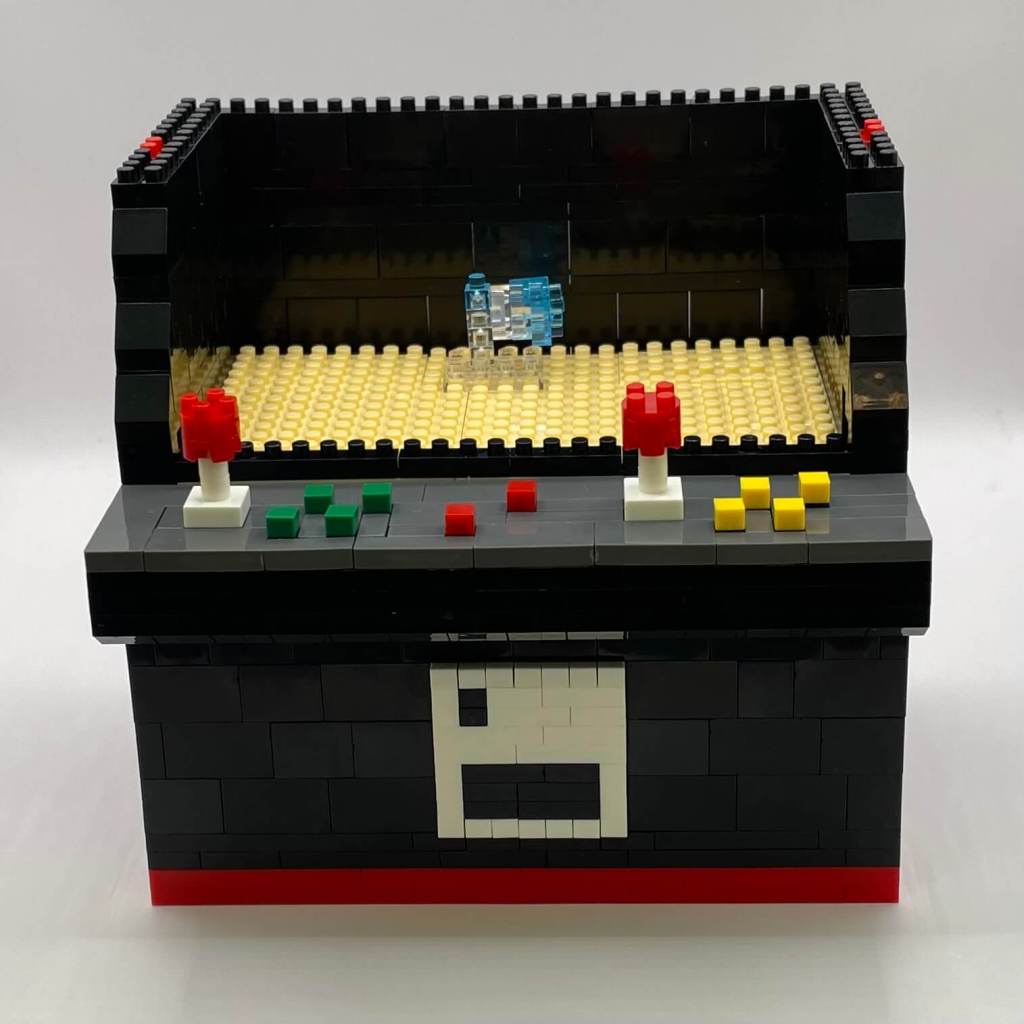
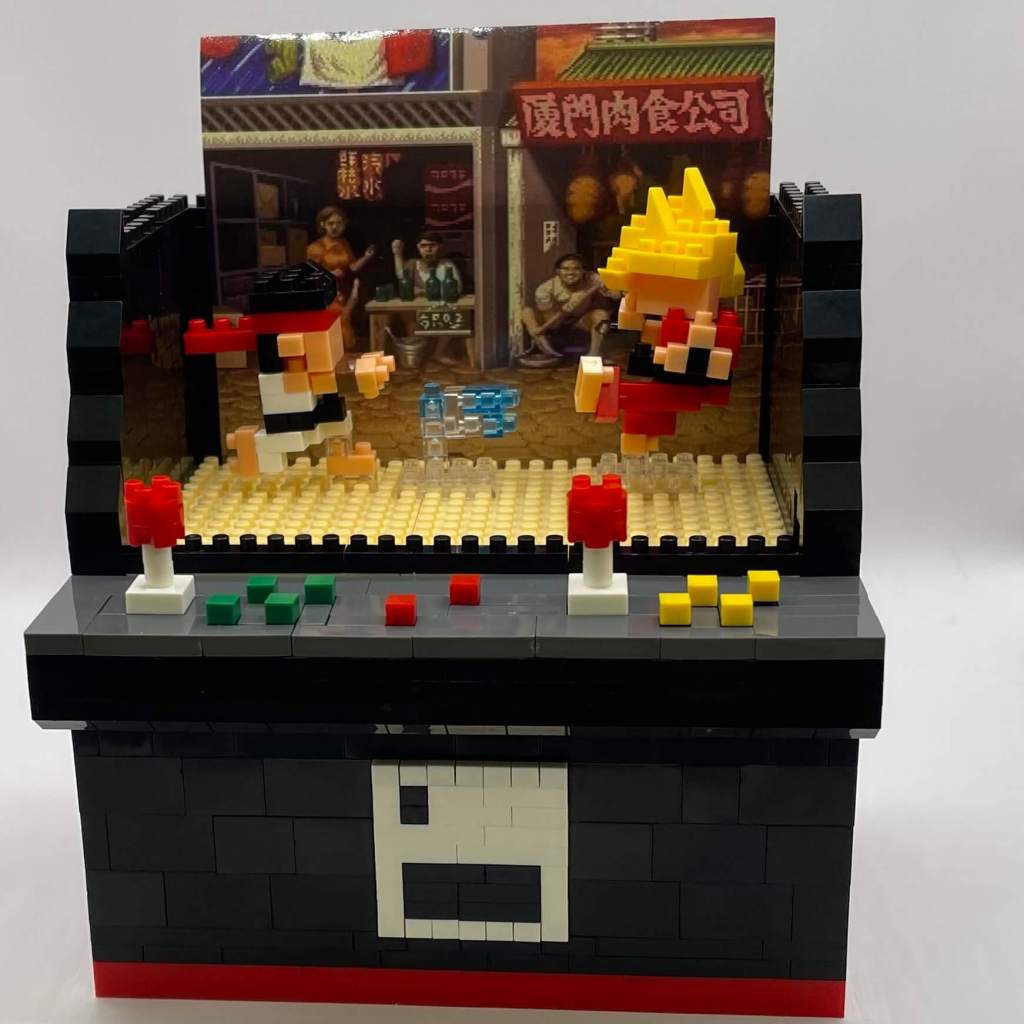
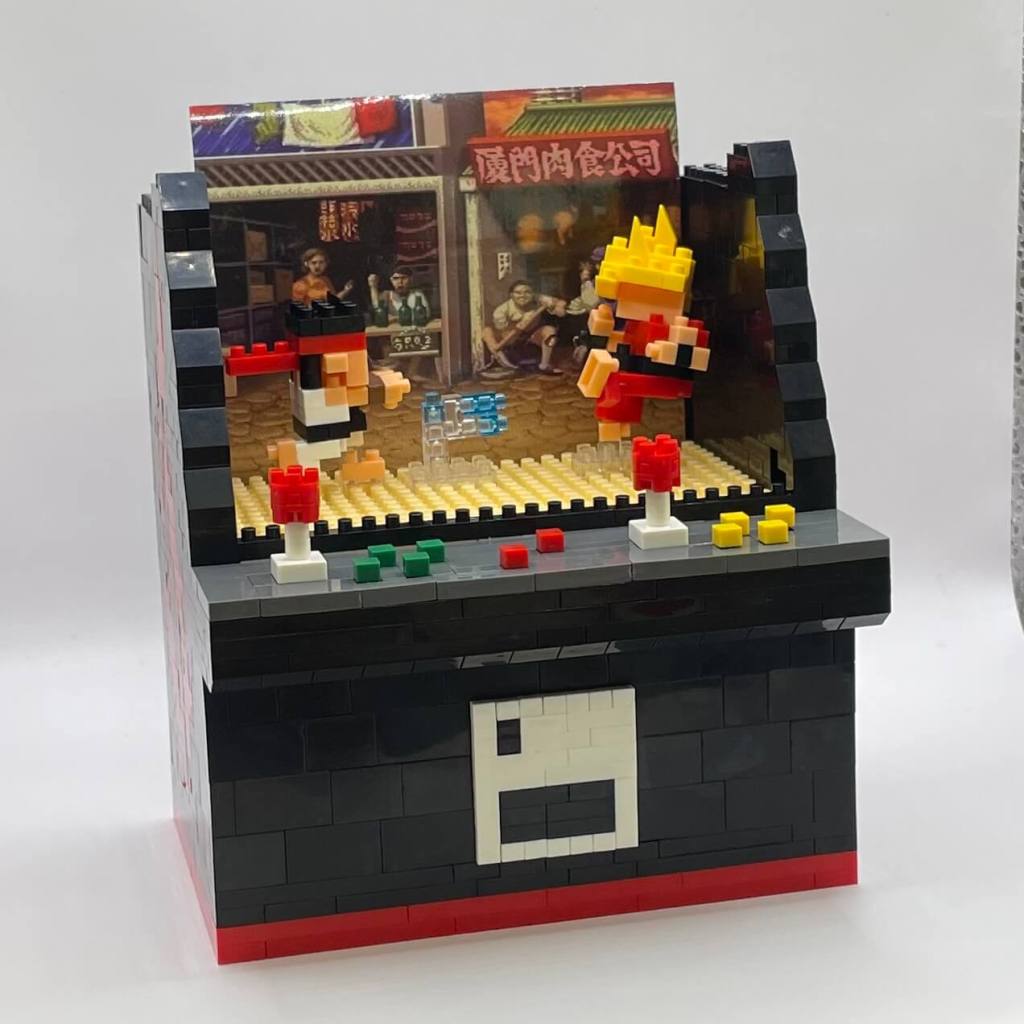
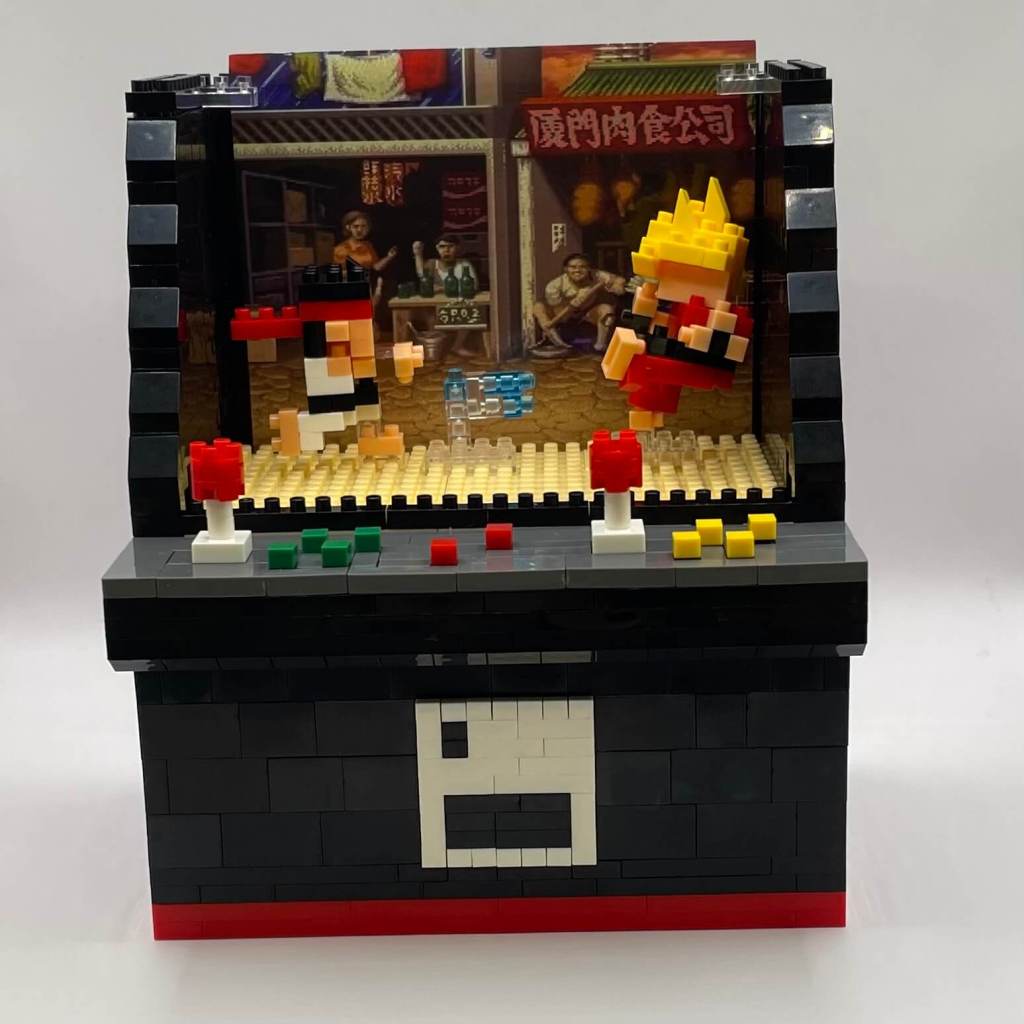
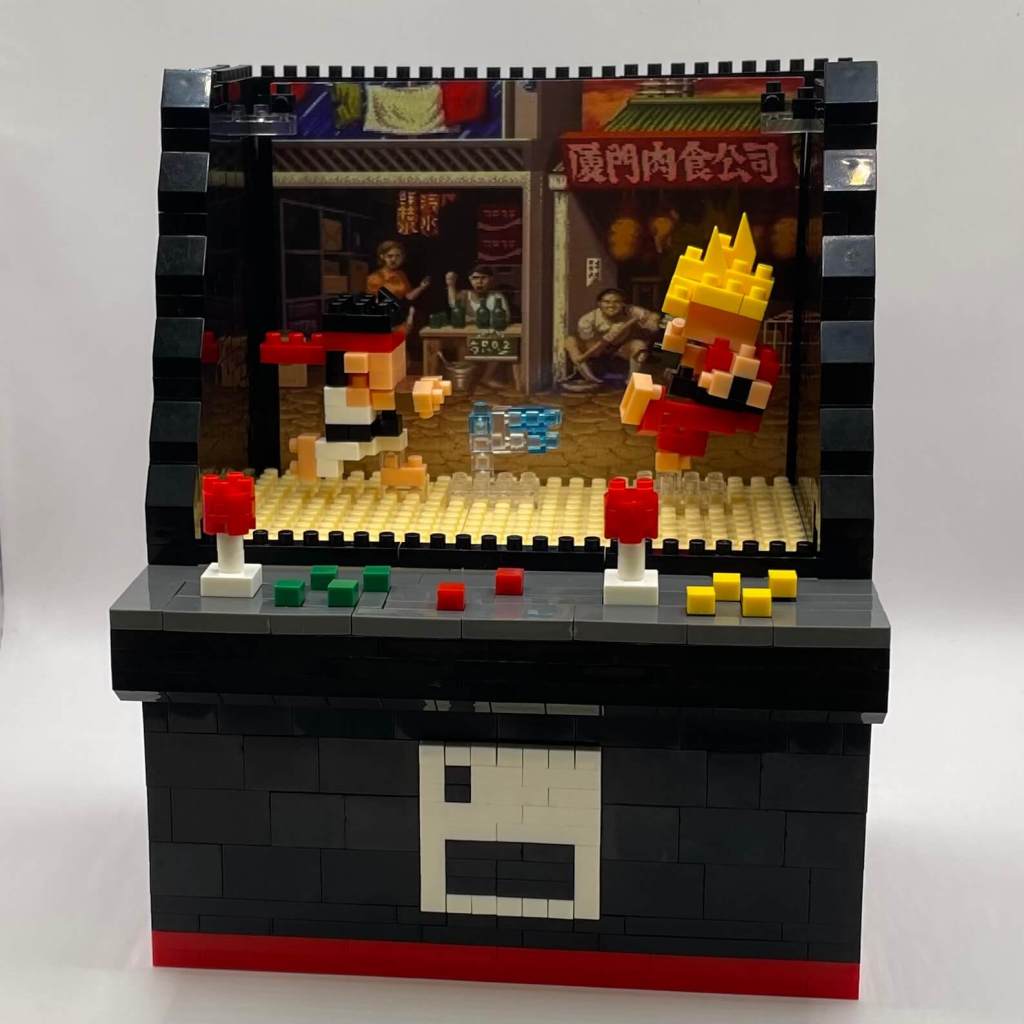
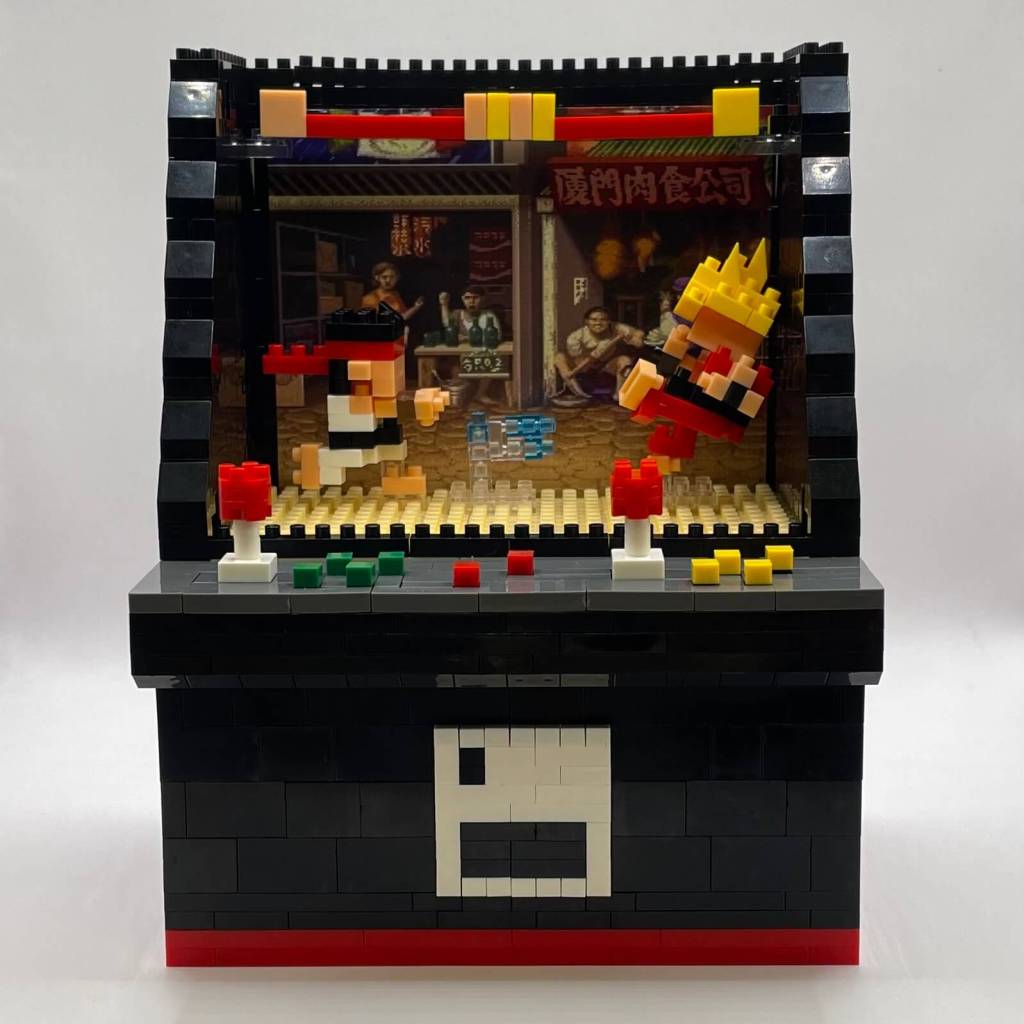
Finally, the last step involves attaching the lid to the cabinet, bringing this micro-block fighting arcade game to life right before our eyes.
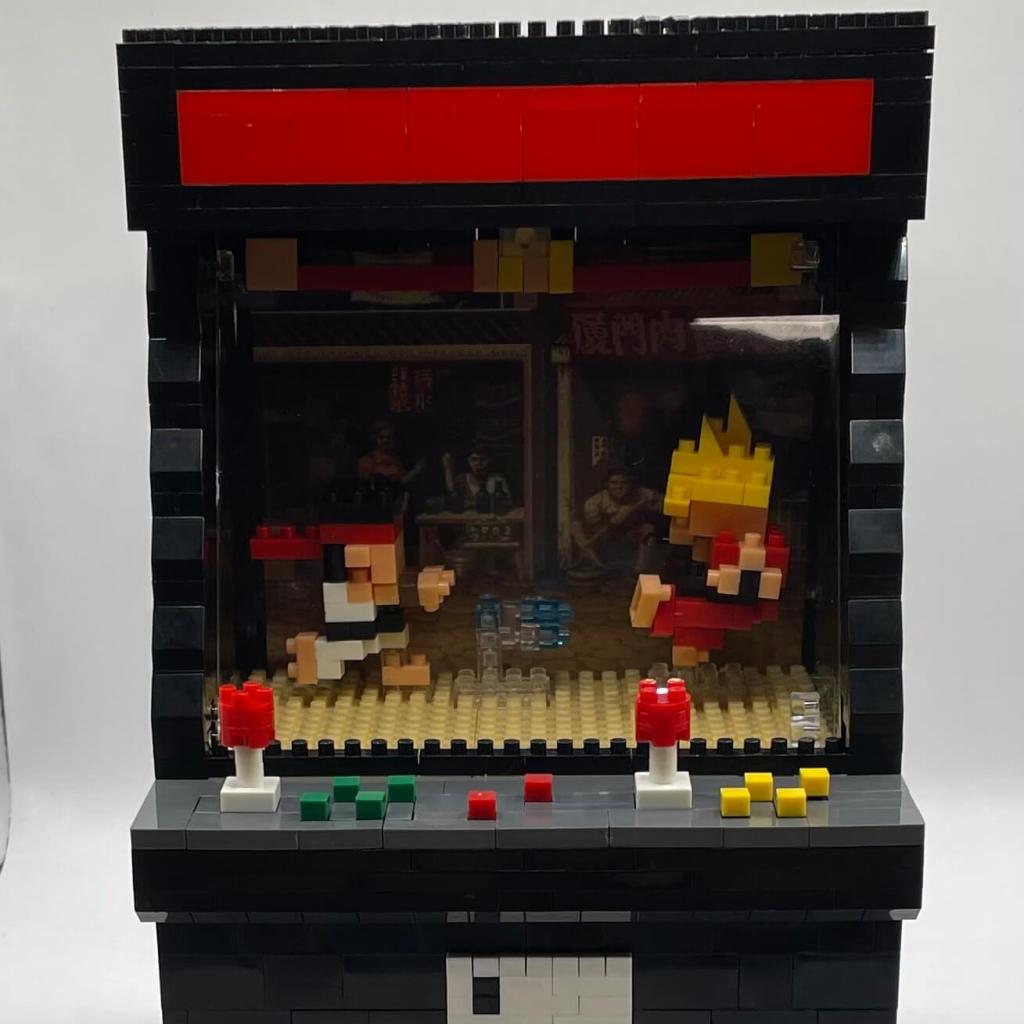
Final Thoughts
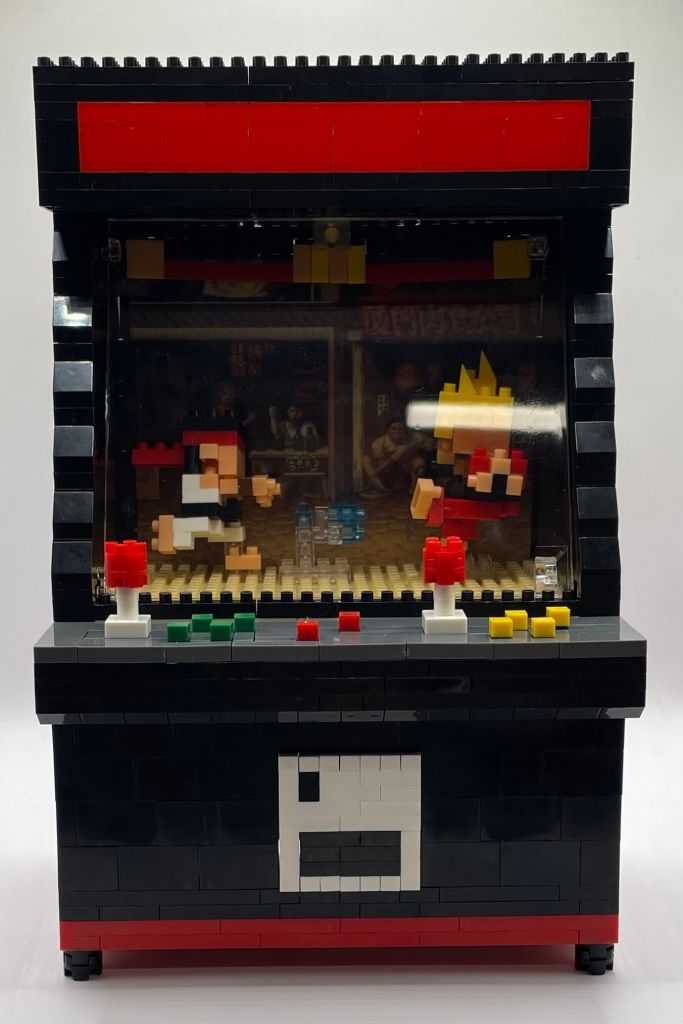
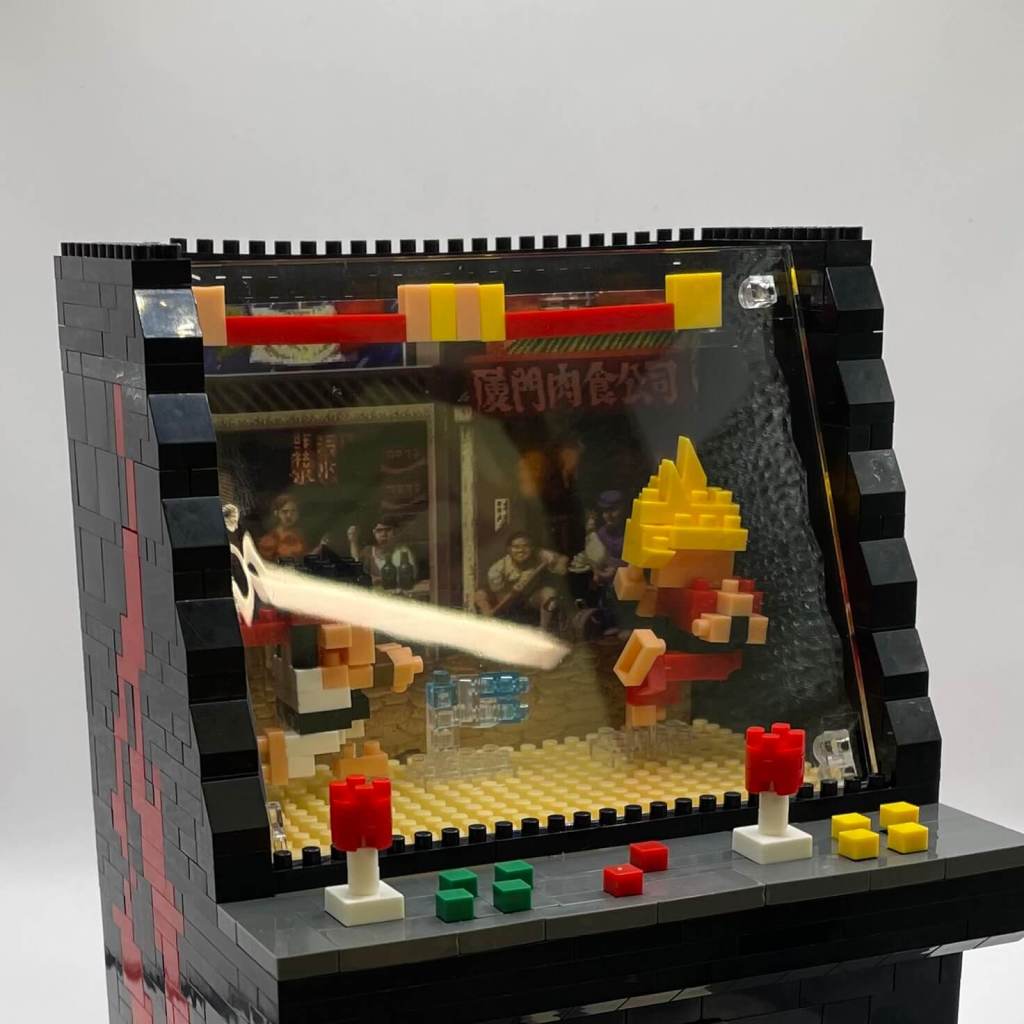
Completing this micro-block fighting arcade game was a journey through moderately intricate details and creative challenges. Although we encountered a few delicate elements and minor setbacks, the end product stands as a remarkable display piece that beautifully encapsulates the essence of classic arcade gaming. The process leaned more toward tedium than relentless challenge, fostering patience and igniting creativity. The outcome is a unique and nostalgic addition to my collection, with the added bonus of an incredibly cool light feature.

You must be logged in to post a comment.