Before the era of micro-transactions, loot boxes, DLC that was already on the disc, and early access games that felt unfinished yet came with a full price tag, there was another notorious source of frustration that gamers had to contend with: the infamous claw machines. These mechanical marvels, often seen as unholy bastions of chance, taught countless children across the globe a valuable lesson in the art of gambling – where money flows in, but prizes rarely find their way out.
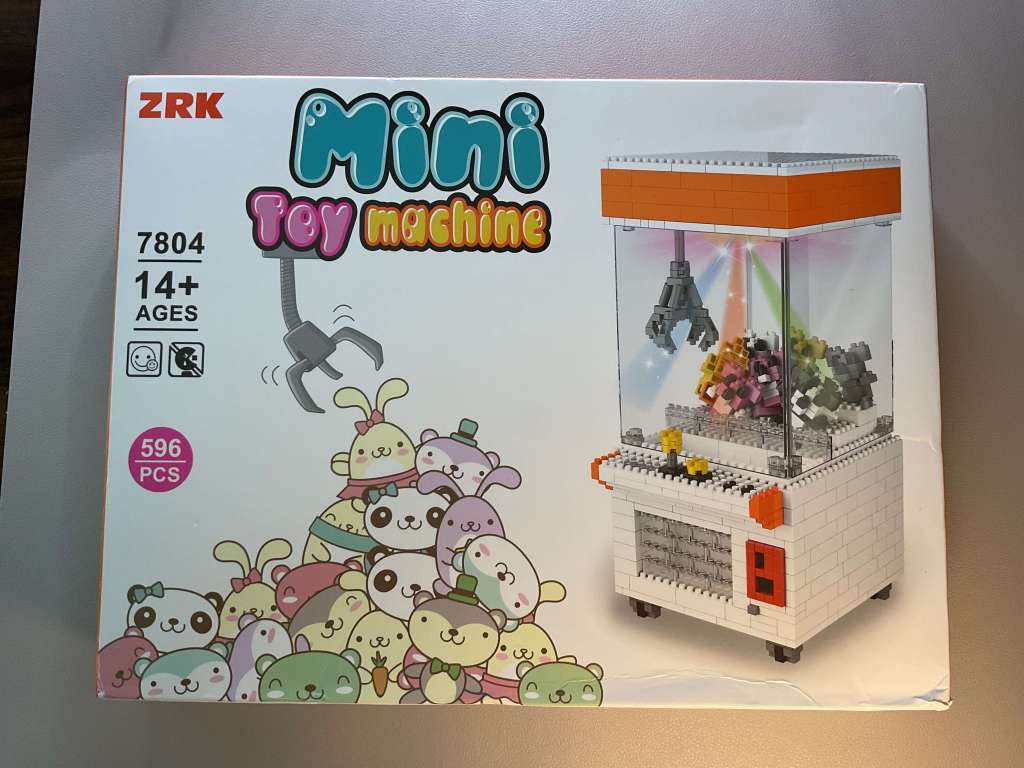
Today, we’re here to pay homage to the enduring legacy of these iconic rip-offs by embarking on a unique adventure – building a non-functioning claw machine using micro blocks. I recently acquired this captivating kit from Amazon, but similar options are readily available on direct-to-consumer platforms like AliExpress and Temu. Join me as we dive into the world of micro blocks and explore the whimsical nostalgia that claw machines have left in their wake.
Unboxing
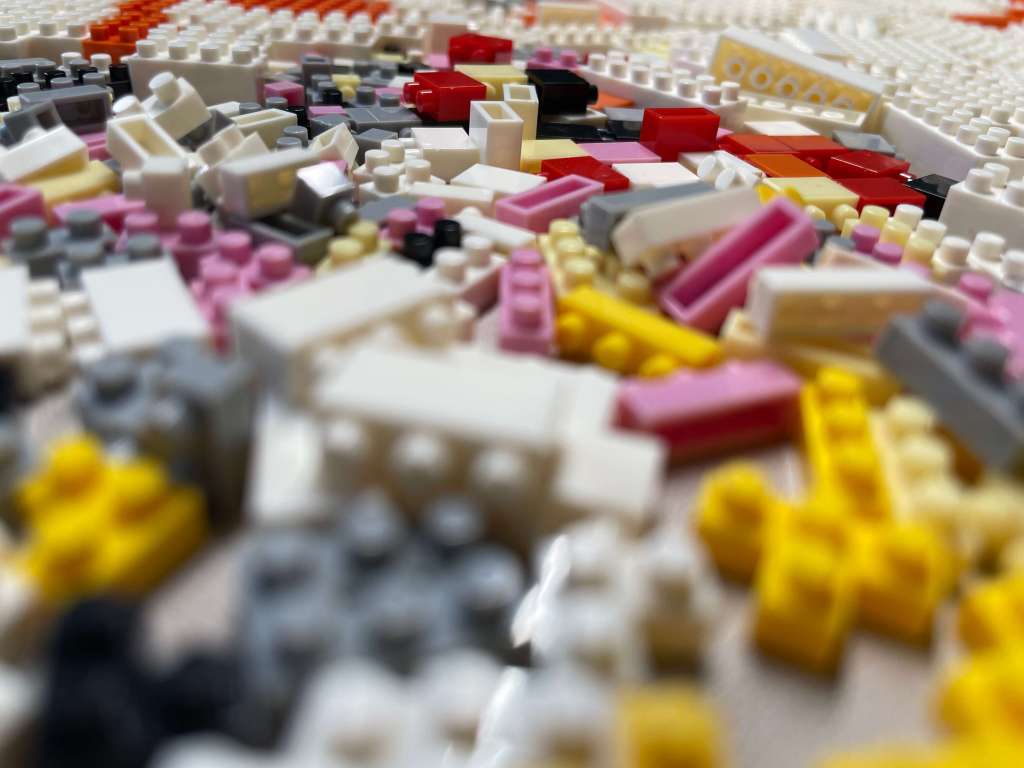
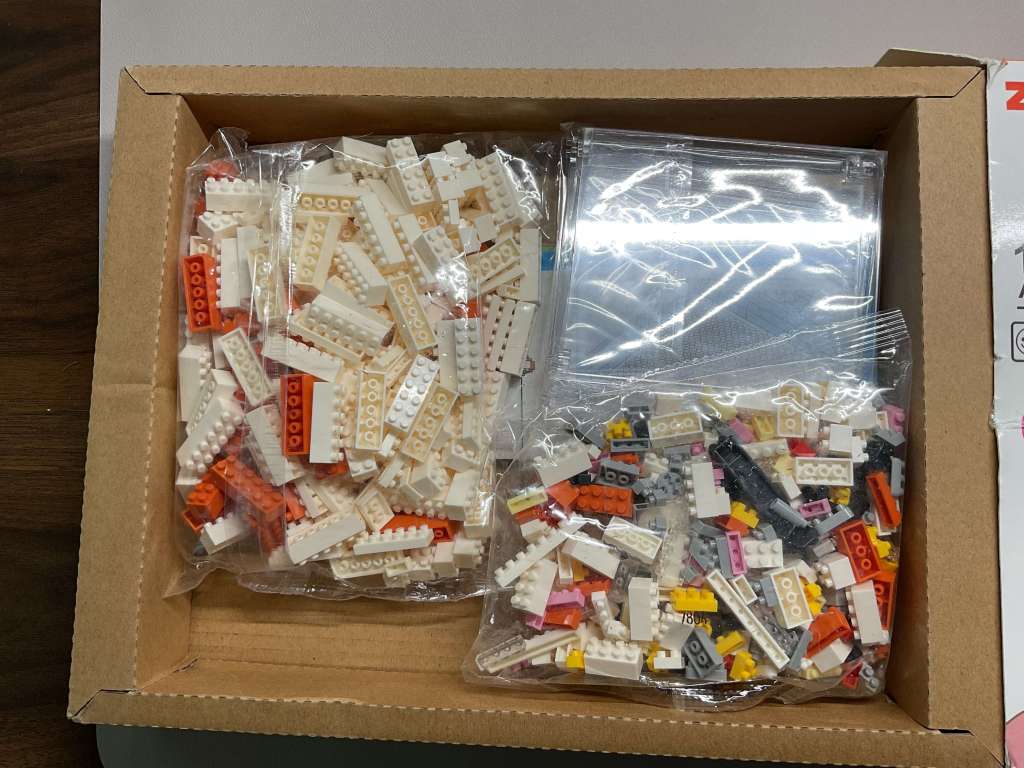
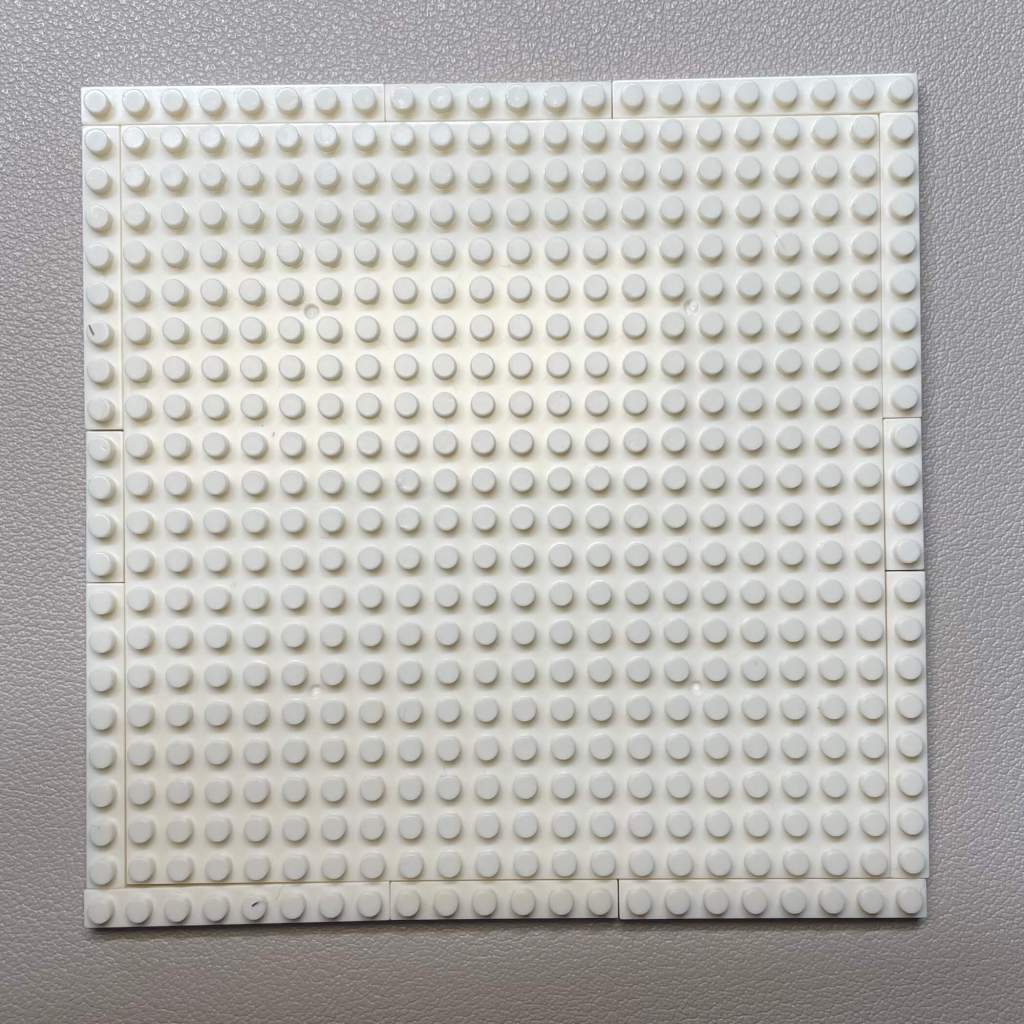
When I cracked open the box of my micro-block claw machine set, I found two large bags teeming with an assortment of bricks, two 20×20 stud plates, four clear panels, and a double-sided instruction sheet.
The Building Process
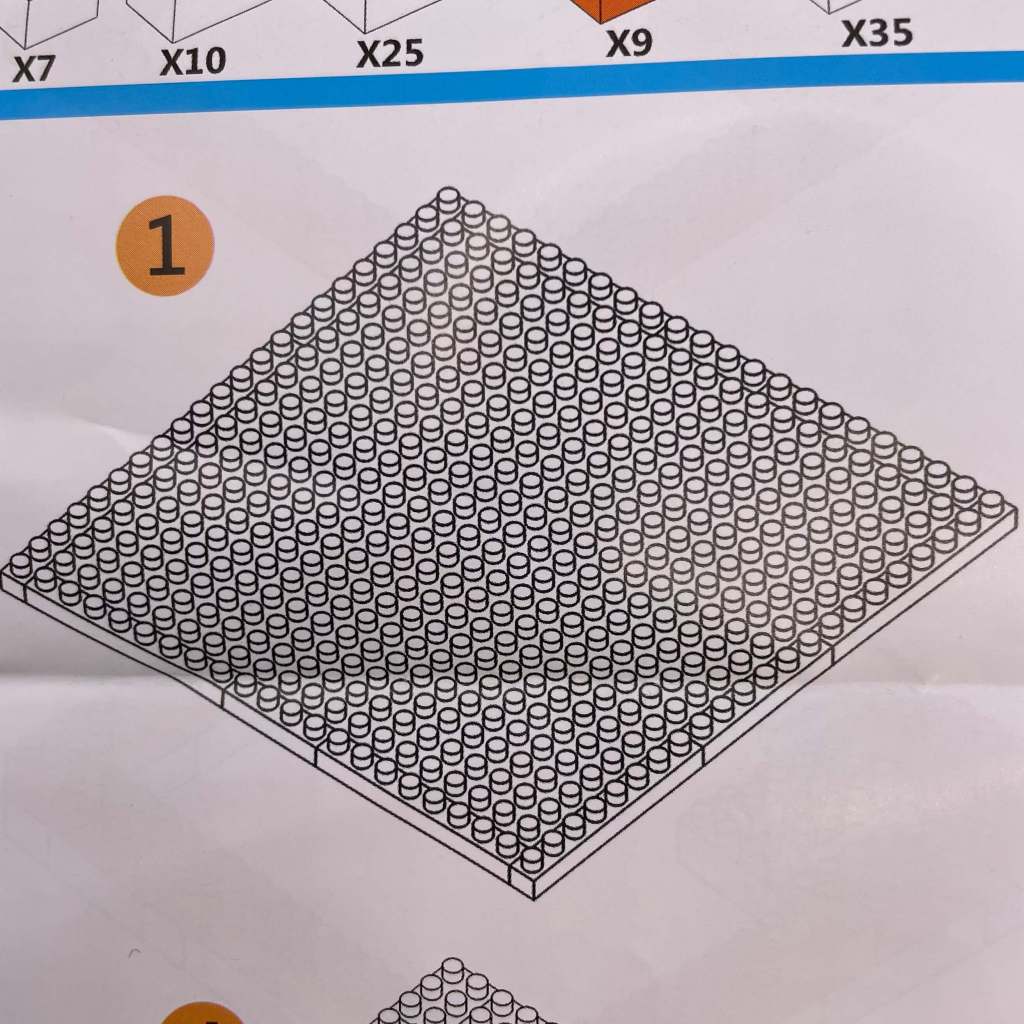
STEP 1: Getting Started
We begin with a 20×20 base-plate, promptly expanded by adding a single stud around the perimeter using a series of 8x1s, 6x1s, and 4x1s. This step may seem a bit confusing at first, as the pieces won’t hold together on their own, but trust me; future steps will secure them in place.
STEP 2: The Elephant in the Room
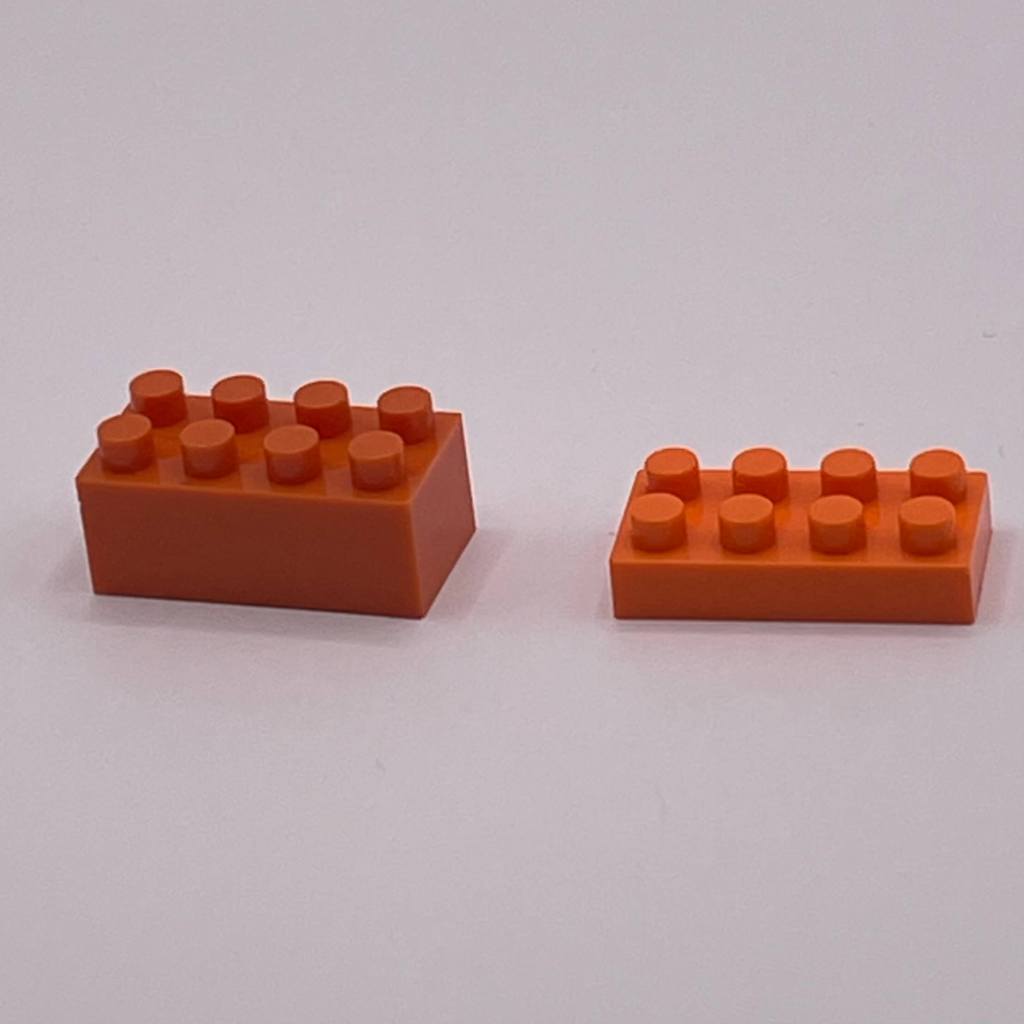
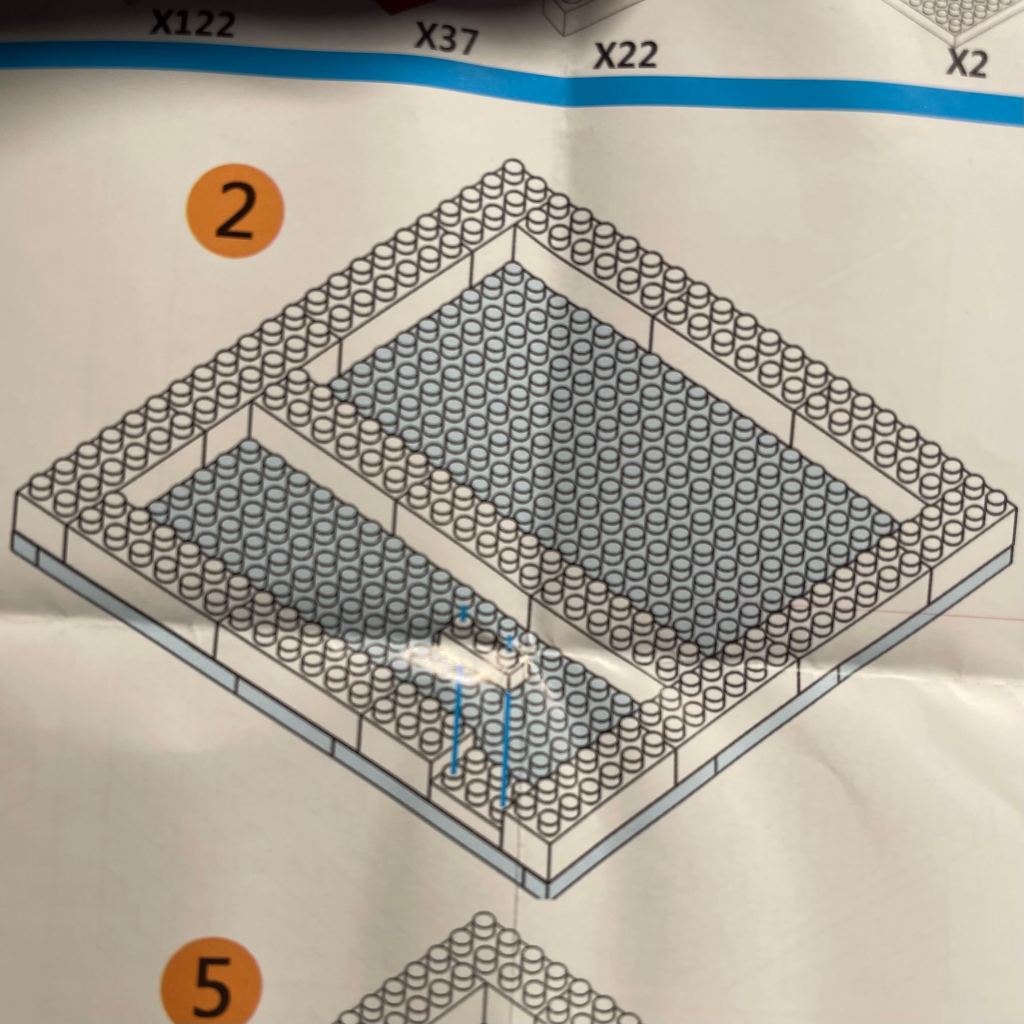
The second layer secures the expanded perimeter with a series of 6×2 and 4×2 bricks. Here, I couldn’t help but notice the elephant in the room—the jumbo-sized bricks. These hefty blocks resemble Lego more than Nanoblock, as they are considerably thicker than standard Nanoblock bricks. Yet, they are indeed Nanoblock-sized and compatible with other similar brands. Each of these chunky boys is the same size as two standard Nanoblock bricks stacked together.

STEP 3: Pushing Through
The third layer continues to build around the perimeter and mid-section. The bricks may be a tad tough to push together—this is not Lego or Nanoblock, after all—yet it’s still doable with a little extra pressure. At this stage, everything looks good, and the structure seems stable enough, though it’s still early in the build.
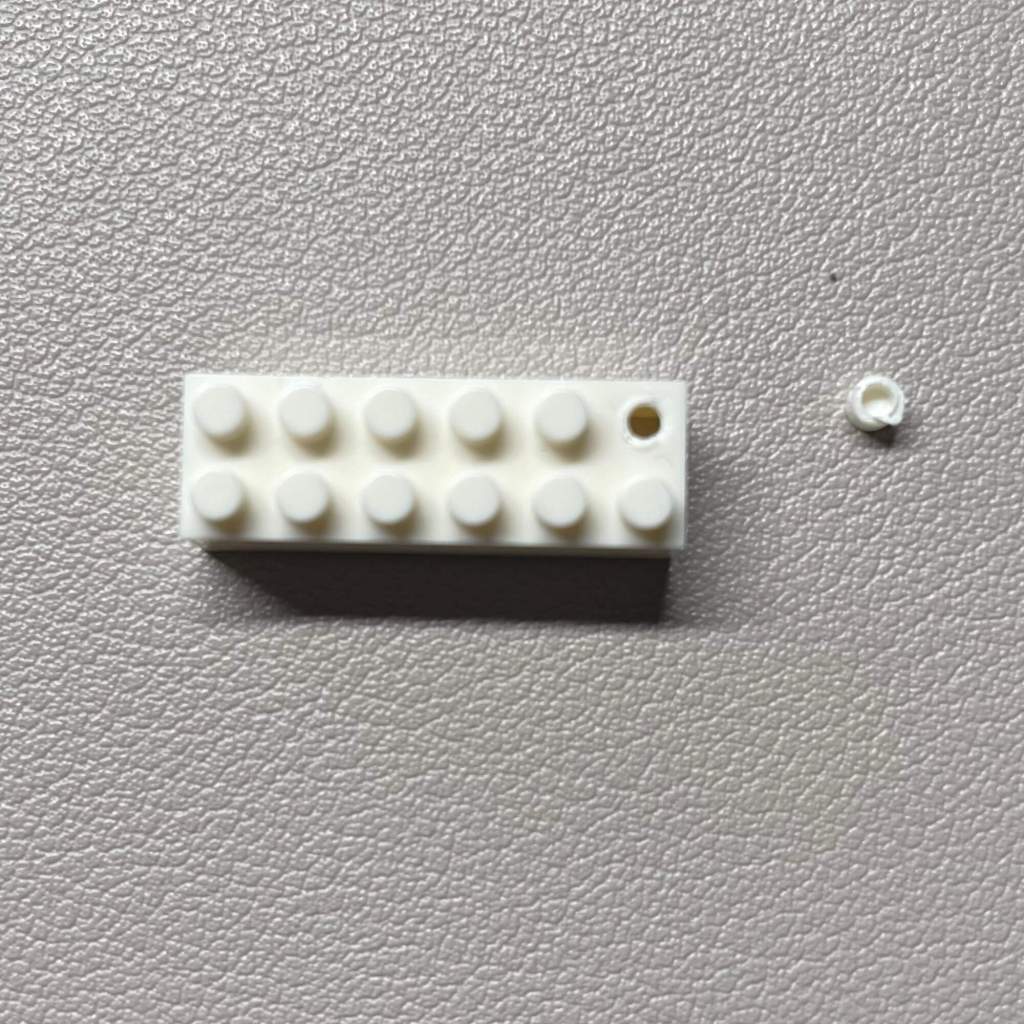
Note: I goofed up during this step, discovering my mistake midway through step 4. I had to backtrack and correct my error. Instead of using the required thicker 2×1 clear bricks, I had used the standard-sized 2×1 clear bricks. This misstep led to alignment issues in step 4. Also, I encountered my first broken brick of the set while deconstructing step 4. Again, these aren’t exactly Lego quality, so handle with care.
STEP 4: Smooth Sailing
Continuing to build up, this layer was a breeze to navigate, especially since I’d already tackled it once due to my earlier mishap. Here, we continued to use the chunky boys in place of standard Nanoblock-width bricks.
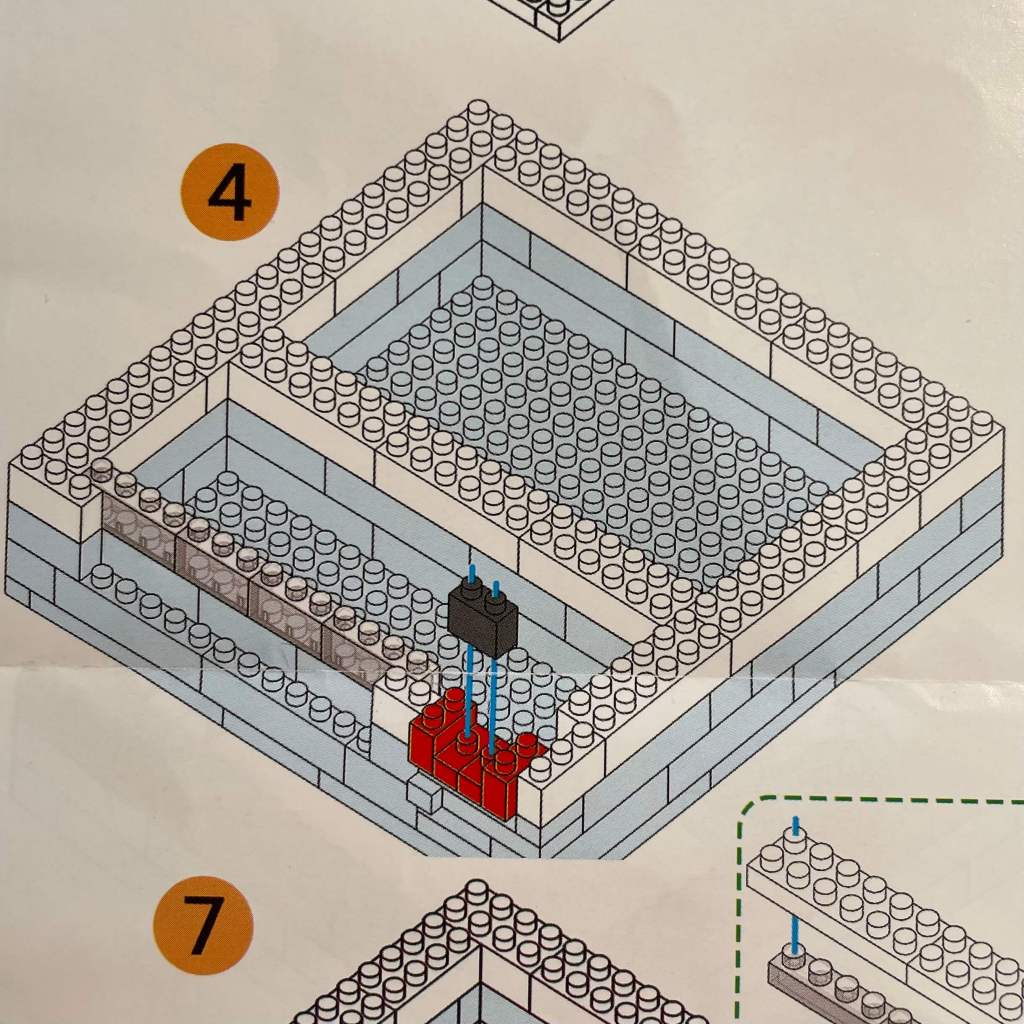
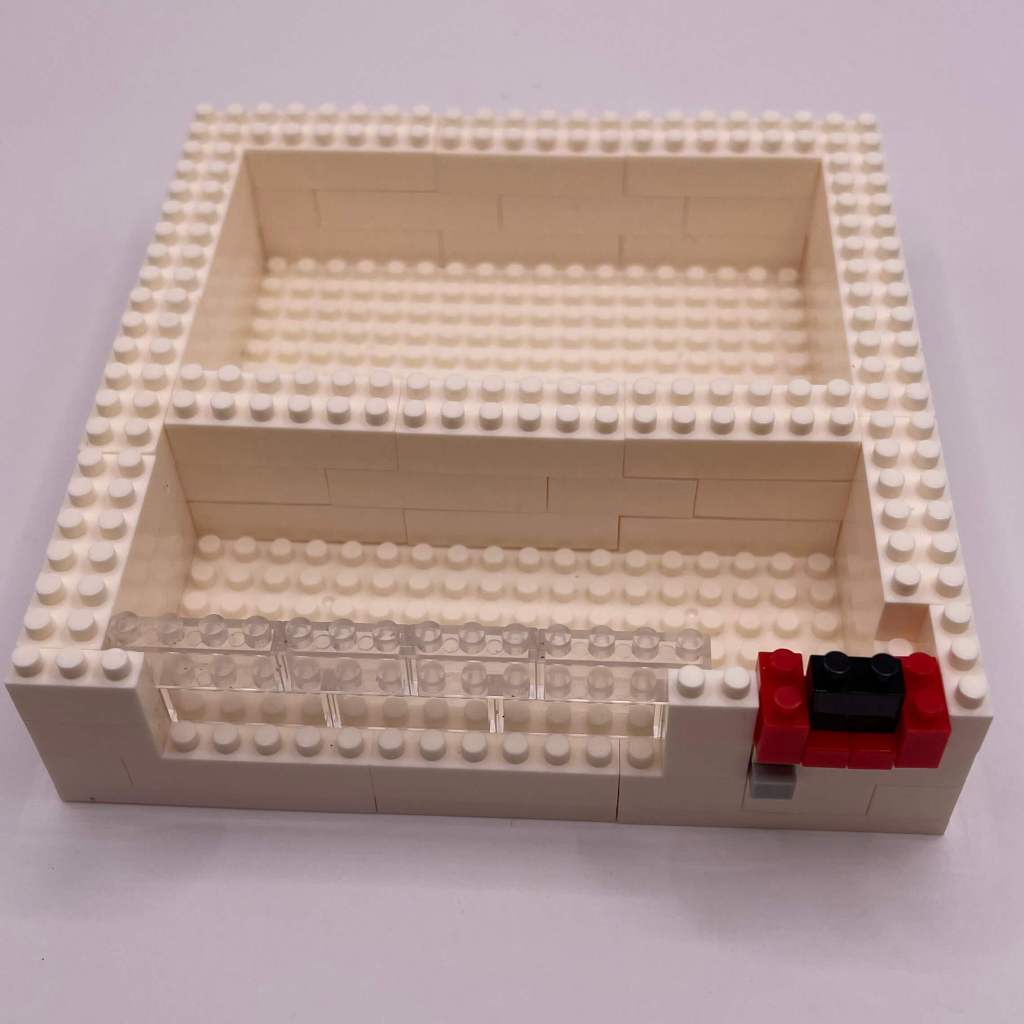
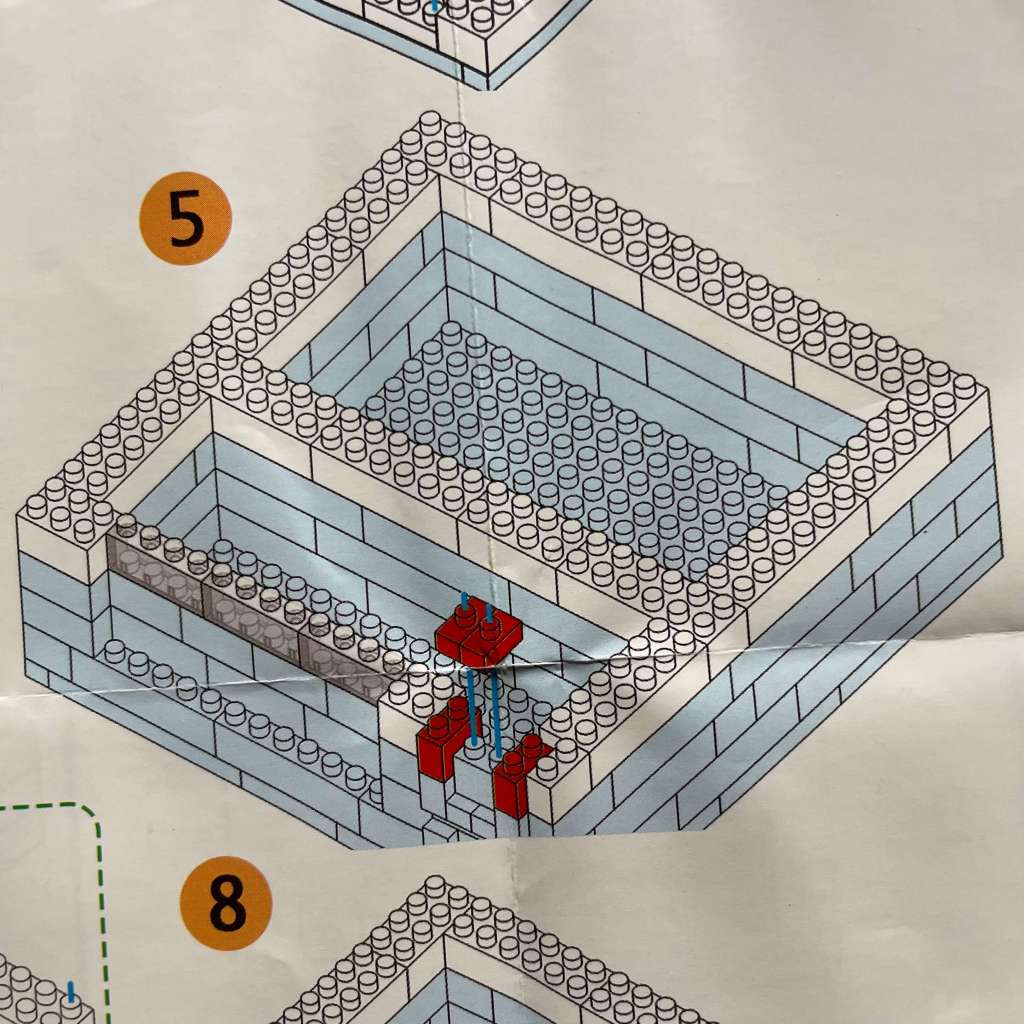
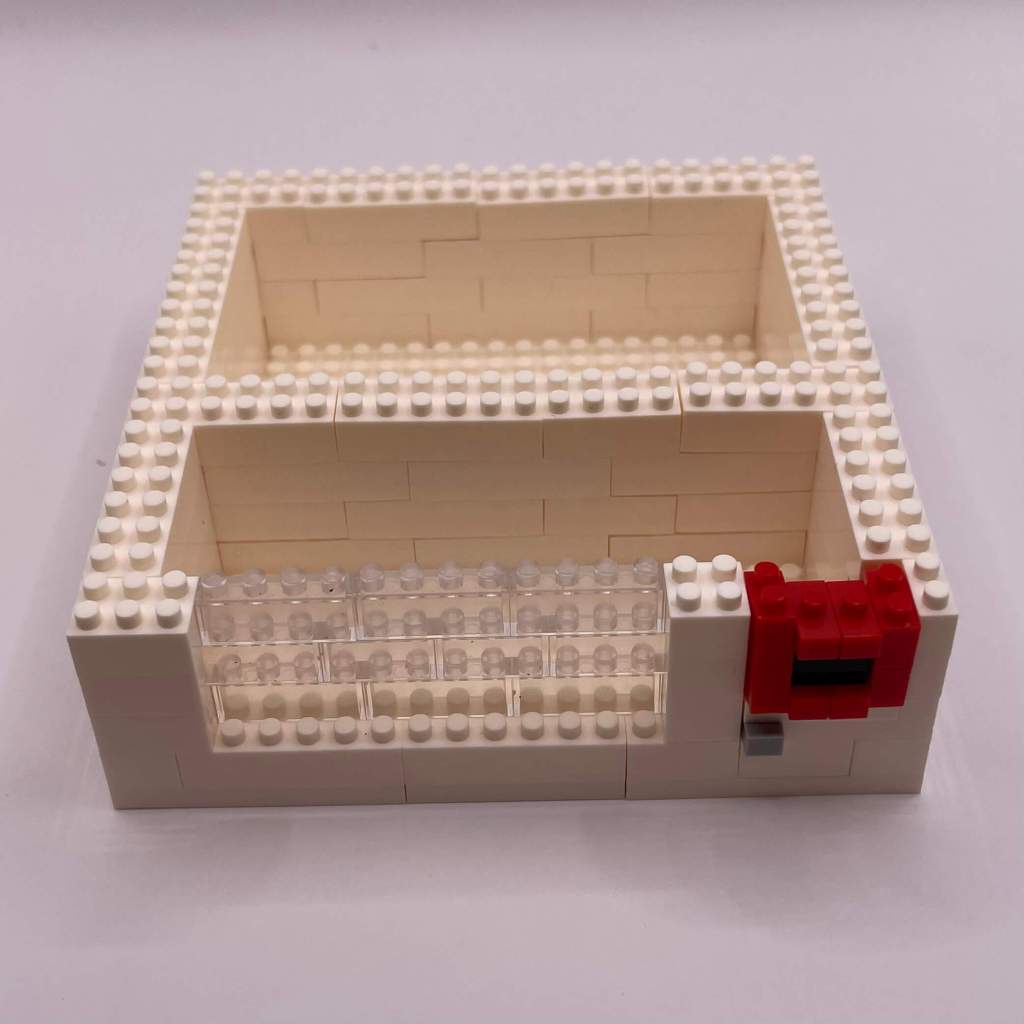
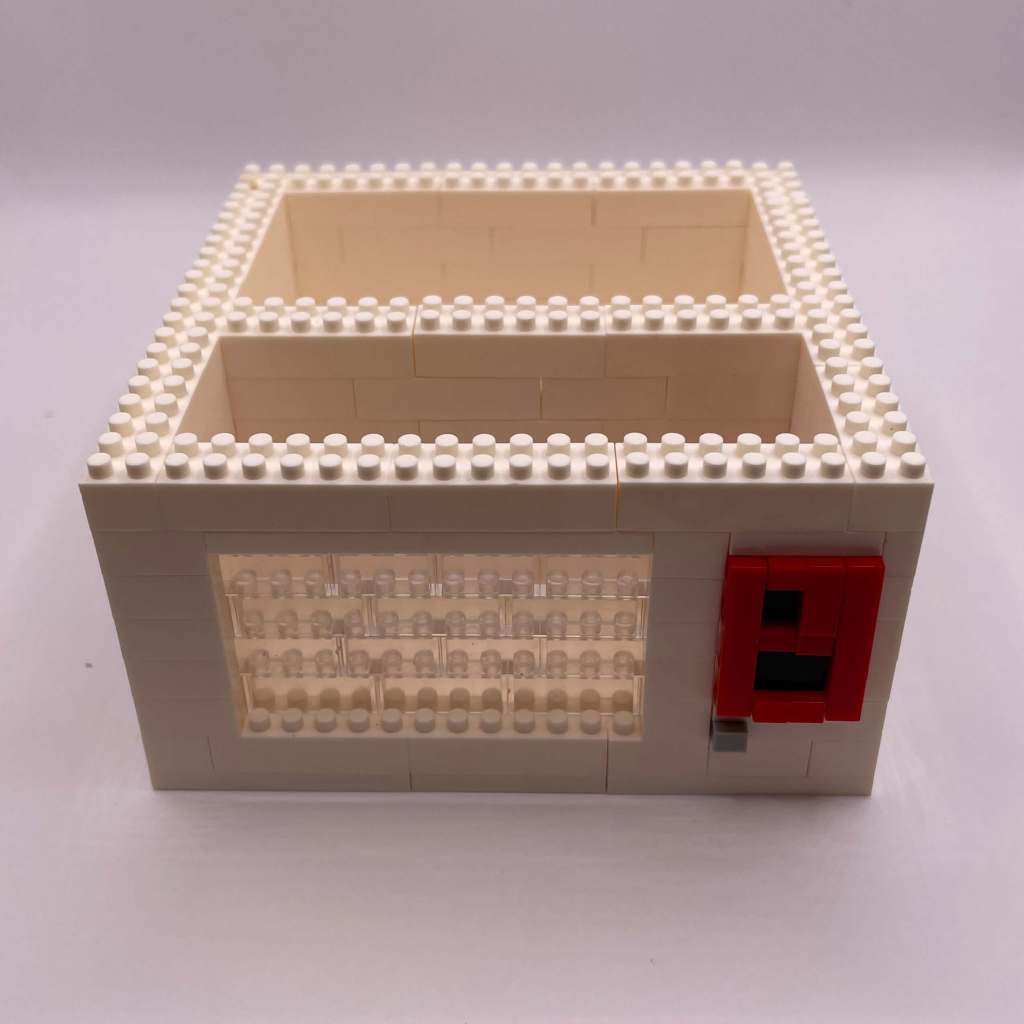
STEP 5: Simple Progression
A straightforward continuation, building up around the expected sections. Note that the coin slot, represented with red and black bricks, is somewhat flimsy at this point, so handle it with care.
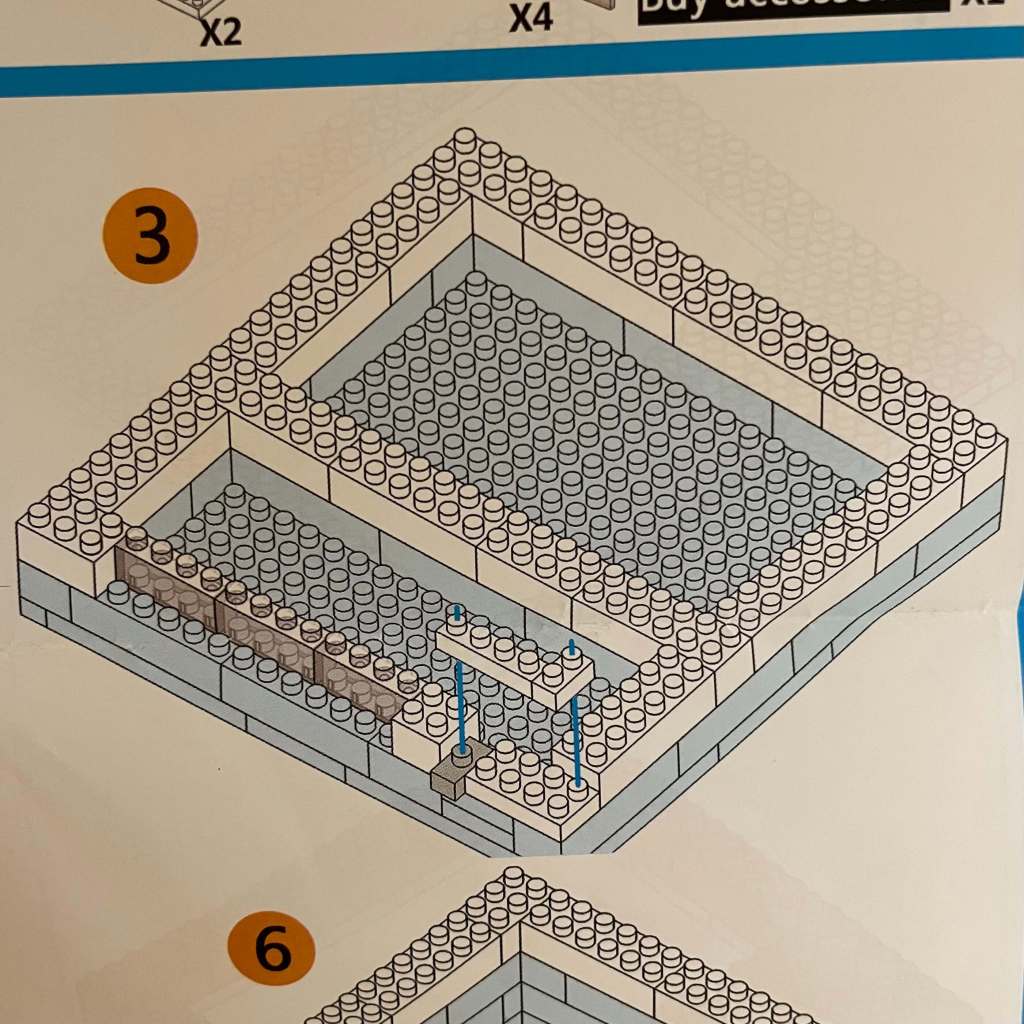
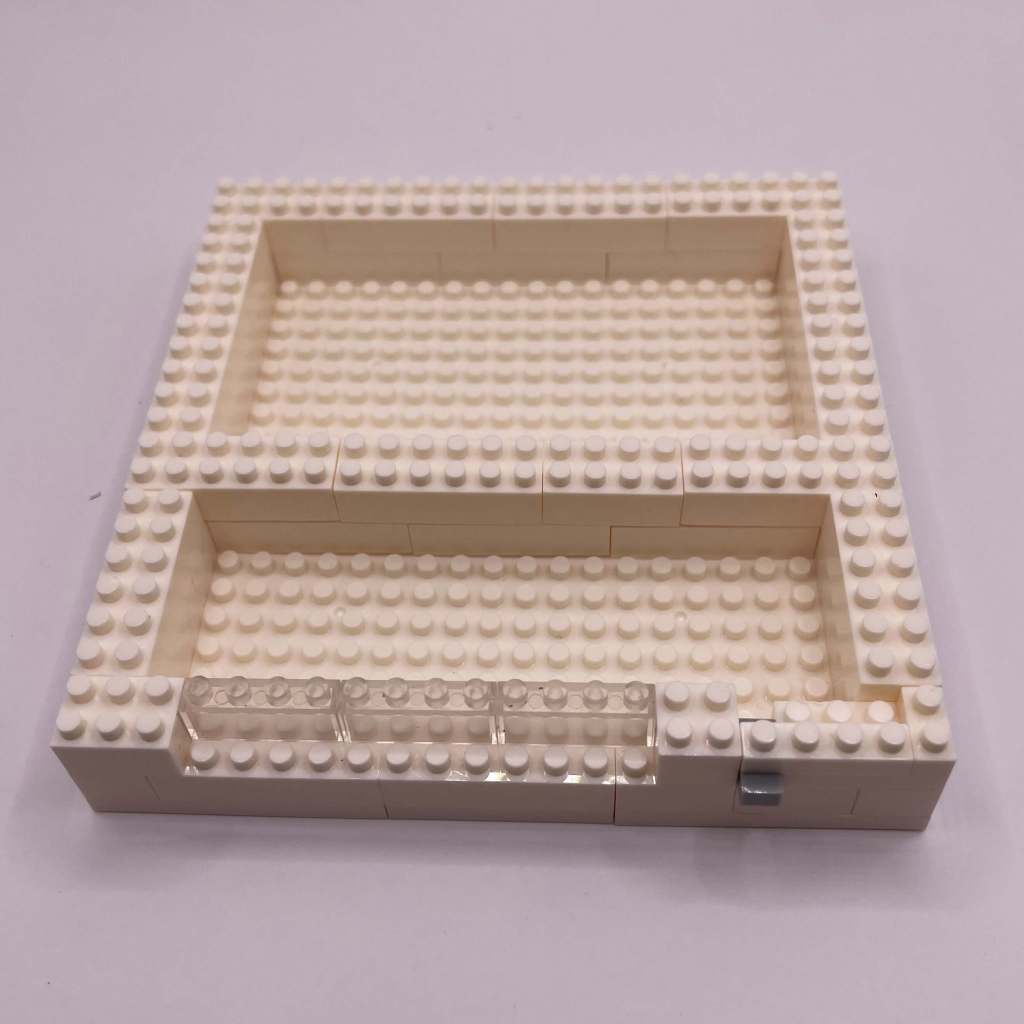
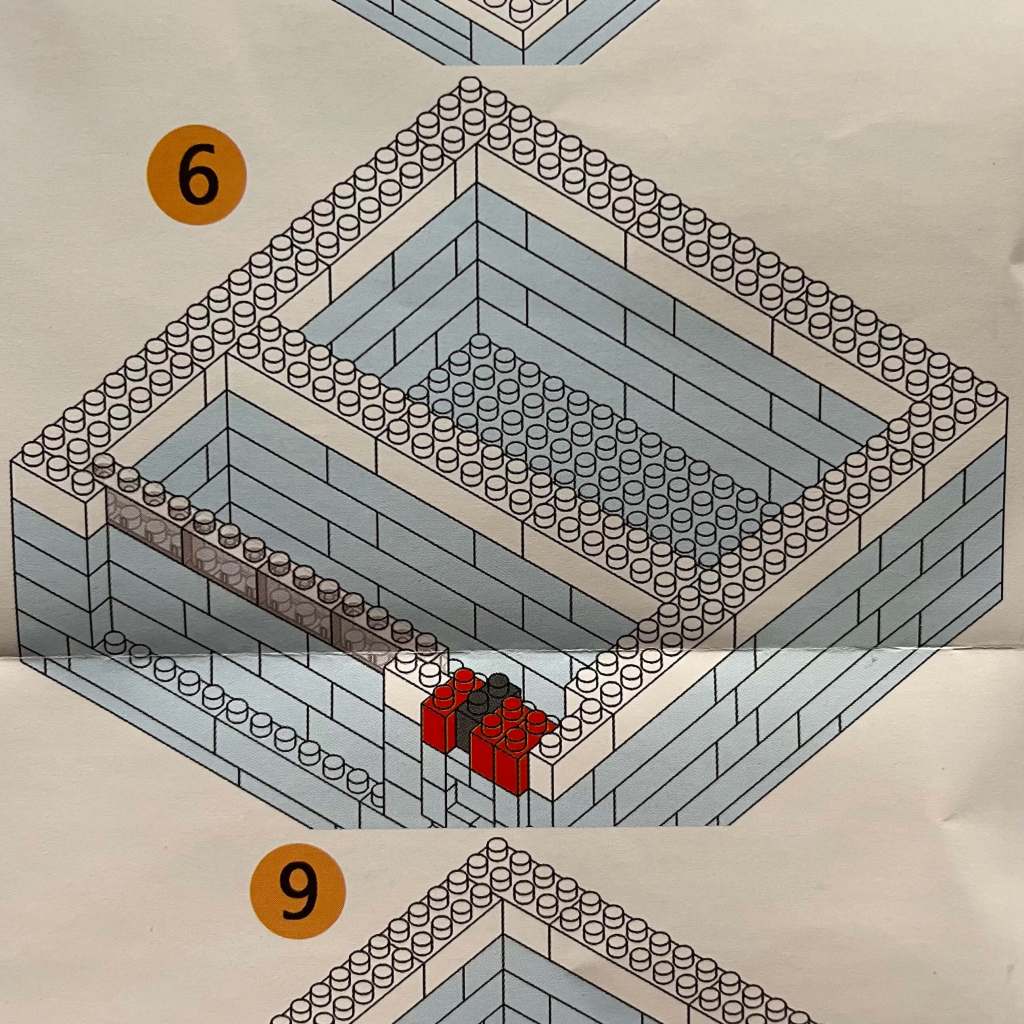
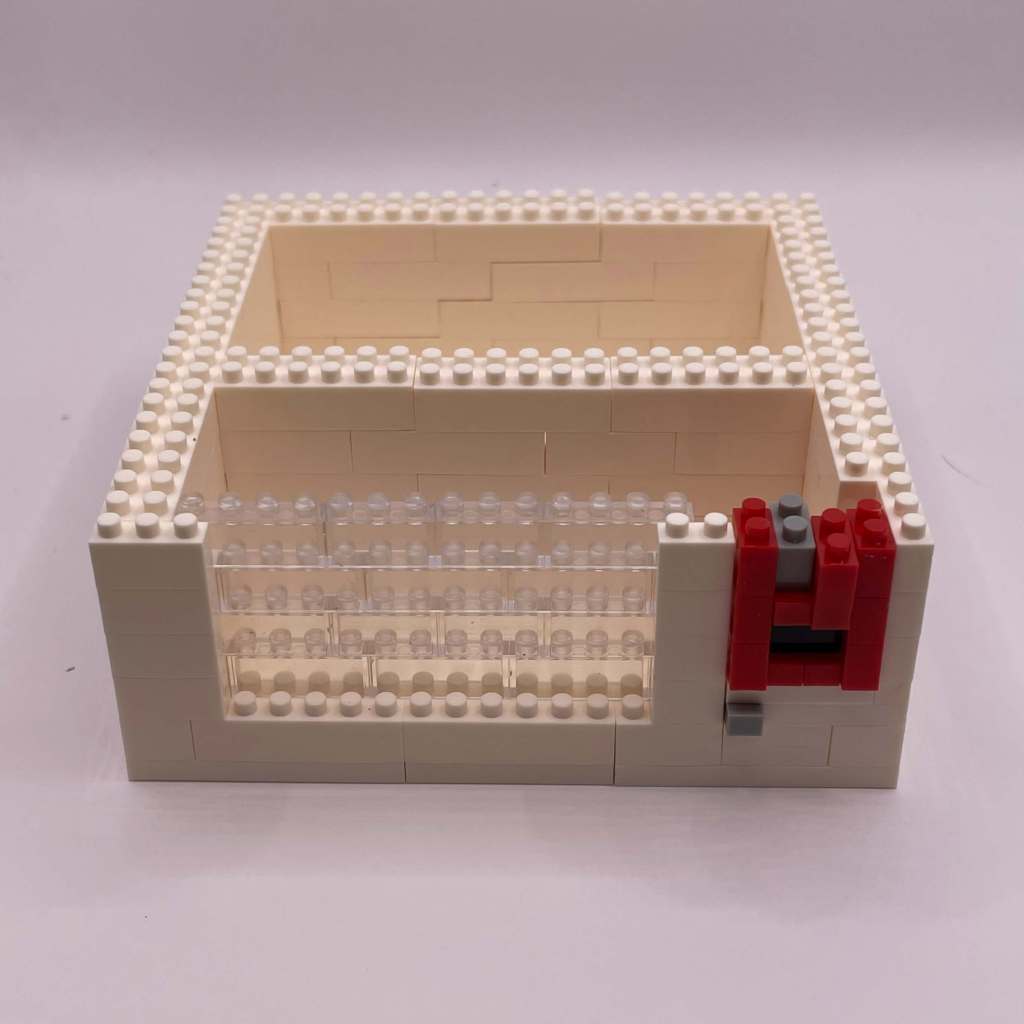
STEP 6: Holding My Breath
Another layer of chunky boy pieces, and the positioning of the pieces making up the coin slot remains precarious. I had a feeling this section might give me some trouble.
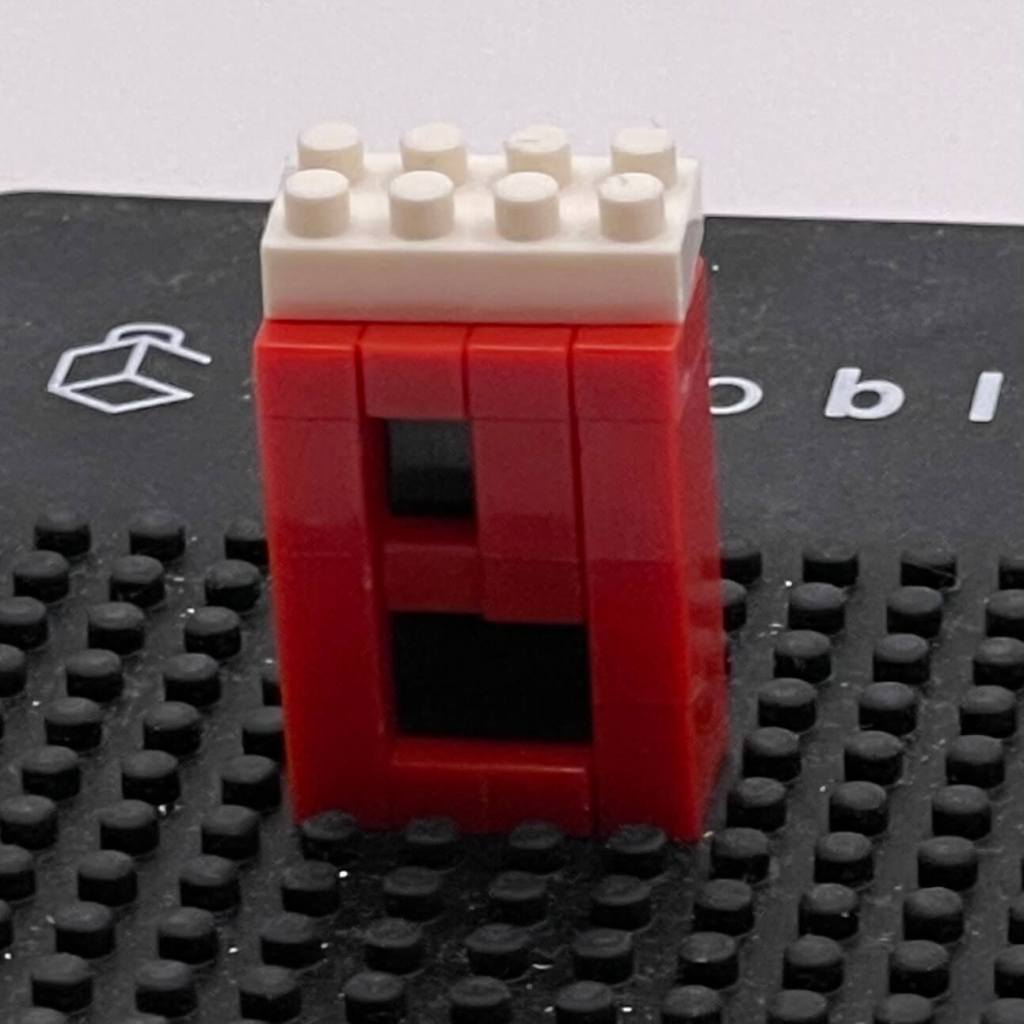
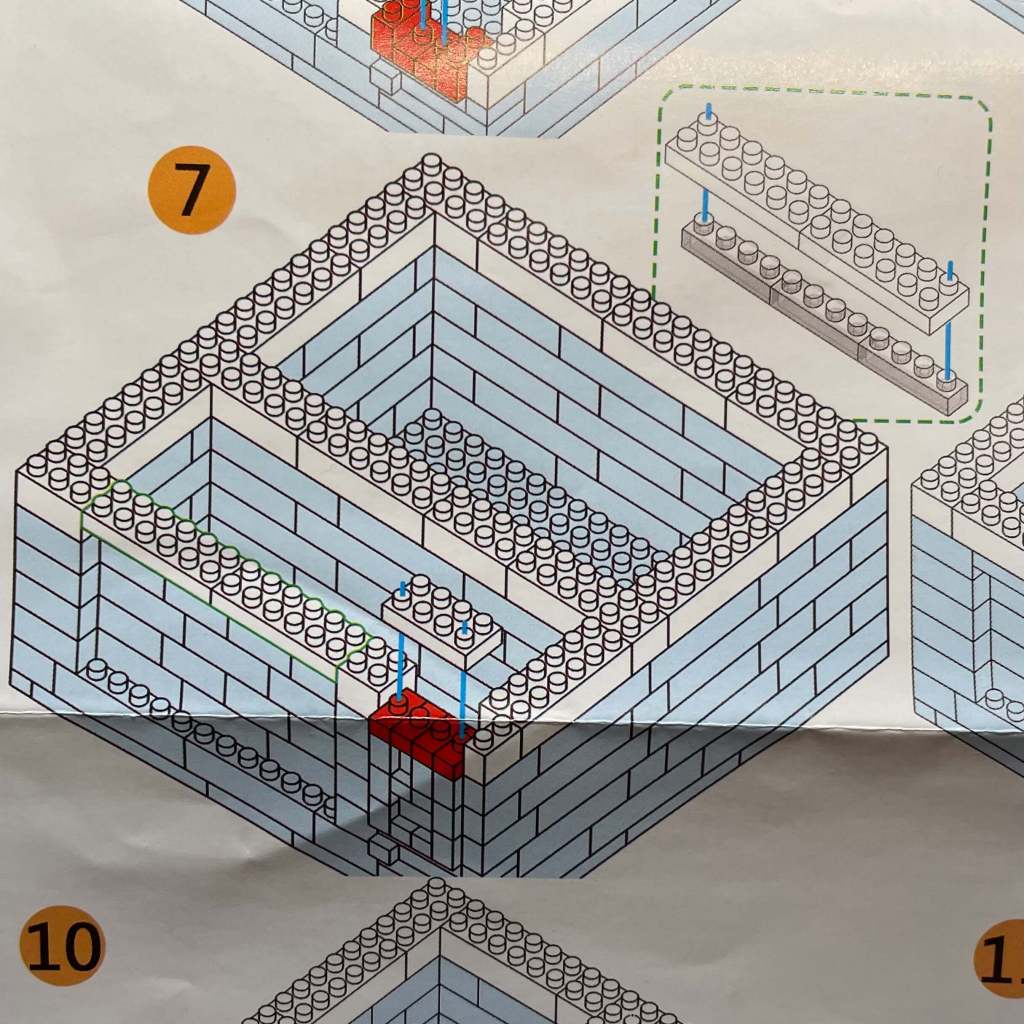
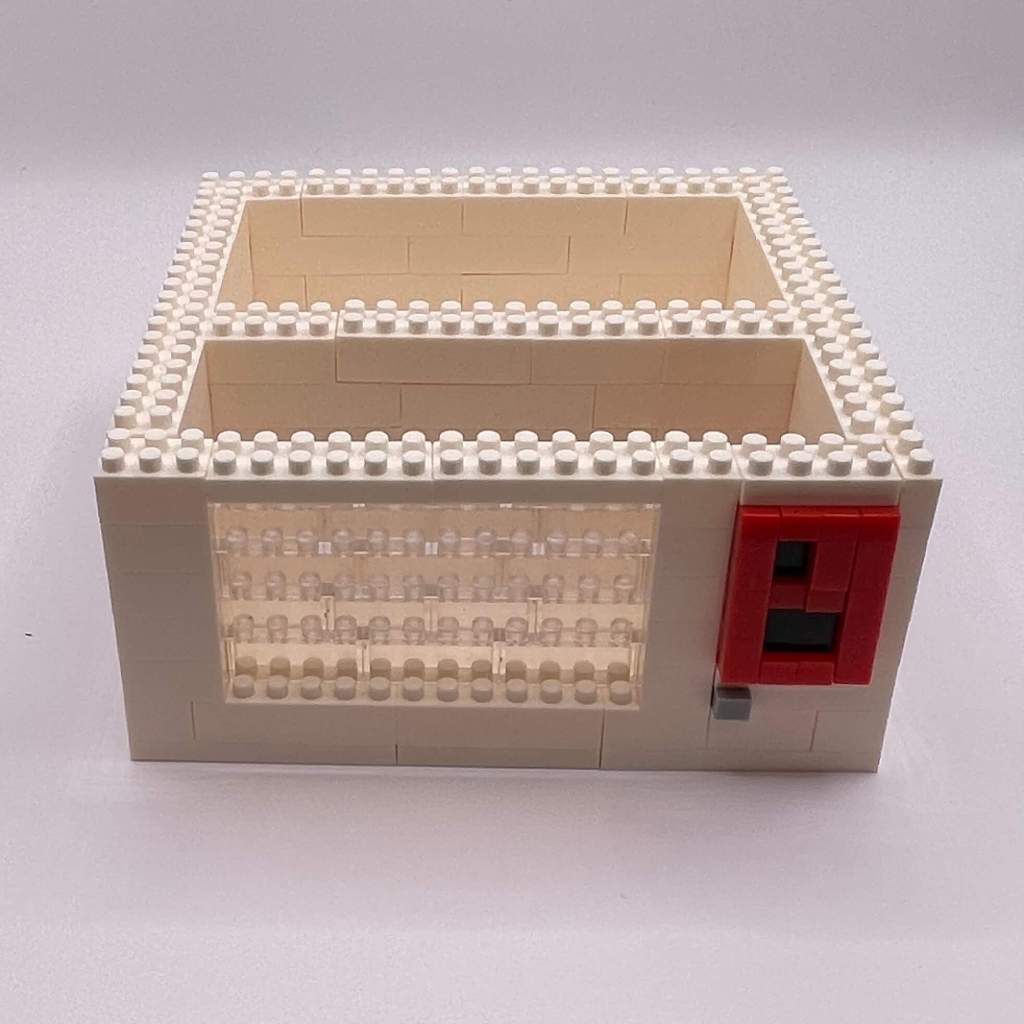
STEP 7: Stabilizing the Coin Slot
I was getting sick of the flimsiness so far, I decided to take matters into my own hands by deconstructed the coin-slot section from step 4 and constructing it independently on a Nanoblock pad for added stability. This step also completes the faux toy-retrieval window flap.
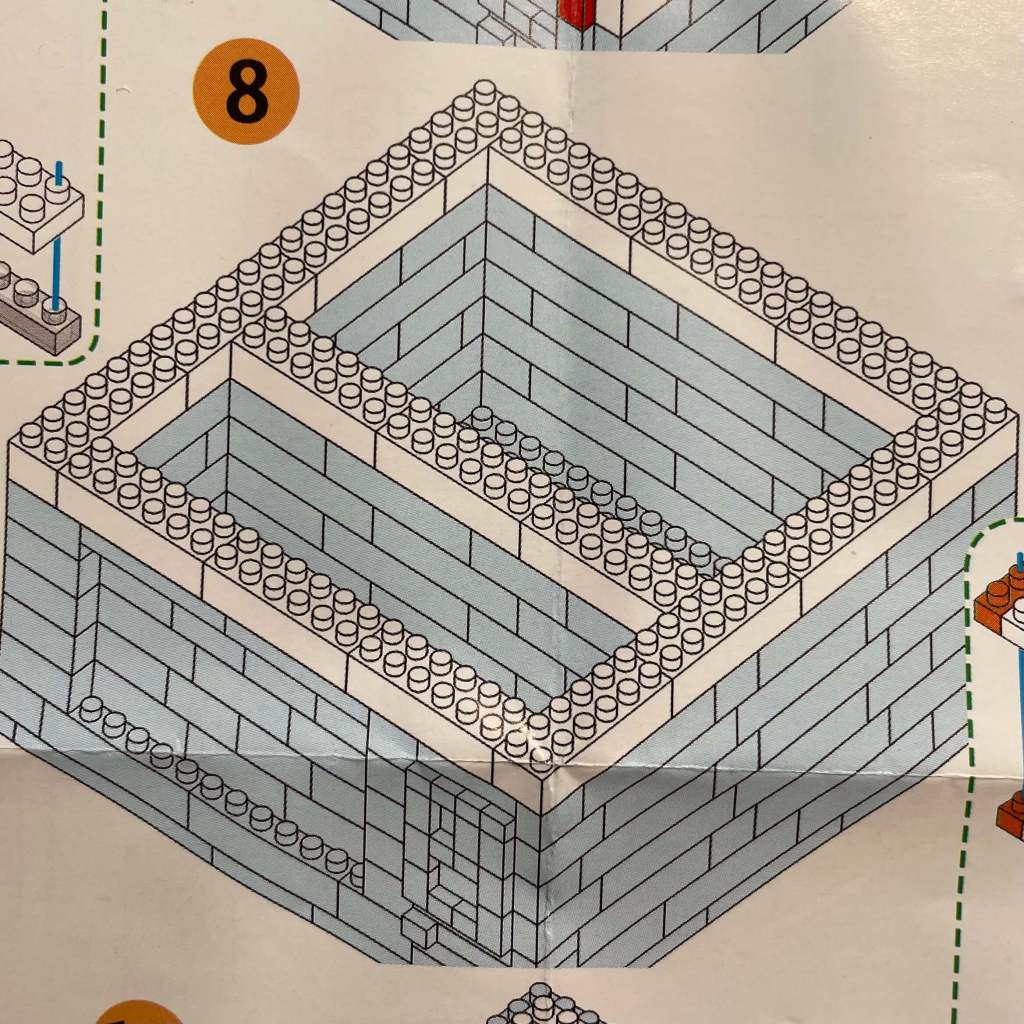
STEP 8: More Chunky Boys
Nothing complicated in this step—just another layer of chunky boys around the same sections.
STEP 9: The Control Panel Base
We now add the base for the control panel section. Be mindful that the red and white bricks on the control panel aren’t securely attached to each other. I had to build the white panel separately and then attach the red sections later to keep everything intact.

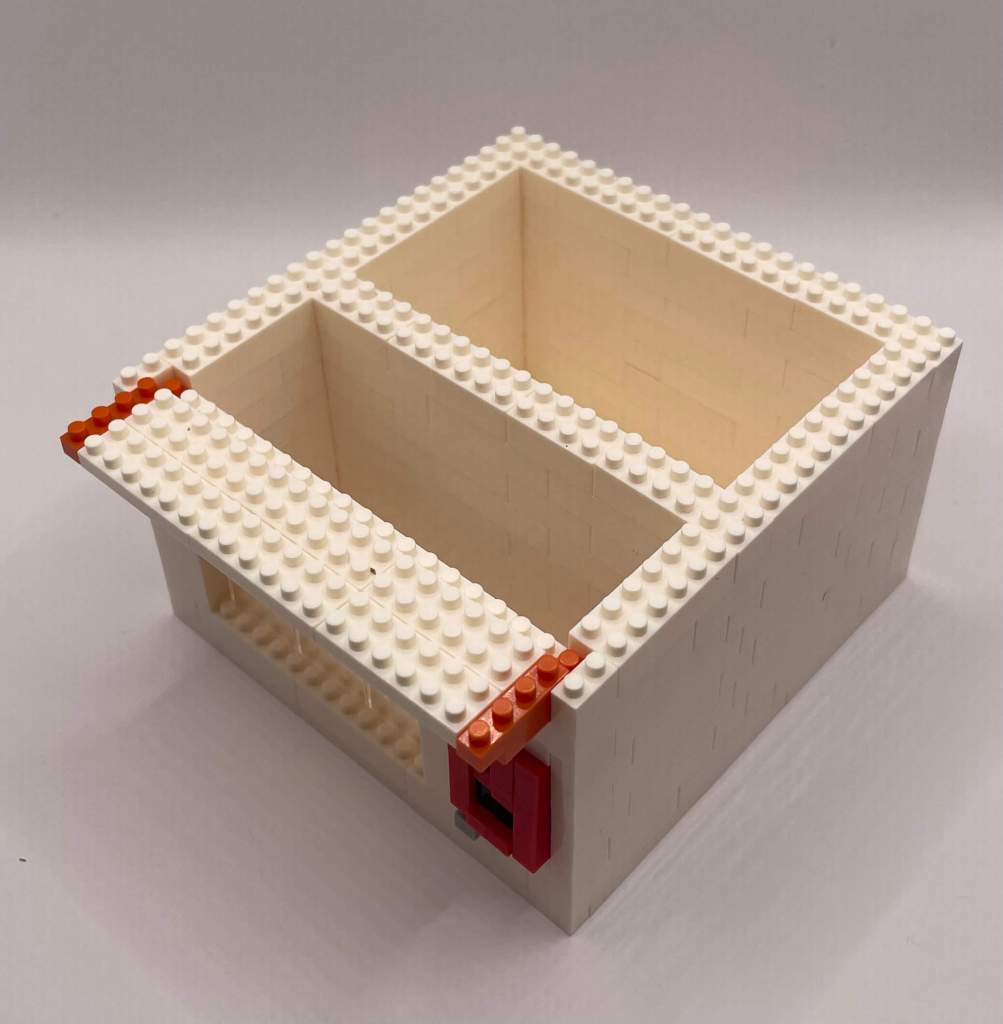
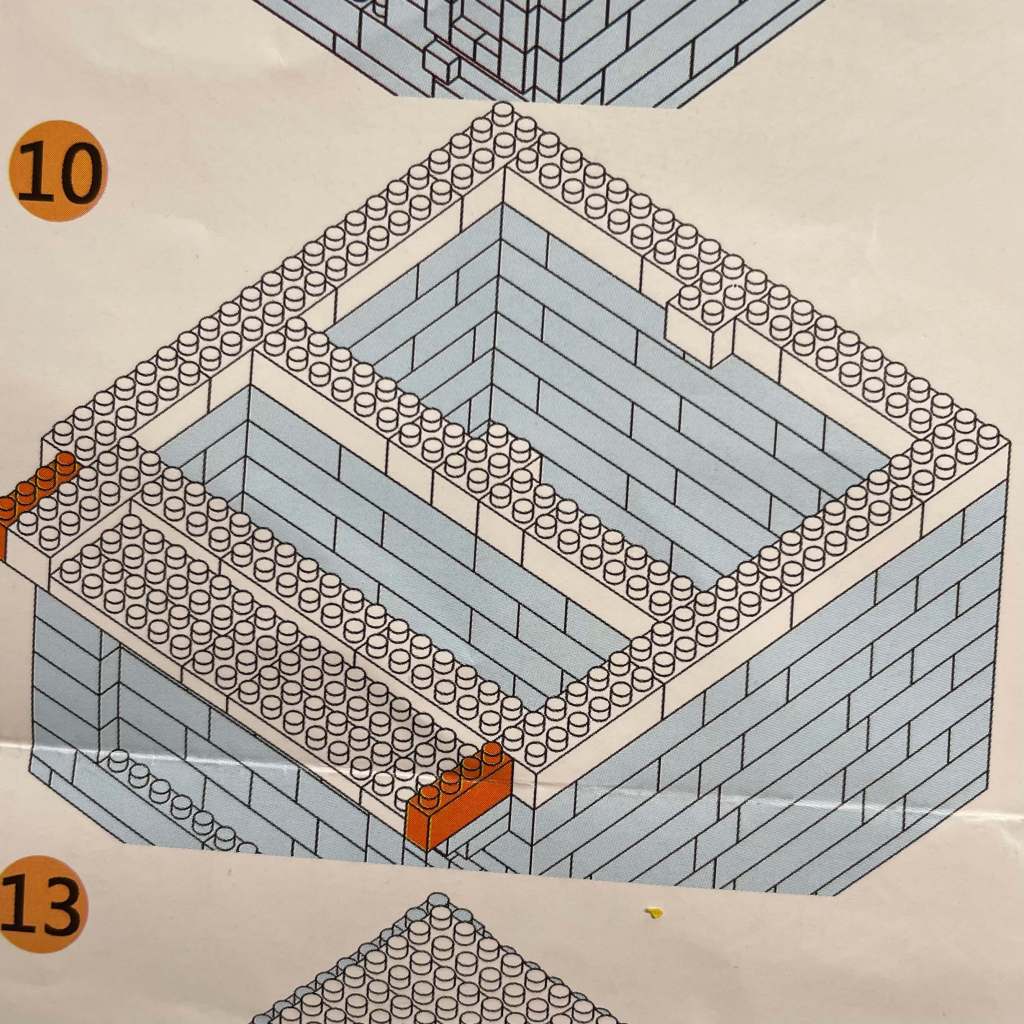
STEP 10: Expanding the Control Panel
This step continues building upward and expanding on the control panel section. The slightly asymmetrical brick layout on the top of the control panel section threw me off a bit but was manageable.
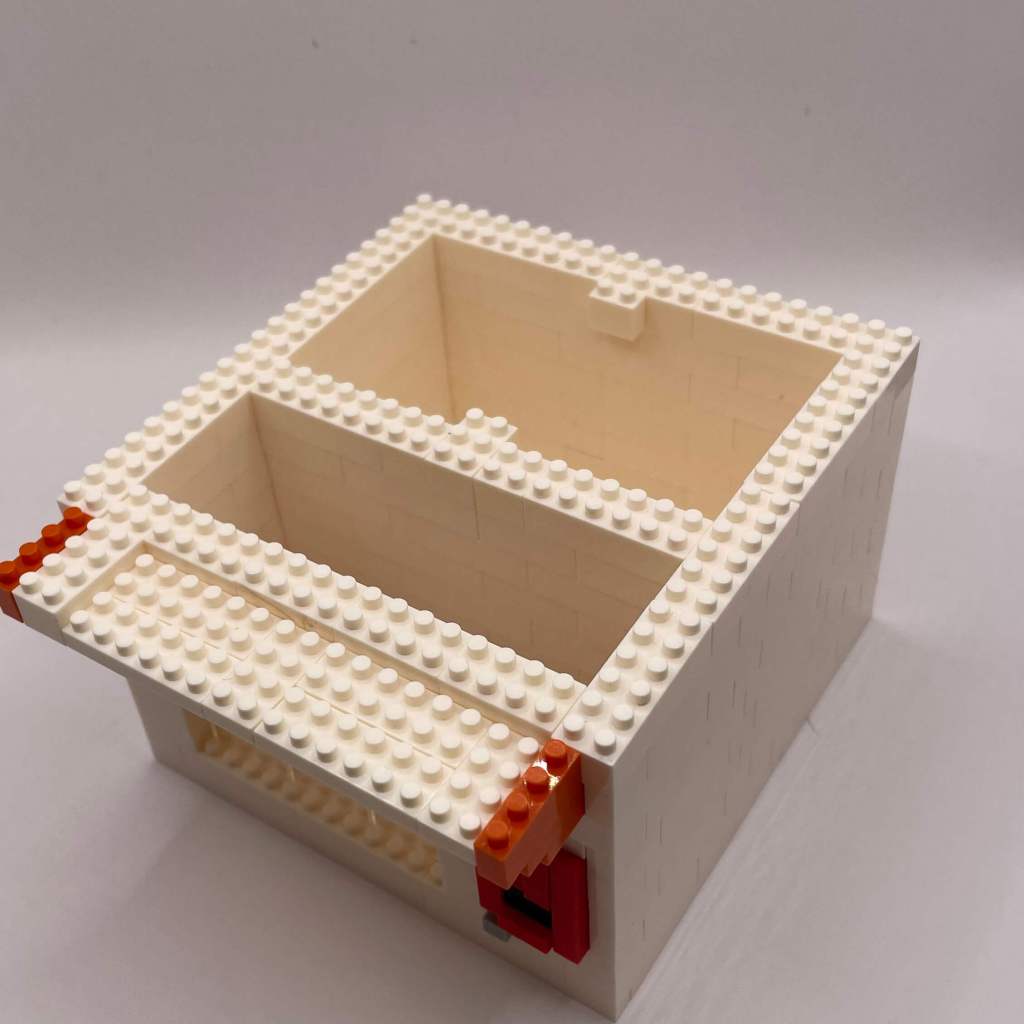
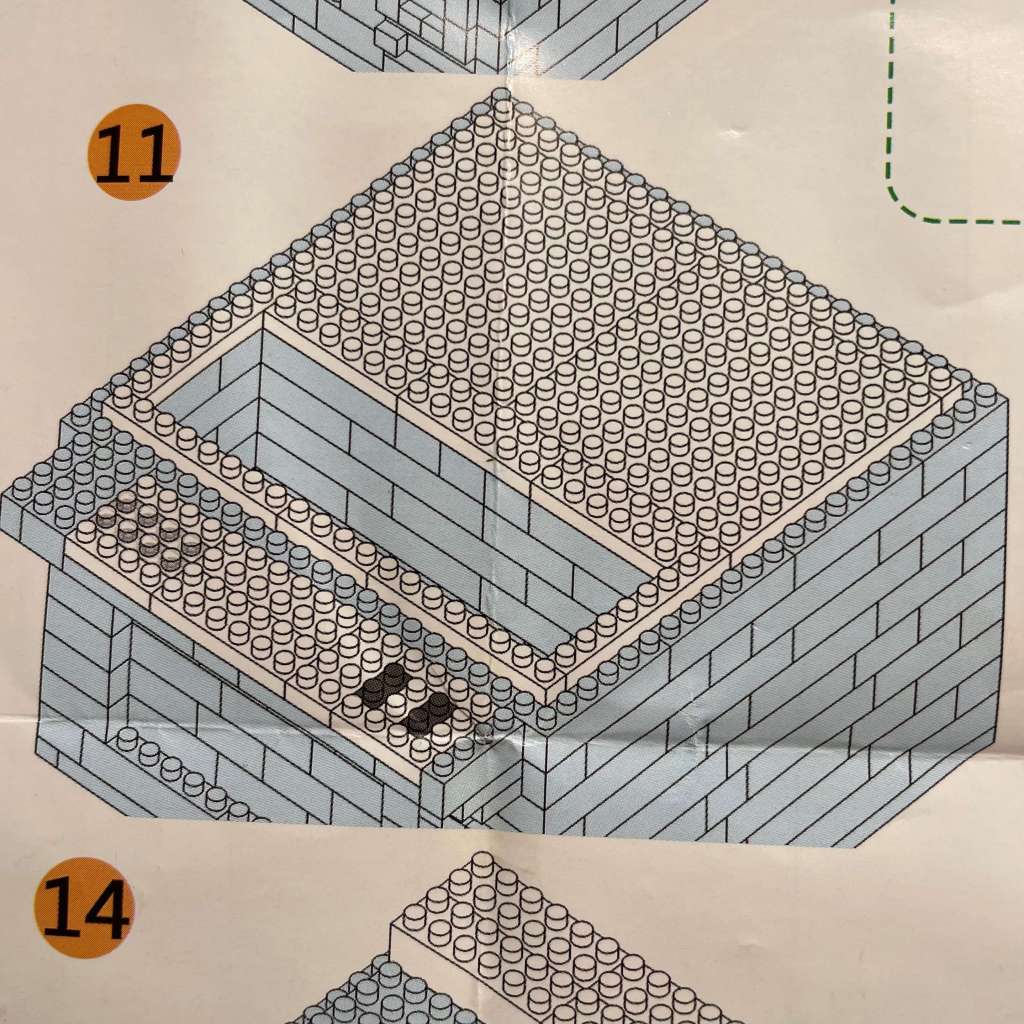
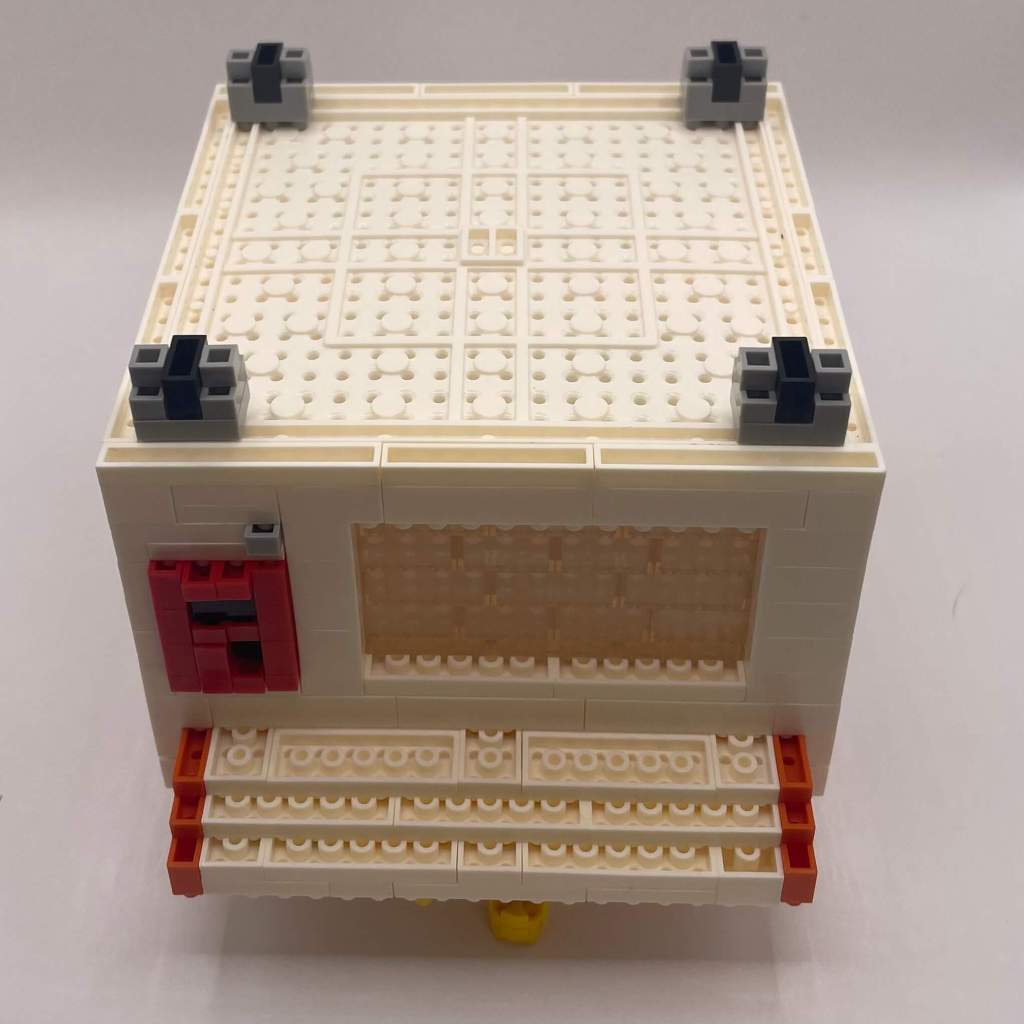
STEP 11: Closing Up
The eleventh layer closes up the box with two 10×10 baseplates and various 6x1s and 8x1s placed around the perimeter. The control panel section continues to expand. I did encounter a little difficulty securing the final 8×1 piece at the end of this step, but persistence paid off.
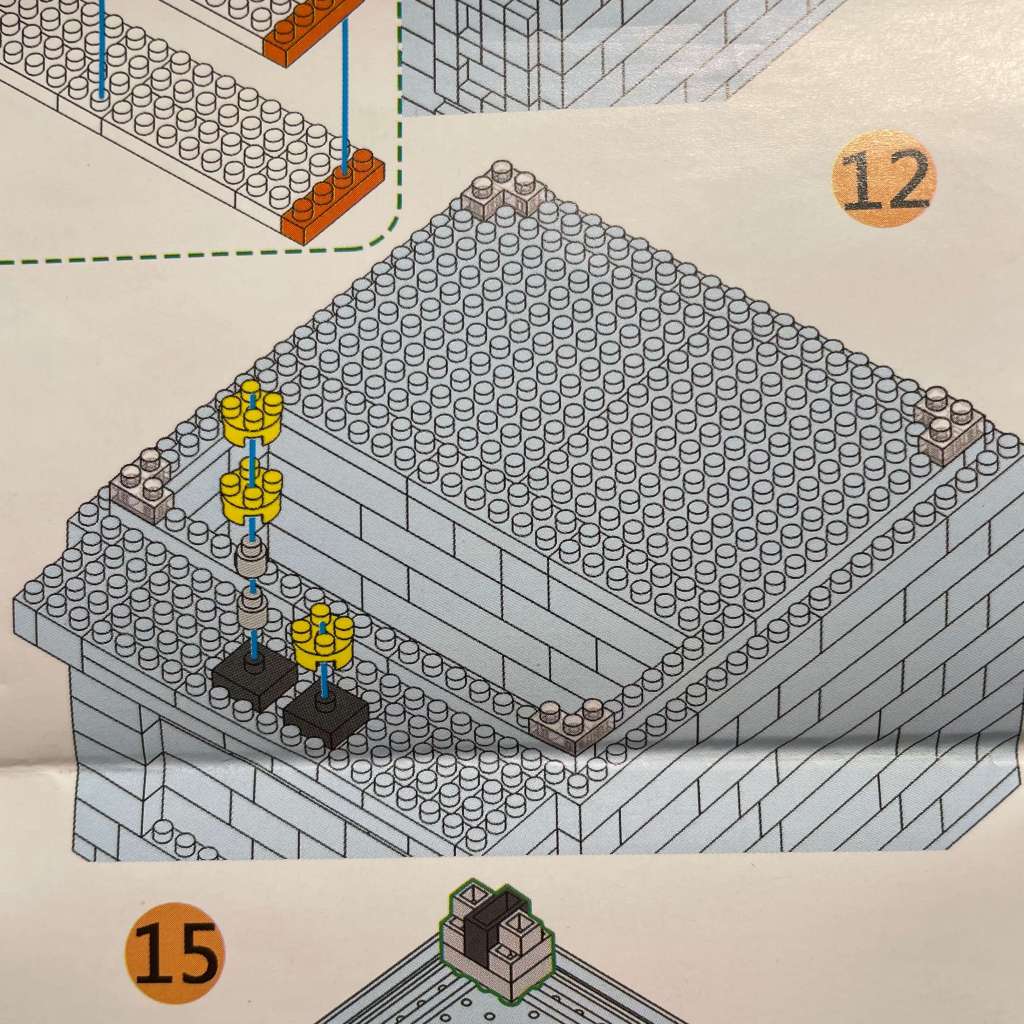
STEP 12: Joysticks and Buttons
A brief step that builds and places the joystick and action button sections. It also adds four clear slanted 3×1 pieces to the top corners of the closed box section.

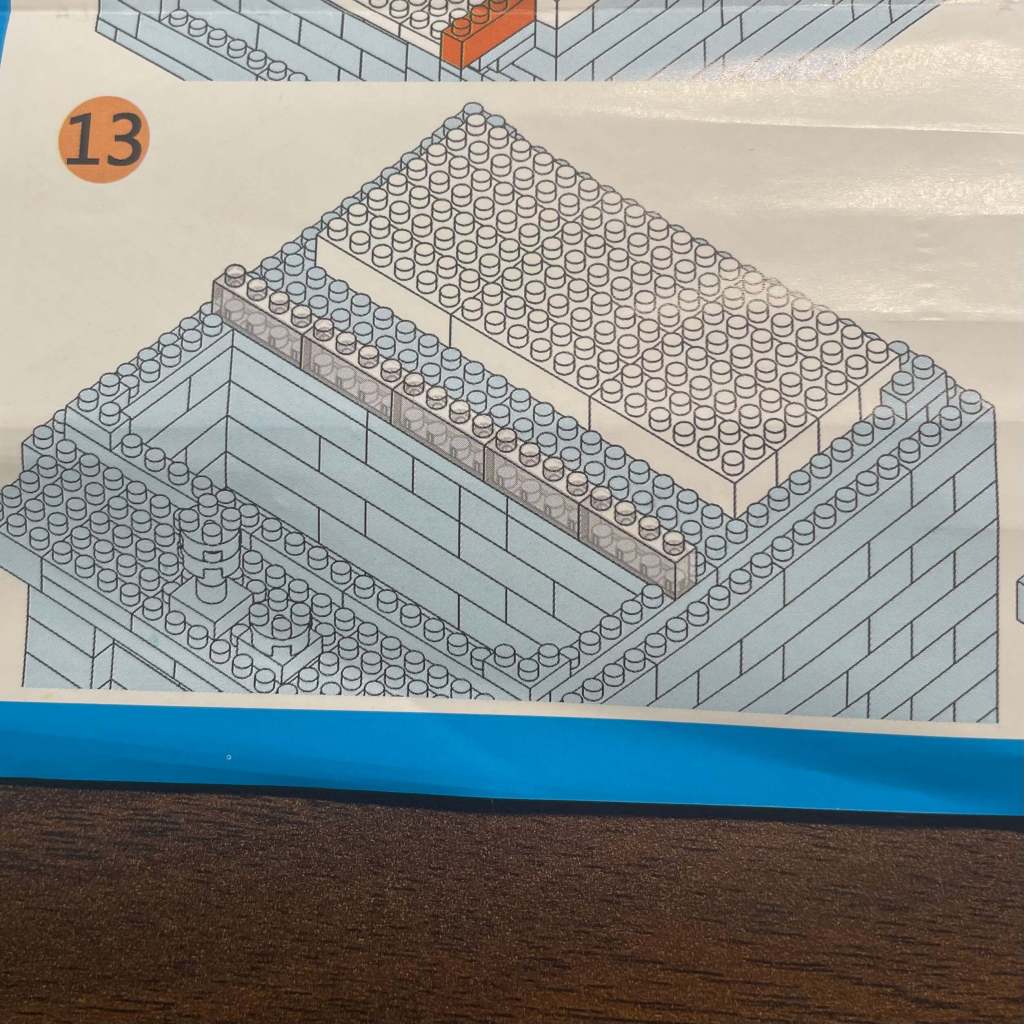
STEP 13: Laying the Foundation
In this step, we start building the foundation for the general toy area using mostly 8×2 chunky boys.
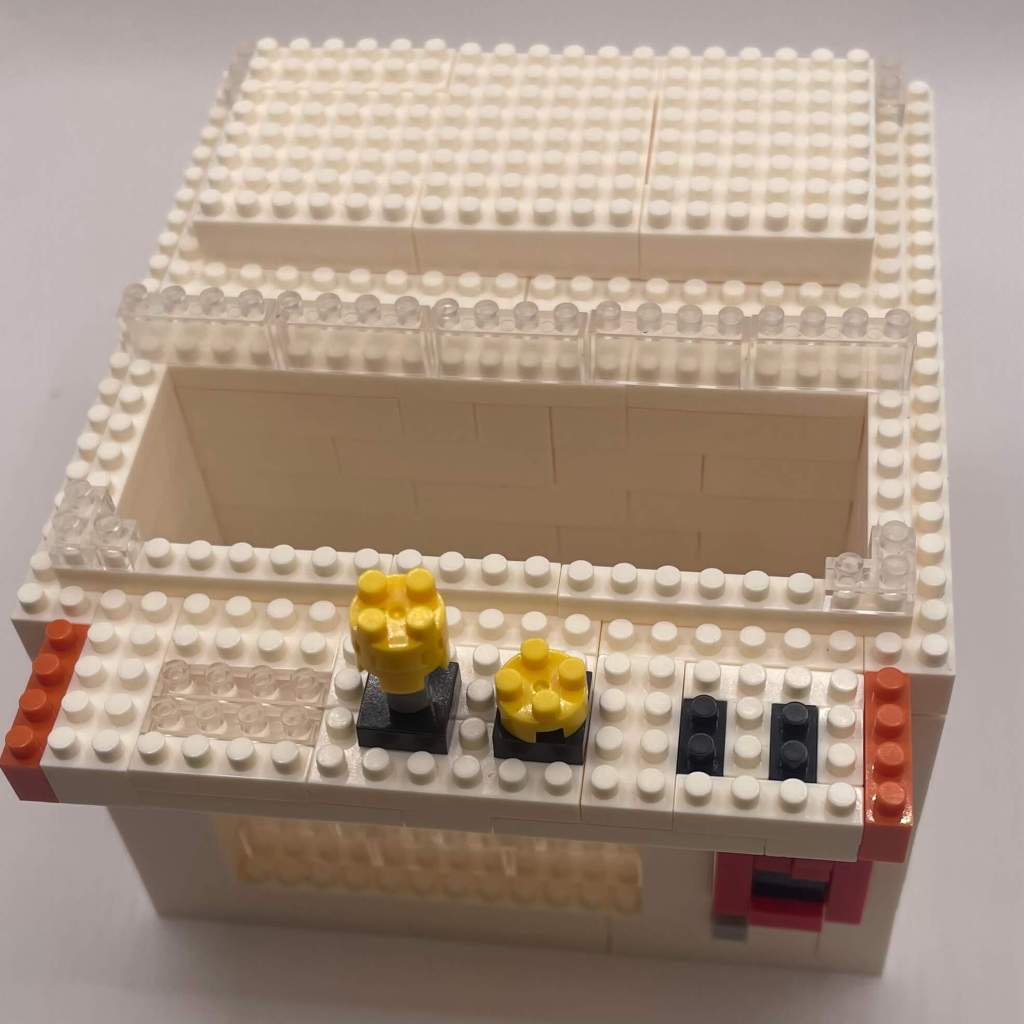
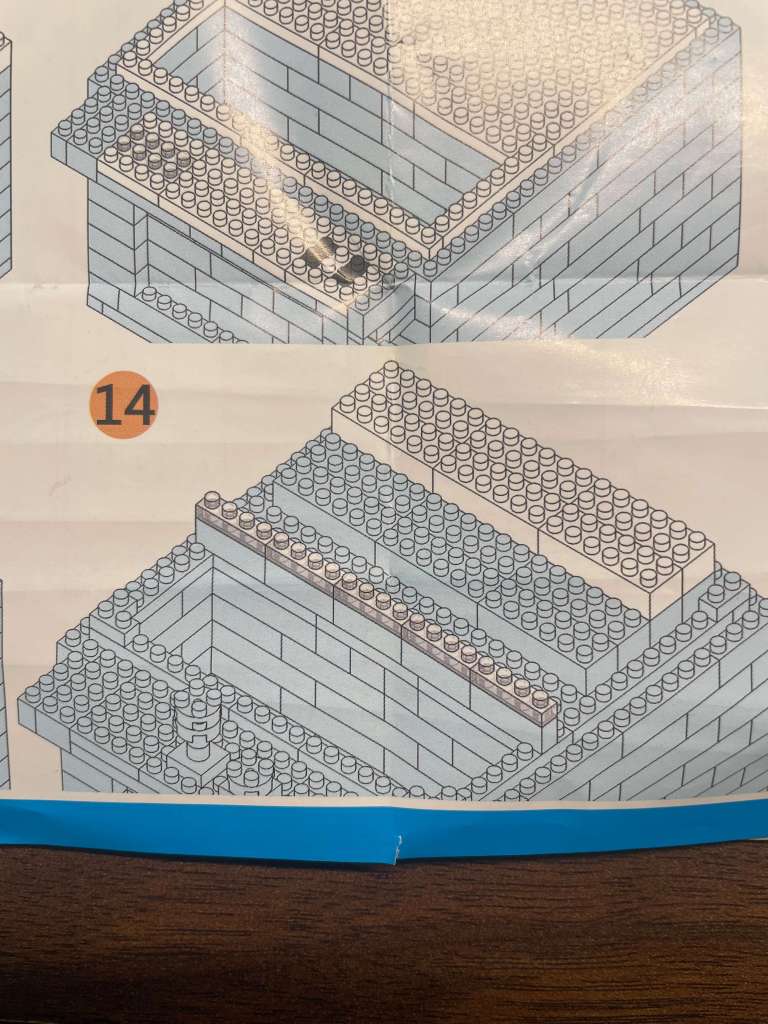
STEP 14: Stepped Layer
A straightforward continuation of the previous step, adding a stepped layer to the toy section.
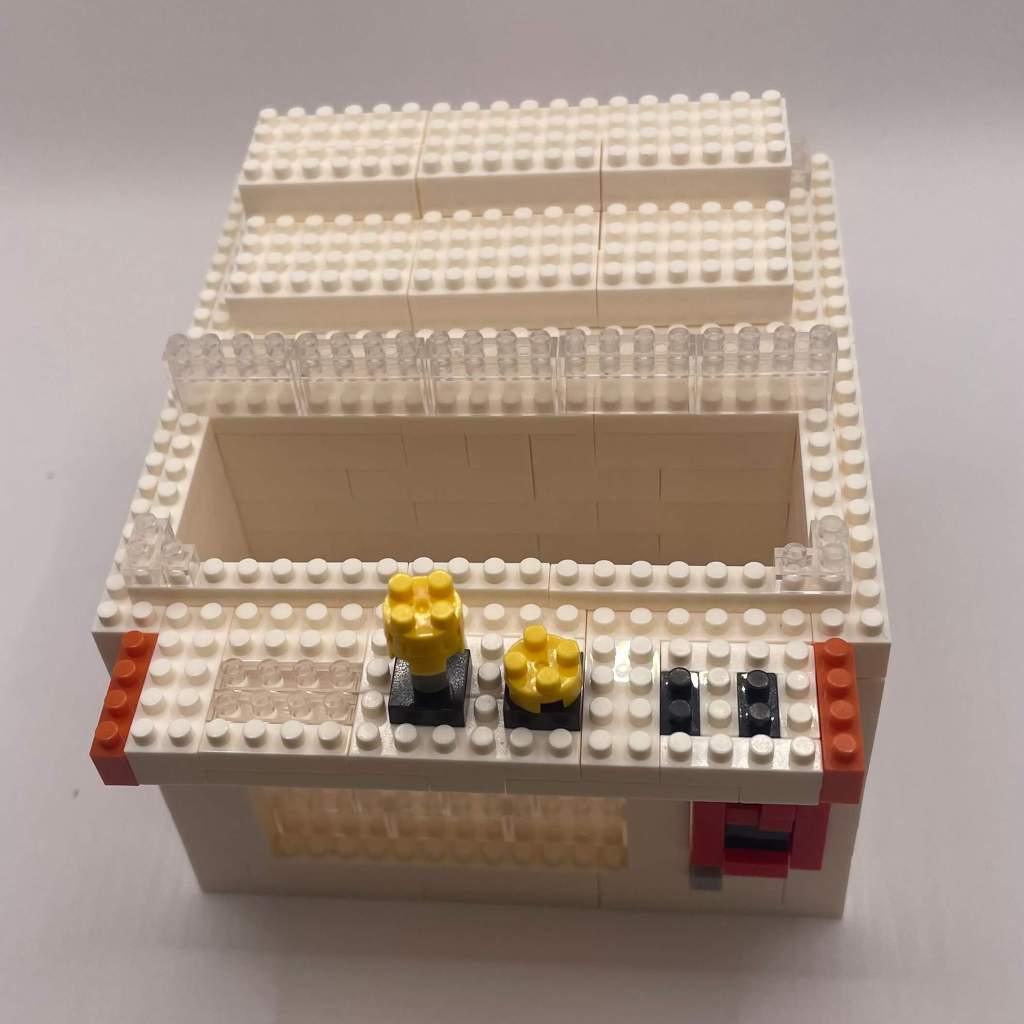
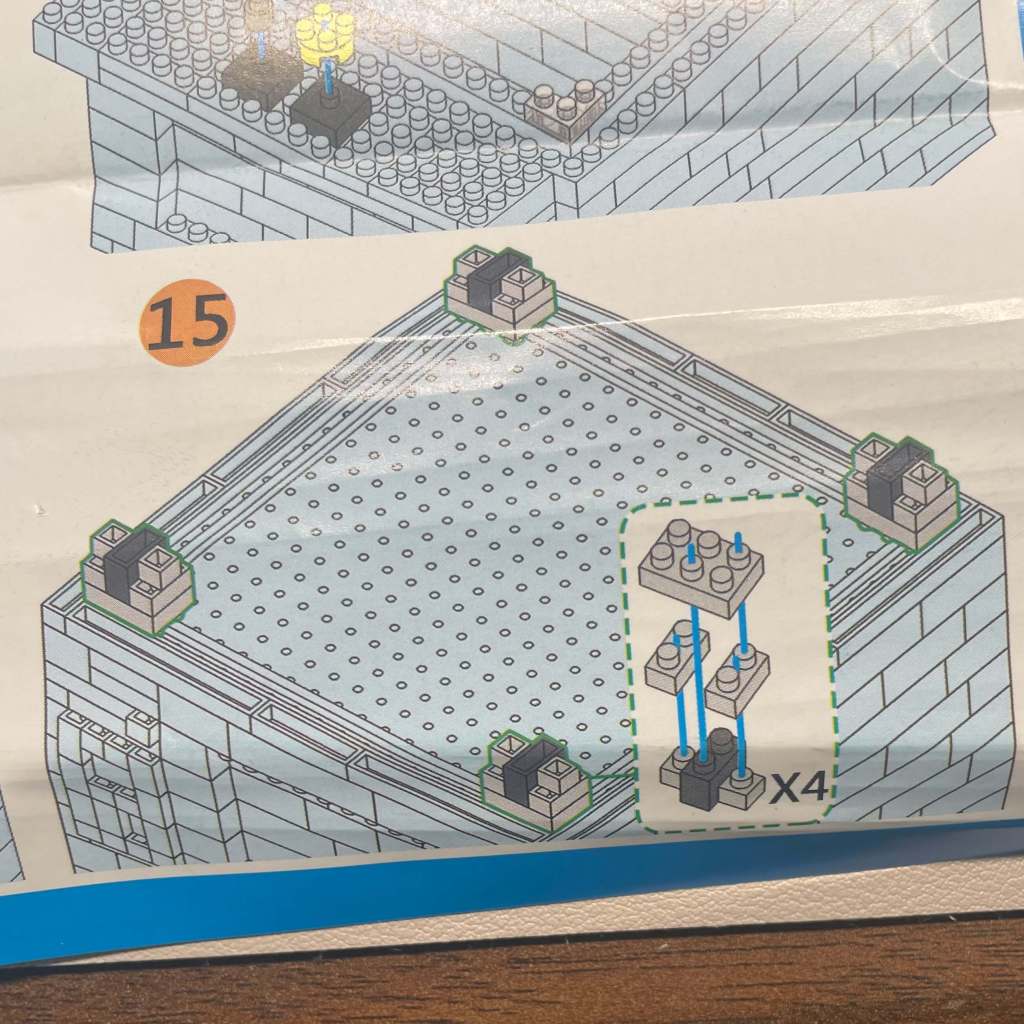
STEP 15: Adding Legs
Here, we build and place the legs. This step requires flipping the current build upside down, but everything remains sturdy.
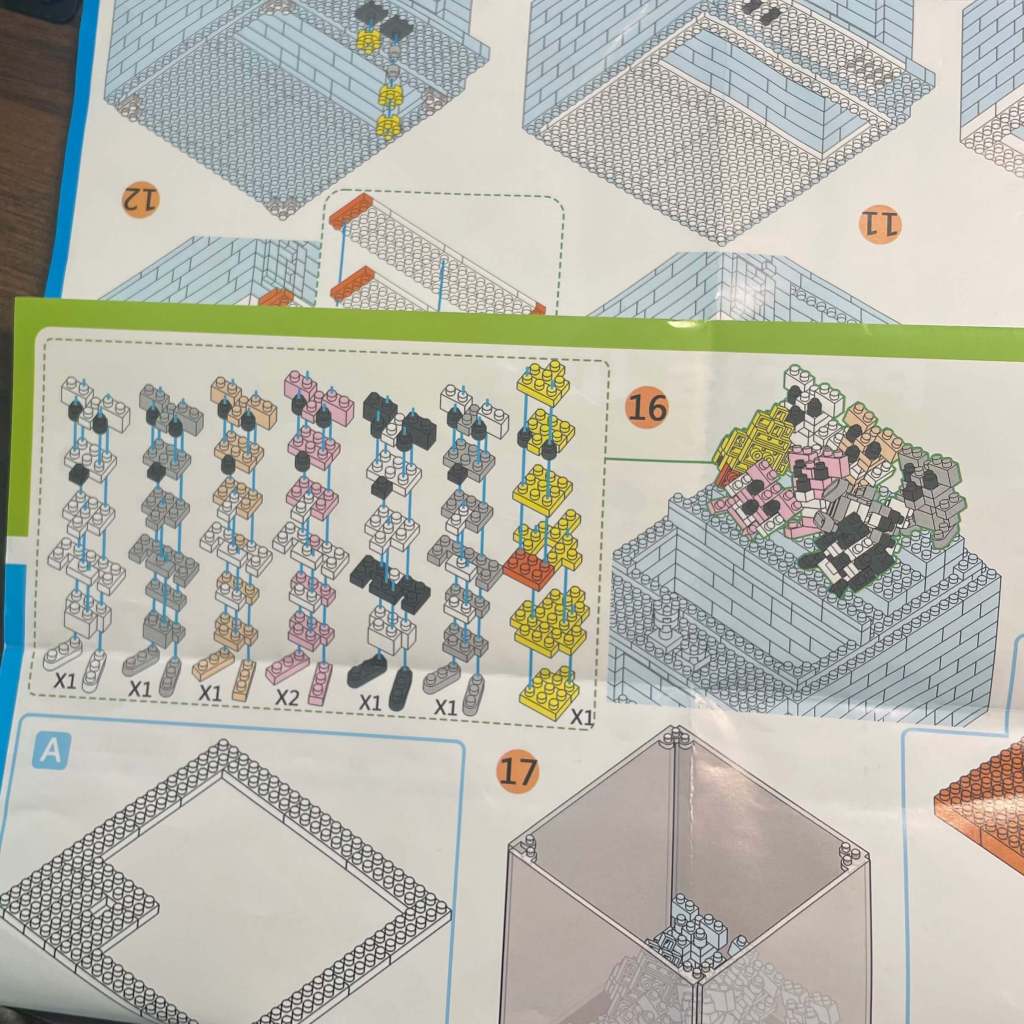
STEP 16: Crafting Prize Toys
Step 16 is all about crafting the adorable prize toys. I recommend building each one from the top down. While the instructions suggest placing the prizes in the machine at this point, I chose to wait until the clear casing is in place to prevent any unexpected tumbles.

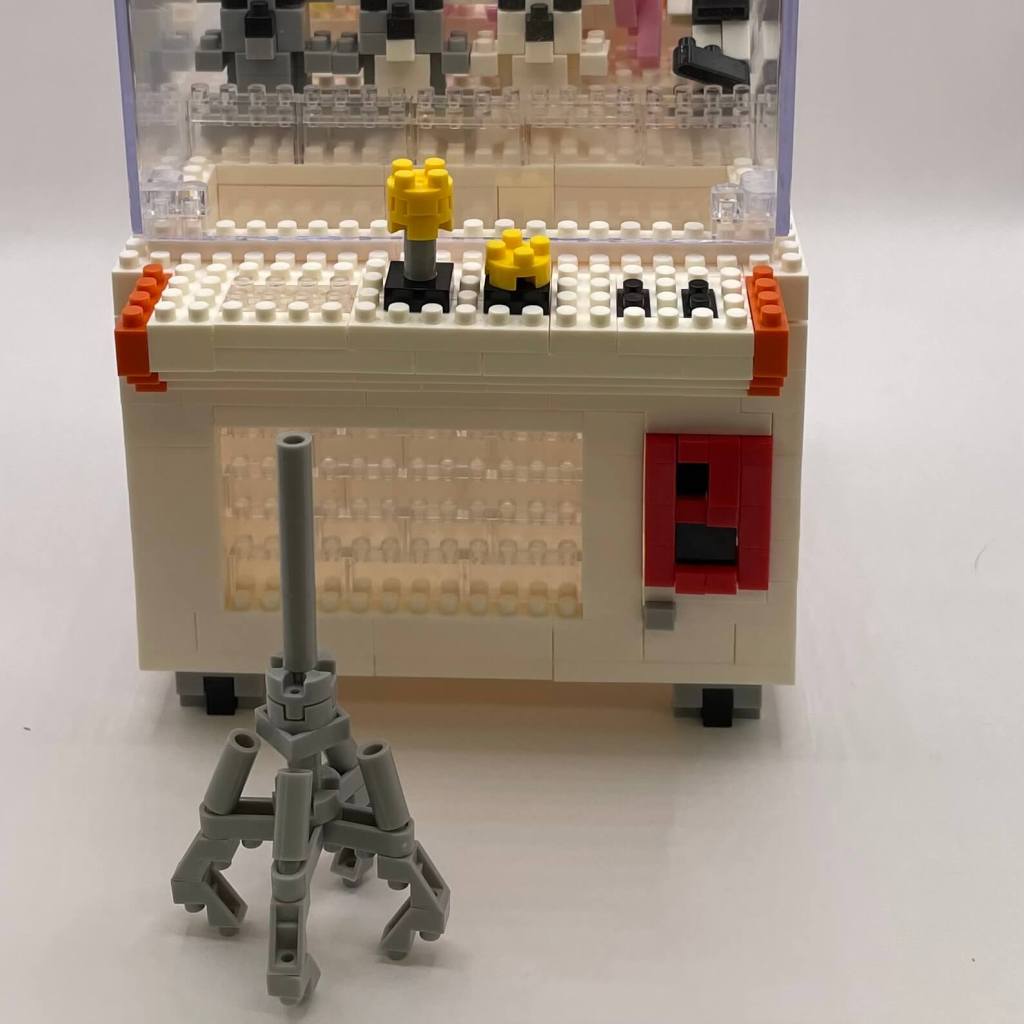
STEP 17: Setting the Windows
In this step, we attach the prize windows as clear casings around the top of the model. I handled the delicate clear pieces with extra care, knowing that they’re not easily replaceable. After securing the clear panels, I filled the prize cavity with the toy prizes from step 16. This step also has us build the claw, which is predictably flimsy but hanging on for now.


STEP 18: A Twist in the Tale
Things take an intriguing turn in step 18. Initially, it appeared to have two steps—an A and a B. However, after some perplexed staring at the instructions, I realized they presented two different ways to complete the build. I opted for version A, which involved building from the bottom up, my preferred method. Step B seemed to involve attaching an accessory that I didn’t have.
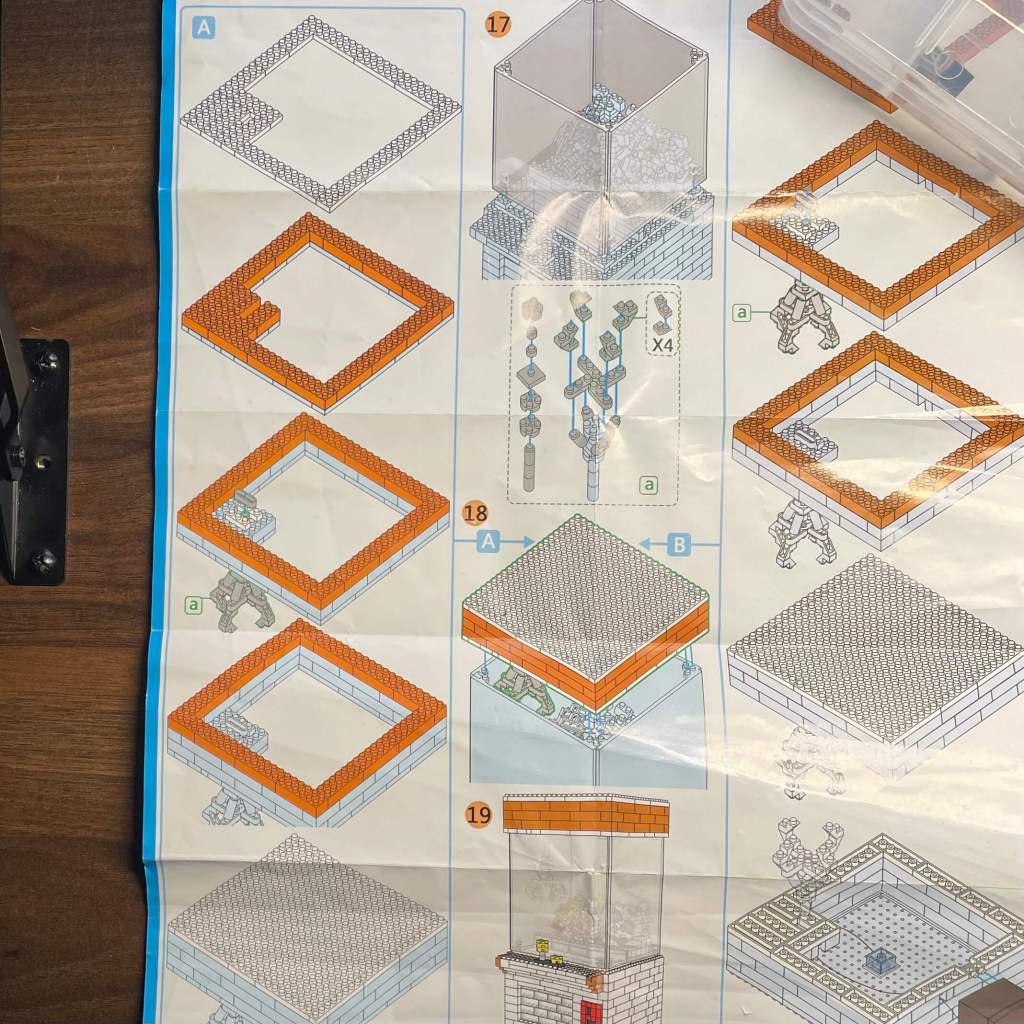
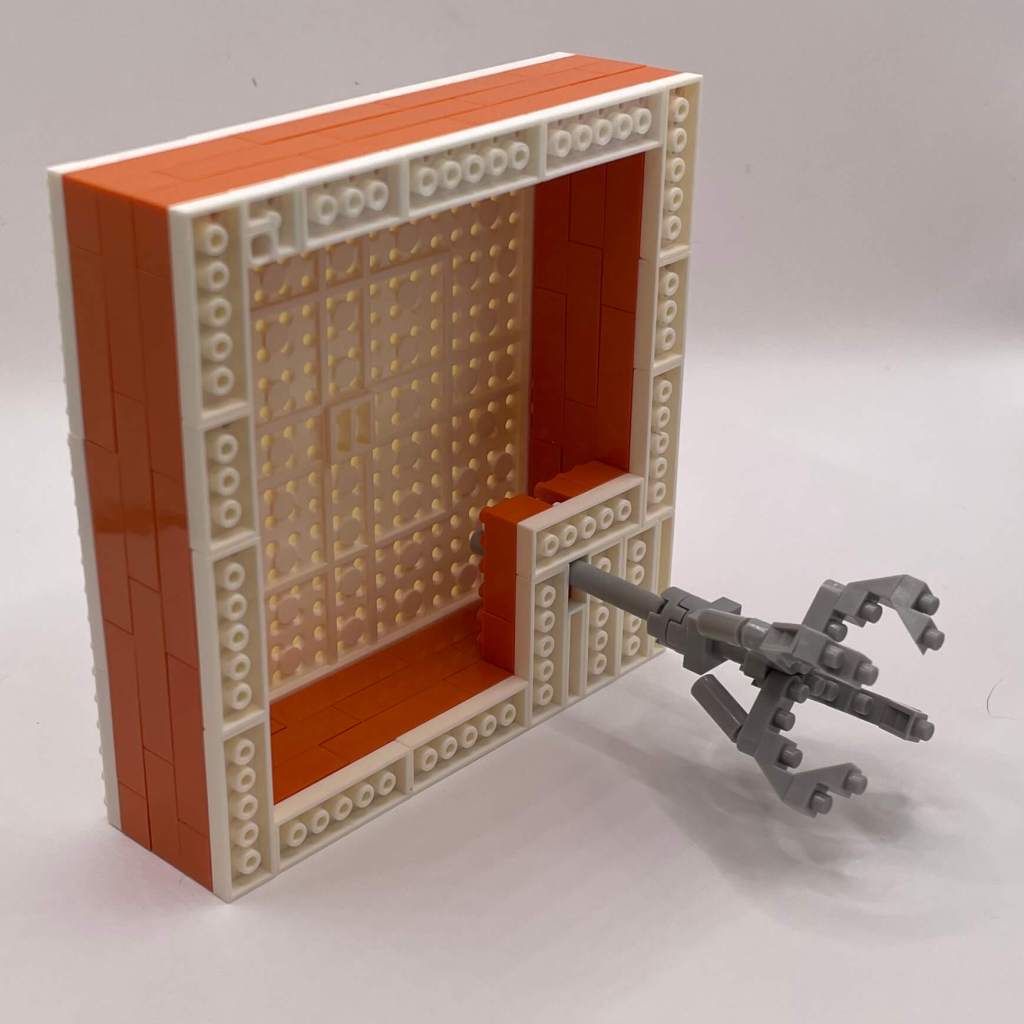
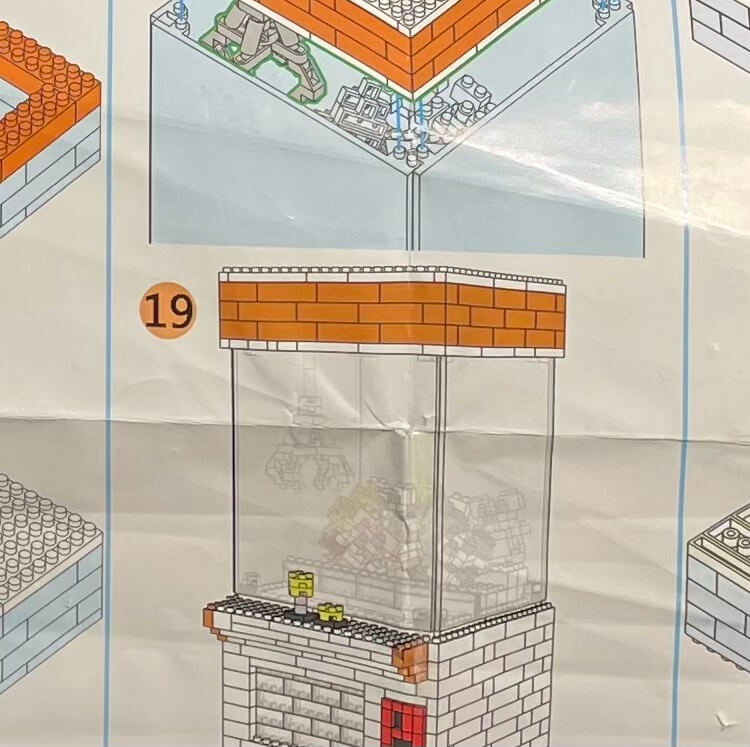
STEP 19: The Final Touch
In this triumphant final step, we take the newly constructed lid and claw and attach them to the top of the model. And just like that, we have a non-functioning, but undeniably attractive, claw machine made out of micro blocks.
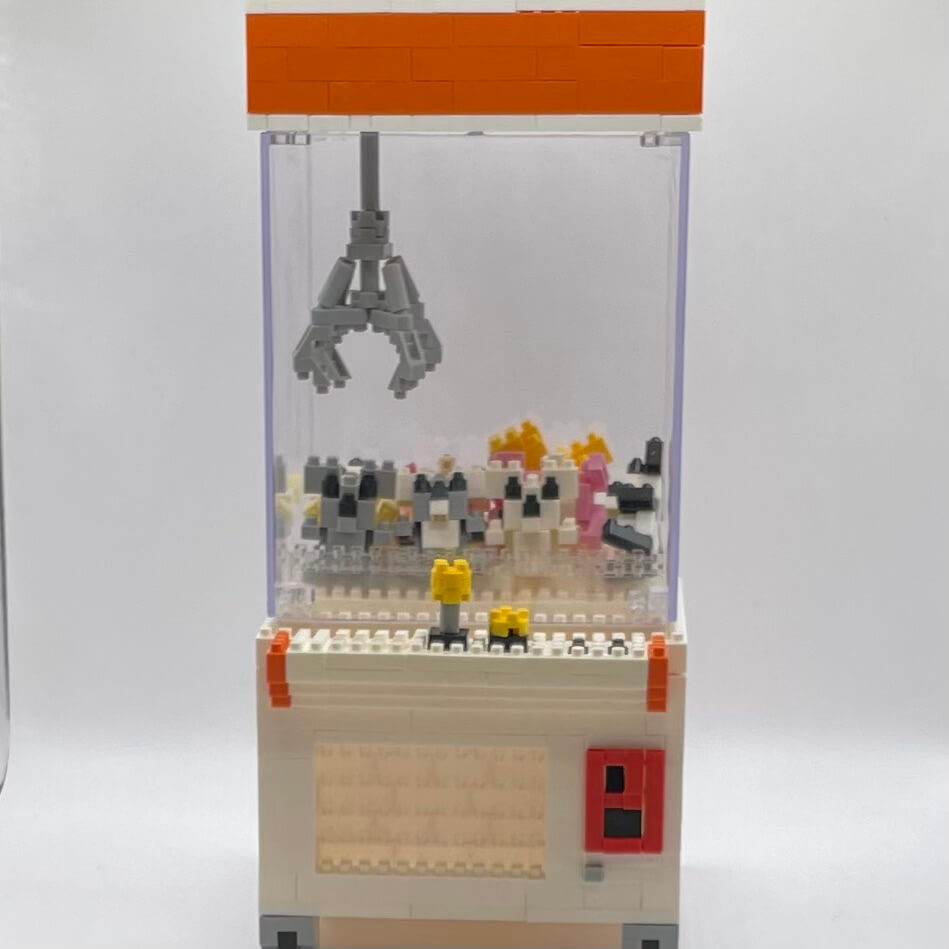
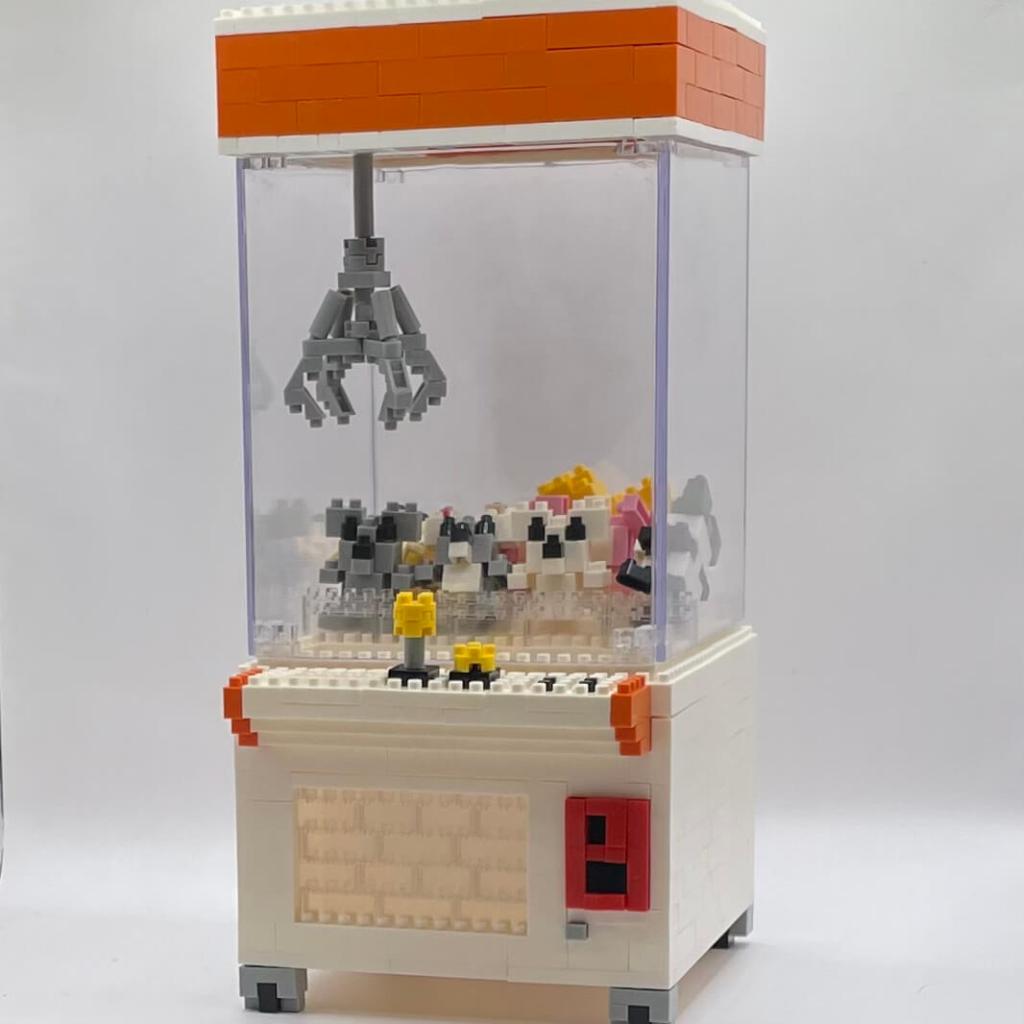
Final Thoughts
This micro-block claw machine build turned out to be less challenging than I expected. Most of it involved simple layering, which streamlined the process beautifully. The attention to detail was delightful, especially with the slightly protruded coin slot section and the charming orange and white color scheme, reminiscent of those claw machines outside grocery stores. The real stars of the show, the toy prizes, were a joy to build and admire, with enough color and brick variety to keep things interesting.
However, there are some downsides to this model. The claw, while visually impressive, is less secure than the rest of the build. Additionally, the toy prizes are not fixed in place, so moving the model can shift them around inside. This issue is compounded by the presence of a prize drop-off cavity, but the prize door is fixed, meaning that retrieving a fallen prize can be a bit of a hassle.
Despite these minor drawbacks, my micro-block claw machine is now proudly displayed!

You must be logged in to post a comment.